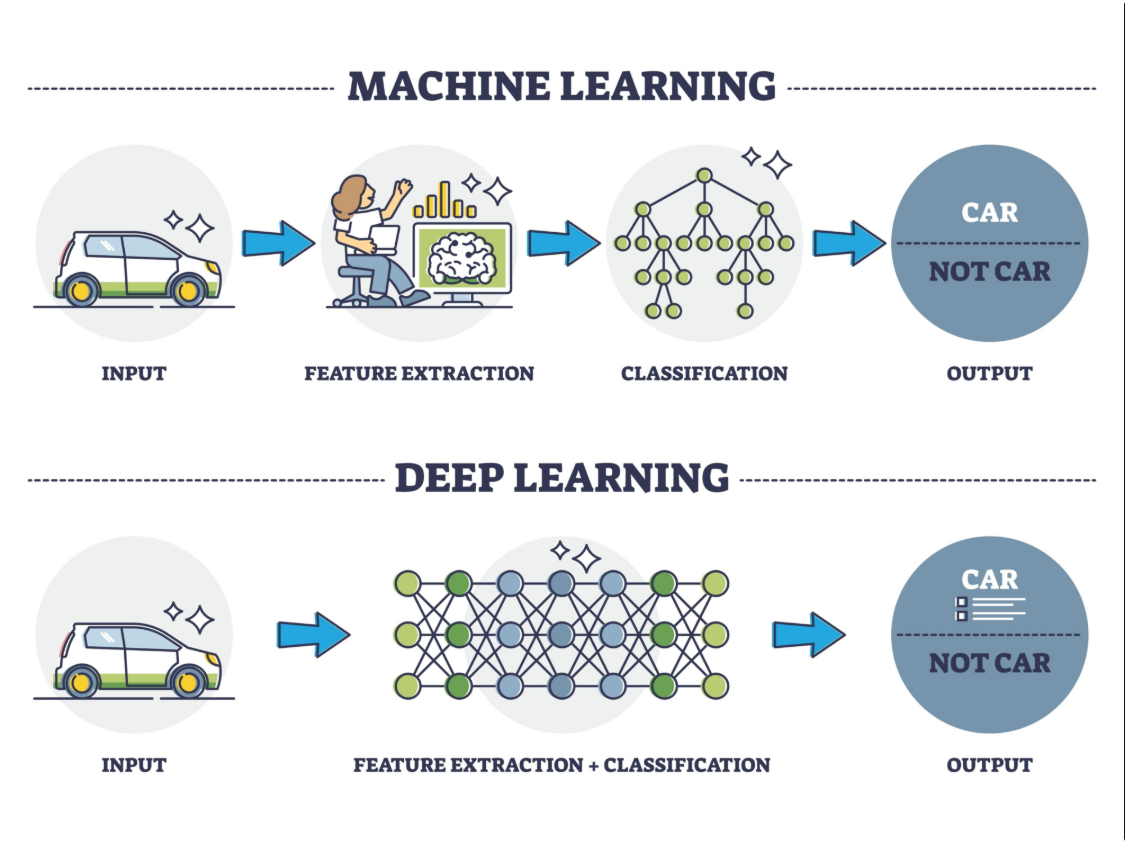
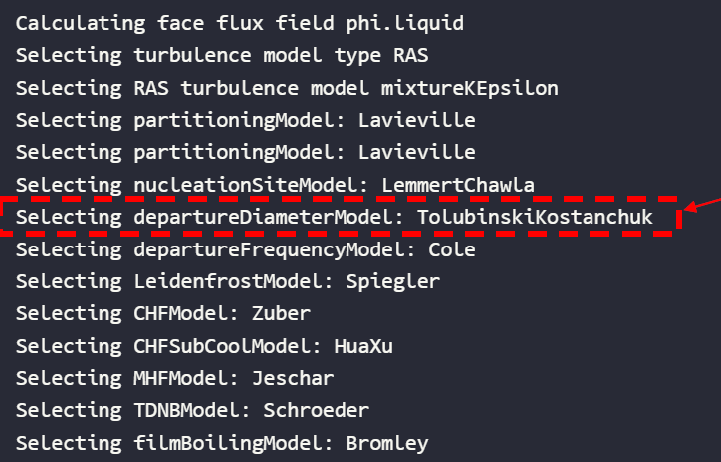
<?xml version="1.0" encoding="utf-8"?>
<feed xmlns="http://www.w3.org/2005/Atom">
  <author>
    <name>tttt</name>
  </author>
  <generator uri="https://hexo.io/">Hexo</generator>
  <id>https://hugh-tong.github.io/</id>
  <link href="https://hugh-tong.github.io/" rel="alternate"/>
  <link href="https://hugh-tong.github.io/atom.xml" rel="self"/>
  <rights>All rights reserved 2026, tttt</rights>
  <title>tttt's</title>
  <updated>2026-09-15T08:00:00.000Z</updated>
  <entry>
    <author>
      <name>tttt</name>
    </author>
    <category term="CS" scheme="https://hugh-tong.github.io/categories/CS/"/>
    <category term="Cpp" scheme="https://hugh-tong.github.io/tags/Cpp/"/>
    <category term="浸没边界法" scheme="https://hugh-tong.github.io/tags/%E6%B5%B8%E6%B2%A1%E8%BE%B9%E7%95%8C%E6%B3%95/"/>
    <category term="CS" scheme="https://hugh-tong.github.io/tags/CS/"/>
    <category term="Application" scheme="https://hugh-tong.github.io/tags/Application/"/>
    <content>
      <![CDATA[<h1 id="ABI概述"><a href="#ABI概述" class="headerlink" title="ABI概述"></a>ABI概述</h1><p>一、什么是 ABI Info，以及它的作用</p><ul><li>ABI（Application Binary Interface，应用二进制接口）定义了在二进制层面上，程序与运行时环境之间如何进行交互的规范。它包含但不限于：<ul><li>调用约定（calling convention）：参数传递方式（寄存器还是栈）、返回值位置、调用方与被调用方的协作方式。</li><li>数据类型的大小与对齐方式（int、指针、结构体等的字节大小、对齐边界）。</li><li>符号命名与链接符号的命名约定（name mangling 的规则，C、C++ 等语言的差异）。</li><li>栈帧布局、异常处理、栈展开、线程本地存储（TLS）的约定。</li><li>动态链接时的符号解析、模块边界（如共享库的接口导出&#x2F;导入、ABI 版本）。</li></ul></li><li>作用：<ul><li>让不同语言、不同编译器、不同版本的库&#x2F;模块能够在同一二进制层面正确交互。</li><li>保障二进制兼容性：你编译的程序能在目标系统上正确运行、调用系统库和其他库时不会崩溃或行为异常。</li><li>方便移植与复用：同一份二进制接口可以在不同平台&#x2F;硬件上实现，只要实现相同的 ABI。</li></ul></li></ul><p>二、ABI 兼容性是什么</p><ul><li>兼容性本质上是“不同二进制实体在同一 ABI 下能互操作、互相替换而不需要重新编译”的能力。</li><li>具体来说，有几种常见的兼容性层次：<ol><li>应用层 ABI 兼容性（source 不变，要么只有小改动）：不同版本的同一语言&#x2F;编译器生成的目标代码，仍然遵循同一调用约定、数据布局、符号约定等。</li><li>库&#x2F;二进制接口兼容性：一个库的新版本仍然提供与旧版本相同的导出符号、函数签名、结构体布局等，以便现有可执行文件无需重新编译就能链接并运行。</li><li>二进制向后&#x2F;向前兼容性：新的运行时&#x2F;系统库版本对旧的二进制仍然可用，或旧的二进制能在新系统上运行，通常需要保持对旧 ABI 的支持。</li></ol></li><li>重要的是：ABI 兼容性不是语言层面的兼容性（编译期的 API&#x2F;源码级别兼容），而是“二进制级别的接口约定”。即使源码可以通过更新后的头文件编译通过，若 ABI 发生变化，现有二进制文件在运行时也可能出错。</li></ul><p>三、兼容性具体怎么做（常见做法与要点） 要实现或维护 ABI 兼容性，通常从以下几个方面入手：</p><ol><li>明确和版本化 ABI</li></ol><ul><li>规定一个明确的 ABI 版本号（例如 libfoo.so 1.x、1.2、2.0 等）。</li><li>在发布时记录该版本的关键差异：结构体对齐、成员顺序、函数签名、导出符号等。</li><li>对外提供文档，告知开发者哪些改动会破坏兼容，哪些仍然兼容。</li></ul><ol start="2"><li>保持数据布局与调用约定的一致性</li></ol><ul><li>不要在已有的结构体&#x2F;联合体中改变成员的顺序、类型长度、对齐方式，除非你推出新版本的 ABI。</li><li>如果必须改动，考虑：<ul><li>使用新的结构体版本号（如 V1、V2），并提供向后兼容的访问层。</li><li>通过封装指针&#x2F;句柄来隐藏内部实现细节，避免直接暴露结构体布局。</li></ul></li><li>保持统一的调用约定（如 x86_64 System V、Windows x64 等），确保不同编译器&#x2F;语言产生的调用规范一致。</li></ul><ol start="3"><li>维持符号导出与名称修饰的一致性</li></ol><ul><li>对 C&#x2F;C++ 等语言，避免改变符号命名风格（name mangling）及版本化符号表。</li><li>使用符号版本控制机制（如 ELF 的版本化符号、Windows 的导出表）来隔离不同 ABI 版本的实现。</li><li>提供兼容层（shim）或中间层，使旧的符号依然可用。</li></ul><ol start="4"><li>结构体对齐、大小与成员细节的向后兼容</li></ol><ul><li>结构体大小和字段偏移量是最容易破坏兼容性的地方。常见做法：<ul><li>将难以向后兼容的改动放在新的结构体版本中，旧版本继续使用原有定义。</li><li>对于需要扩展的结构体，优先增加新的字段至末尾，并使用填充字段保持对齐，同时通过版本字段标识结构体版本。</li></ul></li></ul><ol start="5"><li>版本化的 API&#x2F;ABI</li></ol><ul><li>提供“稳定的二进制接口”（stable binary interface）和“实验性接口”（experimental）两套路径，逐步淘汰实验性接口。</li><li>对外暴露最低可用版本（minimum supported ABI）和当前版本，帮助下游正确选择编译目标。</li></ul><ol start="6"><li>测试与验证</li></ol><ul><li>构建和运行跨版本的二进制测试，覆盖：<ul><li>兼容的加载和链接（ld.so、Windows LoadLibrary 等）</li><li>调用约定正确性（参数传递、返回值、异常处理）</li><li>结构体序列化&#x2F;反序列化的一致性</li></ul></li><li>使用自动化测试来回归 ABI 兼容性变化。</li></ul><ol start="7"><li>架构与平台相关性</li></ol><ul><li>不同硬件架构（x86_64、AArch64、x86、armv7 等）有各自的 ABI。跨架构的兼容通常需要重新编译，不能简单复用同一二进制。</li><li>操作系统也有自己的运行时约定（如 Linux 的 System V AMD64 ABI vs Windows 的 x64 调用约定），这需要在跨平台开发时特别注意。</li></ul><ol start="8"><li>实践中的常见策略</li></ol><ul><li>采用面向接口的设计：通过抽象接口&#x2F;虚拟表（vtable）或 API 版本层来隐藏实现细节，尽量避免对外暴露具体的结构体布局。</li><li>使用跨版本的序列化格式：当需要跨版本传输数据时，使用稳定的序列化格式（如 protobuf、cap’n proto 等），而不是直接对结构体二进制布局进行依赖。</li><li>在库更新时提供对旧二进制的兼容性开关：如通过环境变量、API 版本选择，或者在库中实现多版本分支。</li></ul><p>如果你愿意提供具体的场景，我可以给出更贴近的建议。例如：</p><ul><li>你们的项目是用 C&#x2F;C++ 的共享库需要保持向后兼容吗？</li><li>你们是在做一个公共库，需要对外提供稳定的 ABI 版本吗？</li><li>目标平台是某个操作系统&#x2F;架构（如 Linux x86_64）吗？</li></ul><p>附带一个简短的对比要点，方便记忆：</p><ul><li>ABI Info：关于二进制层面的接口约定（调用约定、数据布局、符号约定等）。用途是确保二进制可交互、可移植。</li><li>ABI 兼容性：在不同版本&#x2F;构建之间仍然能够无缝工作，不需要重新编译就能链接运行。</li><li>兼容性实现：版本化、保持数据布局和调用约定的一致、提供兼容层、结构体版本化、充分测试等具体做法。</li></ul><h1 id="结构体序列化-反序列化的一致性"><a href="#结构体序列化-反序列化的一致性" class="headerlink" title="结构体序列化&#x2F;反序列化的一致性"></a>结构体序列化&#x2F;反序列化的一致性</h1><p>好问题。结构体序列化&#x2F;反序列化的一致性，字面意思就是把一个结构体在内存中的二进制布局“写成”可持久化的数据（序列化），以及把这些数据再“读回”成结构体对象（反序列化）时，确保两端的解释是一致的。简单来说，就是谁、在什么时候、用哪种规则把内存中的字段映射到字节序列，以及再把字节序列映回同样的字段和含义。</p><p>下面分点讲清楚它的含义、常见问题和应对办法。</p><ol><li>为什么需要序列化&#x2F;反序列化的一致性</li></ol><ul><li>跨进程&#x2F;跨机器通信：把结构体作为消息体发送，另一端需要按相同规则解读字段。</li><li>持久化：把结构体写入文件或数据库，下次读取需要还原成原始对象。</li><li>版本变更管理：在结构体定义变动后，仍然能够正确读写旧&#x2F;新版本的数据。</li></ul><ol start="2"><li>一致性包含的核心要素</li></ol><ul><li>字段顺序与对齐<ul><li>序列化时按某个固定顺序把字段写出；反序列化时按相同顺序读取。</li><li>字段的字节对齐和填充在不同平台&#x2F;编译器之间可能不同，若直接二进制拷贝往往不可移植。</li></ul></li><li>字段大小与类型<ul><li>int、long、float、double 等在不同平台可能有不同位宽（如 32 位 vs 64 位）。</li><li>指针在序列化时通常不应直接写内存地址，而是以句柄&#x2F;偏移量或序列化后的标识符表示。</li></ul></li><li>端序（字节序）<ul><li>多字节数字在内存中的存放顺序（大端 vs 小端）不同，序列化需要规定字节序并在反序列化时按同样字节序解析。</li></ul></li><li>数据表示的语义<ul><li>枚举值、布尔值、时间&#x2F;日期等字段在序列化时应保持相同的取值意义和范围。</li></ul></li><li>兼容性与版本信息<ul><li>当结构体发生变化时，是否包含版本字段、如何向后&#x2F;向前兼容（见下文版本化做法）。</li></ul></li></ul><ol start="3"><li>常见问题场景</li></ol><ul><li>平台&#x2F;编译器差异<ul><li>同一个结构体在 Windows 与 Linux、GCC 与 MSVC 上的内存布局可能不同，直接二进制序列化会破坏跨平台兼容。</li></ul></li><li>结构体变更<ul><li>若新增字段、调整字段顺序或类型，旧数据可能无法正确解读，导致崩溃或错误。</li></ul></li><li>指针与引用成员<ul><li>直接序列化结构体中的指针只保存地址，另一端无法找到原始数据，需要把指针改为索引、句柄或分离出可序列化的子对象。</li></ul></li><li>结构体对齐填充<ul><li>编译器为了对齐可能在字段之间插入填充字节，二进制直接快照可能包含不可预期的填充，影响跨版本&#x2F;跨平台读取。</li></ul></li></ul><ol start="4"><li>如何实现“安全且一致”的序列化</li></ol><ul><li>使用显式的序列化格式<ul><li>避免直接对内存布局进行序列化，改用可控的序列化方案：如 JSON、Protobuf、MsgPack、Cap’n Proto 等。</li><li>这样你可以固定字段的顺序、大小、编码规则，跨语言跨平台都能解析。</li></ul></li><li>明确版本和向后&#x2F;向前兼容策略<ul><li>在数据结构里放一个版本字段，表示当前数据的架构版本。</li><li>旧版本数据用旧的解析路径，新版本数据用新路径，或实现“兼容层”读旧数据并映射到新结构。</li></ul></li><li>避免指针直接序列化<ul><li>将指针改为句柄、索引或将相关对象做成可序列化的子结构，或通过引用&#x2F;ID 来重建关系。</li></ul></li><li>固定字段编码<ul><li>对定长整数、浮点数、布尔值等定义统一的字节序和大小（如始终 using little-endian 8-byte 时序列化）。</li></ul></li><li>使用成熟的序列化库<ul><li>这些库通常内置了向后&#x2F;向前兼容策略、字段标记、版本化支持，减少自行实现时的坑。</li></ul></li><li>测试覆盖<ul><li>编写跨版本、跨平台的序列化&#x2F;反序列化回归测试，确保同样的数据在不同端能互换。</li></ul></li></ul><ol start="5"><li>一个简单的对比示例</li></ol><ul><li>不使用一致性的方法（不推荐）：<ul><li>C 结构体直接内存复制到字节流，直接写到磁盘 &#x2F; 发送网络。</li><li>问题：平台差异、对齐填充、字节序、结构体改动带来的破坏。</li></ul></li><li>使用显式序列化（推荐）：<ul><li>选择 Protobuf&#x2F;JSON 等格式，手动或自动生成的编解码器按字段顺序逐一编码&#x2F;解码。</li><li>这样即使在不同编译器、不同平台，数据都能被正确解释，只要你遵循格式规则。</li></ul></li></ul><p>如果你愿意，可以给我一个具体的语言&#x2F;场景（如 C&#x2F;C++ 的二进制日志、跨服务的 Protobuf 消息、或对旧数据的向后兼容需求），我可以给出更贴合你场景的实现思路和示例代码。</p>]]>
    </content>
    <id>https://hugh-tong.github.io/2026/09/15/abi-overview/</id>
    <link href="https://hugh-tong.github.io/2026/09/15/abi-overview/"/>
    <published>2026-09-15T08:00:00.000Z</published>
    <summary>CSAPP 读书笔记:ABI 的概念、构成与兼容性意义。</summary>
    <title>ABI(Application Binary Interface)概述</title>
    <updated>2026-09-15T08:00:00.000Z</updated>
  </entry>
  <entry>
    <author>
      <name>tttt</name>
    </author>
    <category term="CS" scheme="https://hugh-tong.github.io/categories/CS/"/>
    <category term="编程" scheme="https://hugh-tong.github.io/categories/CS/%E7%BC%96%E7%A8%8B/"/>
    <category term="Cpp" scheme="https://hugh-tong.github.io/categories/CS/%E7%BC%96%E7%A8%8B/Cpp/"/>
    <category term="Cpp" scheme="https://hugh-tong.github.io/tags/Cpp/"/>
    <category term="LES" scheme="https://hugh-tong.github.io/tags/LES/"/>
    <category term="CS/编程/Cpp" scheme="https://hugh-tong.github.io/tags/CS-%E7%BC%96%E7%A8%8B-Cpp/"/>
    <content>
      <![CDATA[<h1 id="为什么-C-引入-import（C-20-Modules）特性"><a href="#为什么-C-引入-import（C-20-Modules）特性" class="headerlink" title="为什么 C++ 引入 import（C++20 Modules）特性"></a>为什么 C++ 引入 import（C++20 Modules）特性</h1><p>C++ 在 C++20 中引入了模块（Modules），通过 <code>import</code> 关键字替代传统的 <code>#include</code> 头文件机制的部分用途。其核心动机是解决 C&#x2F;C++ 头文件模型长期存在的工程痛点，并显著提升编译速度、可维护性与可用性。</p><hr><h2 id="背景：传统-include-的问题"><a href="#背景：传统-include-的问题" class="headerlink" title="背景：传统 #include 的问题"></a>背景：传统 <code>#include</code> 的问题</h2><ul><li><strong>文本拼接模型的固有缺陷</strong><br><code>#include</code> 只是预处理期的文本复制粘贴：<ul><li>重复解析同一份头文件（即便有 include guard 也只是避免重复定义，解析仍会发生）。</li><li>容易引入宏污染（宏全局可见，互相干扰，难以约束可见性）。</li><li>依赖顺序敏感（宏&#x2F;类型前置声明的顺序问题）。</li></ul></li><li><strong>编译速度与可扩展性差</strong><br>大型工程动辄数千头文件，编译器反复解析同样的声明，导致：<ul><li>冷启动全量编译慢。</li><li>增量编译常常因为依赖扇出大而不够快。</li></ul></li><li><strong>ODR（One Definition Rule）风险与可见性混乱</strong><br>模板&#x2F;内联函数在多个翻译单元重复实例化与定义，容易触发 ODR 问题。</li><li><strong>封装性和接口表达能力不足</strong><br>头文件暴露过多实现细节；没有“接口&#x2F;实现”物理级隔离的语言级语义。</li></ul><hr><h2 id="C-Modules-与-import-的核心价值"><a href="#C-Modules-与-import-的核心价值" class="headerlink" title="C++ Modules 与 import 的核心价值"></a>C++ Modules 与 <code>import</code> 的核心价值</h2><ul><li><strong>真正的语言级模块化与清晰的边界</strong><ul><li>使用 <code>module;</code>、<code>export module</code> 定义模块，<code>export</code> 对外暴露接口，内部实现默认不可见。</li><li>通过 <code>import &lt;module-name&gt;;</code> 引用时，仅载入已导出的符号，避免实现细节泄漏。</li></ul></li><li><strong>显著提升编译速度</strong><ul><li>编译器可将模块接口编译为“已编译模块接口”（BMI&#x2F;CMI），类似二进制接口缓存。</li><li>下游编译单元 <code>import</code> 模块时，跳过重复解析文本头文件的开销。</li><li>大型项目可获得数量级的冷&#x2F;热编译加速（视工具链与组织方式而定）。</li></ul></li><li><strong>更好的封装与可维护性</strong><ul><li>默认不导出即不暴露，可控的符号可见性，减少命名污染与耦合。</li><li>宏不会跨模块传播，降低“宏地狱”风险。</li></ul></li><li><strong>更可靠的一致性与 ODR 安全</strong><ul><li>模块接口是编译器验证过的单一事实来源（single source of truth）。</li><li>模板导出接口在模块边界内更易于保证一致性。</li></ul></li><li><strong>工具链与增量构建友好</strong><ul><li>构建系统可基于模块依赖图做更精确的最小重建；IDE 可更快地做语义索引。</li></ul></li></ul><hr><h2 id="与-include-的关系与迁移策略"><a href="#与-include-的关系与迁移策略" class="headerlink" title="与 #include 的关系与迁移策略"></a>与 <code>#include</code> 的关系与迁移策略</h2><ul><li><strong>共存与渐进迁移</strong><ul><li>现有头文件可通过“头文件单元”（header units）机制用 <code>import &quot;header.hpp&quot;;</code> 方式引入，作为过渡。</li><li>新代码优先以模块接口单元（<code>.ixx</code>&#x2F;<code>.mpp</code> 等）导出 API。</li><li>实现细节放入模块实现单元，仅在同模块内使用 <code>import</code>。</li></ul></li><li><strong>宏与条件编译的处置</strong><ul><li>宏不再跨模块传播；如需常量，优先使用 <code>constexpr</code> 或枚举。</li><li>必须导入前就确定的编译条件，可通过配置或构建系统解决。</li></ul></li><li><strong>与预编译头（PCH）的对比</strong><ul><li>PCH 是编译器私有的全局大缓存，脆弱且跨工具链不可移植。</li><li>Modules 是语言级机制，粒度细、可组合、可移植，依赖关系可被构建系统理解。</li></ul></li></ul><hr><h2 id="小示例"><a href="#小示例" class="headerlink" title="小示例"></a>小示例</h2><h3 id="传统头文件方式"><a href="#传统头文件方式" class="headerlink" title="传统头文件方式"></a>传统头文件方式</h3><figure class="highlight cpp"><table><tr><td class="gutter"><pre><span class="line">1</span><br><span class="line">2</span><br><span class="line">3</span><br><span class="line">4</span><br><span class="line">5</span><br><span class="line">6</span><br><span class="line">7</span><br></pre></td><td class="code"><pre><span class="line"><span class="comment">// math.hpp</span></span><br><span class="line"><span class="meta">#<span class="keyword">pragma</span> once</span></span><br><span class="line"><span class="function"><span class="keyword">inline</span> <span class="type">int</span> <span class="title">add</span><span class="params">(<span class="type">int</span> a, <span class="type">int</span> b)</span> </span>&#123; <span class="keyword">return</span> a + b; &#125;</span><br><span class="line"></span><br><span class="line"><span class="comment">// main.cpp</span></span><br><span class="line"><span class="meta">#<span class="keyword">include</span> <span class="string">&quot;math.hpp&quot;</span></span></span><br><span class="line"><span class="function"><span class="type">int</span> <span class="title">main</span><span class="params">()</span> </span>&#123; <span class="keyword">return</span> <span class="built_in">add</span>(<span class="number">1</span>, <span class="number">2</span>); &#125;</span><br></pre></td></tr></table></figure><h3 id="模块方式（C-20）"><a href="#模块方式（C-20）" class="headerlink" title="模块方式（C++20）"></a>模块方式（C++20）</h3><figure class="highlight cpp"><table><tr><td class="gutter"><pre><span class="line">1</span><br><span class="line">2</span><br><span class="line">3</span><br></pre></td><td class="code"><pre><span class="line"><span class="comment">// math.ixx (模块接口单元)</span></span><br><span class="line"><span class="keyword">export</span> <span class="keyword">module</span> math;</span><br><span class="line"><span class="function"><span class="keyword">export</span> <span class="keyword">inline</span> <span class="type">int</span> <span class="title">add</span><span class="params">(<span class="type">int</span> a, <span class="type">int</span> b)</span> </span>&#123; <span class="keyword">return</span> a + b; &#125;</span><br></pre></td></tr></table></figure><figure class="highlight cpp"><table><tr><td class="gutter"><pre><span class="line">1</span><br><span class="line">2</span><br><span class="line">3</span><br></pre></td><td class="code"><pre><span class="line"><span class="comment">// main.cpp</span></span><br><span class="line"><span class="keyword">import</span> math;</span><br><span class="line"><span class="function"><span class="type">int</span> <span class="title">main</span><span class="params">()</span> </span>&#123; <span class="keyword">return</span> <span class="built_in">add</span>(<span class="number">1</span>, <span class="number">2</span>); &#125;</span><br></pre></td></tr></table></figure><ul><li>优点：<code>main.cpp</code> 不再解析 <code>math.ixx</code> 的文本每次重复展开，导入的是编译好的接口。</li><li>进一步：可将实现细节移至模块实现单元，不对外 <code>export</code>。</li></ul><hr><h2 id="常见问题与实践建议"><a href="#常见问题与实践建议" class="headerlink" title="常见问题与实践建议"></a>常见问题与实践建议</h2><ul><li><strong>Q: 所有编译器都支持了吗？</strong>  <ul><li>GCC、Clang、MSVC 已支持 C++20 Modules，但细节（如 BMI&#x2F;CMI 文件扩展名、搜索路径）与构建系统集成仍需配置。使用 CMake 3.28+ 可获得更好支持。</li></ul></li><li><strong>Q: 头文件还能用吗？</strong>  <ul><li>可以，共存。建议新公共 API 采用模块，旧代码逐步过渡为头文件单元或真正的模块。</li></ul></li><li><strong>Q: 会不会破坏模板库生态？</strong>  <ul><li>反而更好：模板可在模块边界导出，显著减少重复实例化带来的开销与 ODR 问题。</li></ul></li><li><strong>Q: 性能提升有多大？</strong>  <ul><li>视工程规模与模块化程度而定，中大型项目常见 2×–10× 的冷&#x2F;热编译加速。需合理拆分模块与缓存策略。</li></ul></li></ul><hr><h2 id="总结"><a href="#总结" class="headerlink" title="总结"></a>总结</h2><ul><li>C++ 引入 <code>import</code>（Modules）的根本原因是解决头文件模型在编译性能、封装性、宏污染、ODR 风险等方面的系统性问题。  </li><li>Modules 提供了语言级的模块边界、可控导出、可缓存的接口工件，带来更快的构建、更清晰的接口与更可靠的大型工程可维护性。  </li><li>与 <code>#include</code> 可长期共存，建议新项目优先使用模块，并为旧代码提供平滑迁移路径。</li></ul>]]>
    </content>
    <id>https://hugh-tong.github.io/2026/09/15/cpp20-modules/</id>
    <link href="https://hugh-tong.github.io/2026/09/15/cpp20-modules/"/>
    <published>2026-09-15T08:00:00.000Z</published>
    <summary>C++ 引入 import 模块特性的动机与使用要点。</summary>
    <title>C++20 Modules:为什么以及怎么用</title>
    <updated>2026-09-15T08:00:00.000Z</updated>
  </entry>
  <entry>
    <author>
      <name>tttt</name>
    </author>
    <category term="CS" scheme="https://hugh-tong.github.io/categories/CS/"/>
    <category term="CS" scheme="https://hugh-tong.github.io/tags/CS/"/>
    <category term="GPU加速" scheme="https://hugh-tong.github.io/tags/GPU%E5%8A%A0%E9%80%9F/"/>
    <category term="Computing" scheme="https://hugh-tong.github.io/tags/Computing/"/>
    <category term="Unit" scheme="https://hugh-tong.github.io/tags/Unit/"/>
    <content>
      <![CDATA[<p>在“面向DCU的OpenFOAM并行加速研究”中，DCU通常指的是数据处理单元（Data Compute Unit ）。 在计算机硬件领域，DCU是一种专门设计用于高效处理数据密集型计算任务的芯片或硬件模块。与传统的CPU（中央处理器）和GPU（图形处理器）不同，DCU针对特定的数据处理任务进行了优化，比如在大规模数据处理、机器学习和高性能计算等领域有着广泛的应用。 在OpenFOAM的语境下，OpenFOAM是一款用于计算流体动力学（CFD）等工程模拟的开源软件。使用DCU对OpenFOAM进行并行加速研究，目的是利用DCU强大的并行计算能力，加速OpenFOAM模拟过程中的计算，提高计算效率 ，从而更快速地完成复杂的流体动力学模拟等任务。</p><h2 id="DCU（Deep-Computing-Unit）与GPU的区别"><a href="#DCU（Deep-Computing-Unit）与GPU的区别" class="headerlink" title="DCU（Deep Computing Unit）与GPU的区别"></a>DCU（Deep Computing Unit）与GPU的区别</h2><blockquote><p>这里的DCU的D是Data还是该是Deep？</p><ul><li>确认是deep</li></ul><p>DCU 加速卡是一种协处理器，其架构类似于GPU，具有相似的特性，本文<br>通过在新型国产超算平台上安装OpenFOAM，并在单节点实现了多块DCU 加速卡<br>与OpenFOAM 的结合，创建了全新的基于DCU 加速卡的求解器DCUsolver。并对<br>其进行编译封装，使其通过OpenFOAM 的controlDict 和fvSolution 两个文件进行调<br>用。测试了相关性能，有着可观的性能加速，并通过热点分析，确定OpenFOAM<br>的算法热点，进行了一定程度的优化。在OpenFOAM-2.2.x 实现了混合精度的处理，<br>大约有1.5 倍的性能加速。</p></blockquote><p>这里谈的DCU，应该就是GPGPU吧</p><h2 id="海光DCU"><a href="#海光DCU" class="headerlink" title="海光DCU"></a>海光DCU</h2><p><a href="https://zhuanlan.zhihu.com/p/627707065">V100的全面国产替代 ——海光DCU Z100L 面向人工智能的GPGPU加速卡 - 知乎</a></p>]]>
    </content>
    <id>https://hugh-tong.github.io/2026/09/15/dcu-vs-gpu/</id>
    <link href="https://hugh-tong.github.io/2026/09/15/dcu-vs-gpu/"/>
    <published>2026-09-15T08:00:00.000Z</published>
    <summary>国产 DCU 加速卡与 GPU 的架构定位差异。</summary>
    <title>DCU(深度计算单元)与 GPU 的区别</title>
    <updated>2026-09-15T08:00:00.000Z</updated>
  </entry>
  <entry>
    <author>
      <name>tttt</name>
    </author>
    <category term="CS" scheme="https://hugh-tong.github.io/categories/CS/"/>
    <category term="命令行工具" scheme="https://hugh-tong.github.io/categories/CS/%E5%91%BD%E4%BB%A4%E8%A1%8C%E5%B7%A5%E5%85%B7/"/>
    <category term="OpenFOAM" scheme="https://hugh-tong.github.io/tags/OpenFOAM/"/>
    <category term="blockMesh" scheme="https://hugh-tong.github.io/tags/blockMesh/"/>
    <category term="LES" scheme="https://hugh-tong.github.io/tags/LES/"/>
    <category term="OF" scheme="https://hugh-tong.github.io/tags/OF/"/>
    <category term="CS/命令行工具" scheme="https://hugh-tong.github.io/tags/CS-%E5%91%BD%E4%BB%A4%E8%A1%8C%E5%B7%A5%E5%85%B7/"/>
    <category term="命令行工具" scheme="https://hugh-tong.github.io/tags/%E5%91%BD%E4%BB%A4%E8%A1%8C%E5%B7%A5%E5%85%B7/"/>
    <content>
      <![CDATA[<h1 id="GDB-相关操作笔记（OpenFOAM-Laplacian-跟踪示例）"><a href="#GDB-相关操作笔记（OpenFOAM-Laplacian-跟踪示例）" class="headerlink" title="GDB 相关操作笔记（OpenFOAM-Laplacian 跟踪示例）"></a>GDB 相关操作笔记（OpenFOAM-Laplacian 跟踪示例）</h1><h2 id="常用命令总结"><a href="#常用命令总结" class="headerlink" title="常用命令总结"></a>常用命令总结</h2><figure class="highlight text"><table><tr><td class="gutter"><pre><span class="line">1</span><br><span class="line">2</span><br><span class="line">3</span><br><span class="line">4</span><br><span class="line">5</span><br><span class="line">6</span><br><span class="line">7</span><br><span class="line">8</span><br><span class="line">9</span><br><span class="line">10</span><br><span class="line">11</span><br><span class="line">12</span><br><span class="line">13</span><br><span class="line">14</span><br><span class="line">15</span><br><span class="line">16</span><br><span class="line">17</span><br><span class="line">18</span><br><span class="line">19</span><br><span class="line">20</span><br><span class="line">21</span><br><span class="line">22</span><br><span class="line">23</span><br><span class="line">24</span><br><span class="line">25</span><br><span class="line">26</span><br></pre></td><td class="code"><pre><span class="line"></span><br><span class="line">info locals //显示所有局部变量，OpenFOAM里别用，会爆炸</span><br><span class="line">info variables/classes/functions/selectors            //顾名思义，但都别乱用，容易爆炸</span><br><span class="line">info break  //显示所有breakpoints</span><br><span class="line">info source //显示当前位置的文件调用关系，非常有用，尤其是被调用的文件是link的时候</span><br><span class="line">n           //next，单个文件里的下一行</span><br><span class="line">s           //step，下一步，能够跳转进入function内部</span><br><span class="line">finish      //从当前function跳出</span><br><span class="line">return      //取消当前函数的执行，并立即返回，后面可以跟一个数值，作为函数的返回值</span><br><span class="line">c           //continue直到下一个breakpoint</span><br><span class="line">r           //run，开始运行code</span><br><span class="line">b           //设置breakpoint，基本格式：break 49;设定指定文件：b gaussLaplacianScheme.C:52</span><br><span class="line">delete 1    //删除代号为1的断点</span><br><span class="line">clear       //删除所有断点</span><br><span class="line">pfvmatrixfull this matrix.txt    //专门用于输出矩阵，一般要先</span><br><span class="line">ctrl+c      //卡住的时候用来跳出</span><br><span class="line">set logging on/off          //用来将gdb命令显示的结果输出到默认的gdb.txt文件里</span><br><span class="line">where       //告诉你你现在在哪个文件里</span><br><span class="line">l           //list，显示附近的代码。可显示特点行号前后10行代码，如：list 12</span><br><span class="line">watch       //表示设置一个监视点，当所指定的表达式EXPR的值被修改了，则程序会停止。</span><br><span class="line">rwatch      //表示设置一个监视点，当所指定的表达式EXPR的值被读取了，则程序会停止。</span><br><span class="line">awatch      //表示设置一个监视点，当所指定的表达式EXPR的值被读取或修改了，都会让程序停止。</span><br><span class="line">p var       //显示变量var</span><br><span class="line">p var@n     //显示数组变量var的前n个元素</span><br><span class="line">whatis var  //显示变量var的类型</span><br><span class="line"></span><br></pre></td></tr></table></figure><p>GdbOF 专属命令应以所安装插件的帮助输出为准。原文使用了一张来源和许可不明确的知乎热链图片，现已移除；常用命令在下文用可搜索文本整理。</p><h2 id="1-启动与附加调试"><a href="#1-启动与附加调试" class="headerlink" title="1. 启动与附加调试"></a>1. 启动与附加调试</h2><ul><li><p>启动可执行文件并进入 GDB</p><ul><li>gdb &#x2F;path&#x2F;to&#x2F;blockMesh</li></ul></li><li><p>直接在程序启动时就运行</p><ul><li>(gdb) run [args]</li></ul></li><li><p>对正在运行的进程进行附加调试</p><ul><li>(gdb) attach</li></ul></li></ul><h2 id="2-设置断点"><a href="#2-设置断点" class="headerlink" title="2. 设置断点"></a>2. 设置断点</h2><ul><li>在函数层设置断点（需要源码或符号信息）<ul><li>(gdb) break laplacian</li></ul></li><li>在具体文件和行号设置断点<ul><li>(gdb) break path&#x2F;to&#x2F;file.C:1234</li></ul></li><li>在 main 函数入口设断点<ul><li>(gdb) break main</li></ul></li><li>条件断点（只有满足条件时才触发）<ul><li>(gdb) break path&#x2F;to&#x2F;file.C:1234 if (i &#x3D;&#x3D; 0)</li></ul></li></ul><h2 id="3-运行与定位"><a href="#3-运行与定位" class="headerlink" title="3. 运行与定位"></a>3. 运行与定位</h2><ul><li>运行到断点<ul><li>(gdb) run</li></ul></li><li>查看当前断点处的调用栈<ul><li>(gdb) bt</li><li>(gdb) bt full # 显示更详细的局部变量</li></ul></li><li>在不同栈帧之间切换<ul><li>(gdb) frame 0</li><li>(gdb) frame 2</li></ul></li></ul><h2 id="4-查看变量与内存"><a href="#4-查看变量与内存" class="headerlink" title="4. 查看变量与内存"></a>4. 查看变量与内存</h2><ul><li>查看当前帧的局部变量<ul><li>(gdb) info locals</li><li>(gdb) info args</li></ul></li><li>打印变量的值<ul><li>(gdb) print varName</li><li>(gdb) p varName</li></ul></li><li>查看指针指向的内容<ul><li>(gdb) print *ptr</li><li>(gdb) print ptr-&gt;field</li></ul></li><li>查看数组&#x2F;向量<ul><li>(gdb) print arr[0]</li><li>(gdb) print arr[i]</li></ul></li><li>查看结构体&#x2F;自定义对象<ul><li>(gdb) p myStruct</li><li>(gdb) p myStruct.field</li></ul></li></ul><h2 id="5-单步执行"><a href="#5-单步执行" class="headerlink" title="5. 单步执行"></a>5. 单步执行</h2><ul><li>跳过函数内部，逐步执行当前语句<ul><li>(gdb) next</li></ul></li><li>进入函数内部逐步执行<ul><li>(gdb) step</li></ul></li><li>继续执行至下一个断点或结束<ul><li>(gdb) continue</li></ul></li><li>在任意行设置新的断点后继续执行<ul><li>(gdb) break file.C:line</li><li>(gdb) continue</li></ul></li></ul><h2 id="6-观察变量变化"><a href="#6-观察变量变化" class="headerlink" title="6. 观察变量变化"></a>6. 观察变量变化</h2><ul><li>观察变量值的变化（触发时暂停）<ul><li>(gdb) watch varName</li></ul></li><li>取消观察<ul><li>(gdb) delete watch varName</li></ul></li><li>条件断点（变量达到某值时断点触发）<ul><li>(gdb) break file.C:line if (varName &gt; 0)</li></ul></li></ul><h2 id="7-断点管理"><a href="#7-断点管理" class="headerlink" title="7. 断点管理"></a>7. 断点管理</h2><ul><li>查看当前所有断点<ul><li>(gdb) info breakpoints</li></ul></li><li>删除断点<ul><li>(gdb) delete</li><li>(gdb) delete 1 2 3 # 删除指定序号的断点</li></ul></li><li>重新启用&#x2F;禁用断点<ul><li>(gdb) enable</li><li>(gdb) disable</li></ul></li></ul><h2 id="8-内存与调试辅助"><a href="#8-内存与调试辅助" class="headerlink" title="8. 内存与调试辅助"></a>8. 内存与调试辅助</h2><ul><li>打印复合类型的字段并逐步调试<ul><li>(gdb) p obj.field</li></ul></li><li>调用外部函数输出<ul><li>(gdb) call printf(“x &#x3D; %d\n”, x)</li></ul></li></ul><h2 id="9-与-OpenFOAM-相关的调试实践要点"><a href="#9-与-OpenFOAM-相关的调试实践要点" class="headerlink" title="9. 与 OpenFOAM 相关的调试实践要点"></a>9. 与 OpenFOAM 相关的调试实践要点</h2><ul><li>启用调试信息<ul><li>确保编译时带 -g，OpenFOAM 常用的调试构建可用。</li></ul></li><li>尽量在关键点设置断点<ul><li>laplacian 的入口、派生类创建点、fvSchemes 的选择点等位置。</li></ul></li><li>并行调试提示<ul><li>MPI 场景下，可能需要为不同进程分别 attach 或在 mpirun&#x2F;mpiexec 层面开启调试参数。</li></ul></li><li>日志与复现<ul><li>同时查看 OpenFOAM 日志输出，确保断点处的变量与日志信息一致，便于复现与定位。</li></ul></li></ul><h2 id="10-简单工作流示例（假设调试-laplacian-的路径）"><a href="#10-简单工作流示例（假设调试-laplacian-的路径）" class="headerlink" title="10. 简单工作流示例（假设调试 laplacian 的路径）"></a>10. 简单工作流示例（假设调试 laplacian 的路径）</h2><ul><li>步骤 1: 启动 GDB<ul><li>gdb &#x2F;path&#x2F;to&#x2F;blockMesh</li></ul></li><li>步骤 2: 设置断点（假设定位到 laplacian 的实现文件）<ul><li>(gdb) break path&#x2F;to&#x2F;laplacianFoam.C:120</li><li>(gdb) break gaussLaplacianScheme.cpp:45</li></ul></li><li>步骤 3: 运行<ul><li>(gdb) run</li></ul></li><li>步骤 4: 到达断点后查看<ul><li>(gdb) bt</li><li>(gdb) info locals</li><li>(gdb) print Gamma</li><li>(gdb) print vf</li></ul></li><li>步骤 5: 单步调查<ul><li>(gdb) step</li><li>(gdb) next</li></ul></li><li>步骤 6: 动态观察<ul><li>(gdb) watch Gamma</li><li>(gdb) continue</li></ul></li></ul>]]>
    </content>
    <id>https://hugh-tong.github.io/2026/09/15/gdb-notes-openfoam-laplacian/</id>
    <link href="https://hugh-tong.github.io/2026/09/15/gdb-notes-openfoam-laplacian/"/>
    <published>2026-09-15T08:00:00.000Z</published>
    <summary>GDB 常用操作笔记,以跟踪 OpenFOAM laplacianFoam 求解过程为例。</summary>
    <title>GDB 操作笔记:以 OpenFOAM Laplacian 跟踪为例</title>
    <updated>2026-09-15T08:00:00.000Z</updated>
  </entry>
  <entry>
    <author>
      <name>tttt</name>
    </author>
    <category term="CS" scheme="https://hugh-tong.github.io/categories/CS/"/>
    <category term="CS" scheme="https://hugh-tong.github.io/tags/CS/"/>
    <category term="Calc" scheme="https://hugh-tong.github.io/tags/Calc/"/>
    <content>
      <![CDATA[<p>逻辑处理器、线程（Thread）和核心（Core）是计算机处理器架构中的三个相关但不同的概念。以下是它们之间的区别和联系：</p><ol><li><p><strong>核心（Core）</strong>：</p><ul><li>核心是CPU内部的一个物理单元，能够独立执行计算任务。</li><li>每个核心都有自己的一套执行单元和缓存。</li><li>在多核心处理器中，每个核心可以并行处理不同的任务。</li></ul></li><li><p><strong>线程（Thread）</strong>：</p><ul><li>线程是操作系统能够进行运算调度的最小单位，是被系统独立调度和分派的基本单位。</li><li>一个进程（Process）可以包含多个线程，每个线程可以并行执行不同的任务。</li><li>线程共享进程的内存空间和资源，但拥有自己的程序计数器、寄存器集合和堆栈。</li></ul></li><li><p><strong>逻辑处理器（Logical Processor）</strong>：</p><ul><li>逻辑处理器是指从操作系统的角度看，能够独立执行线程的处理器。</li><li>逻辑处理器可以是物理核心，也可以是超线程技术（Hyper-Threading Technology，HT）创建的虚拟核心。</li><li>超线程技术允许单个物理核心模拟多个逻辑核心，每个逻辑核心可以执行不同的线程。</li></ul></li></ol><p><strong>区别</strong>：</p><ul><li><strong>物理核心是实际存在的硬件单元</strong>，而<strong>线程是操作系统层面的概念</strong>，用于任务的并行执行。</li><li><strong>逻辑处理器可以是物理核心或由超线程技术创建的虚拟核心</strong>，它们在操作系统看来是独立的处理单元，可以执行线程。</li></ul><p><strong>联系</strong>：</p><ul><li>在没有超线程技术的处理器中，逻辑处理器的数量通常等于物理核心的数量。</li><li>在支持超线程技术的处理器中，逻辑处理器的数量通常是物理核心数量的两倍，因为每个物理核心可以模拟两个逻辑处理器。</li><li>操作系统会将线程分配给逻辑处理器执行，以实现并行处理和提高计算效率。</li></ul><p>总结来说，核心是物理硬件，线程是操作系统的任务执行单元，而逻辑处理器是操作系统看到的可以执行线程的单元，可能是物理核心或超线程技术创建的虚拟核心。</p>]]>
    </content>
    <id>https://hugh-tong.github.io/2026/09/15/hpc-calc-notes/</id>
    <link href="https://hugh-tong.github.io/2026/09/15/hpc-calc-notes/"/>
    <published>2026-09-15T08:00:00.000Z</published>
    <summary>HPC 计算相关杂记:浮点精度与计算性能。</summary>
    <title>HPC 计算杂记</title>
    <updated>2026-09-15T08:00:00.000Z</updated>
  </entry>
  <entry>
    <author>
      <name>tttt</name>
    </author>
    <category term="CS" scheme="https://hugh-tong.github.io/categories/CS/"/>
    <category term="CS" scheme="https://hugh-tong.github.io/tags/CS/"/>
    <category term="GPU加速" scheme="https://hugh-tong.github.io/tags/GPU%E5%8A%A0%E9%80%9F/"/>
    <category term="DeepLearn" scheme="https://hugh-tong.github.io/tags/DeepLearn/"/>
    <category term="MachineLearn" scheme="https://hugh-tong.github.io/tags/MachineLearn/"/>
    <content>
      <![CDATA[<p>简单来说，<strong>Deep Learning（深度学习）是 Machine Learning（机器学习）的一个子集</strong>。如果把人工智能（AI）比作一个圆圈，那么机器学习就在圆圈内部，而深度学习则是机器学习内部的一个更小的圆圈。</p><p>它们的核心区别在于<strong>数据的处理方式</strong>以及<strong>对硬件的依赖程度</strong>。</p><hr><h3 id="1-核心差异对比"><a href="#1-核心差异对比" class="headerlink" title="1. 核心差异对比"></a>1. 核心差异对比</h3><table><thead><tr><th>特性</th><th>Machine Learning (传统机器学习)</th><th>Deep Learning (深度学习)</th></tr></thead><tbody><tr><td><strong>数据依赖</strong></td><td>在小数据集上表现良好。</td><td>需要海量数据（大数据）才能发挥优势。</td></tr><tr><td><strong>特征工程</strong></td><td><strong>人工干预</strong>：需要专家手动提取特征（如颜色、形状、边缘）。</td><td><strong>自动提取</strong>：神经网络自动从原始数据中学习特征。</td></tr><tr><td><strong>硬件需求</strong></td><td>普通 CPU 即可运行。</td><td>高度依赖 <strong>GPU&#x2F;TPU</strong> 进行大规模并行计算。</td></tr><tr><td><strong>执行时间</strong></td><td>训练时间短，推理速度快。</td><td>训练时间可能长达数天甚至数周。</td></tr><tr><td><strong>算法结构</strong></td><td>线性回归、决策树、支持向量机 (SVM)。</td><td>多层神经网络 (CNN, RNN, Transformers)。</td></tr></tbody></table><hr><h3 id="2-关键区别：特征提取-Feature-Extraction"><a href="#2-关键区别：特征提取-Feature-Extraction" class="headerlink" title="2. 关键区别：特征提取 (Feature Extraction)"></a>2. 关键区别：特征提取 (Feature Extraction)</h3><p>这是两者最本质的区别。</p><ul><li><strong>机器学习 (ML)</strong>：在处理任务前，人类需要告诉算法哪些信息是重要的。例如，要识别一张照片里的“汽车”，你需要手动定义车轮、车灯、挡风玻璃等特征，算法再根据这些特征进行分类。</li><li><strong>深度学习 (DL)</strong>：你只需要给模型输入数百万张汽车的照片。通过<strong>多层神经网络</strong>，模型第一层可能学会识别线条，第二层识别几何形状，更高层则能自动识别出“车轮”的特征，最终自己学会判断什么是汽车。</li></ul><p><img src="/images/ml-vs-dl/20260115_MLearnVsDeepLearn.png"></p><hr><h3 id="3-为什么现在深度学习更火？"><a href="#3-为什么现在深度学习更火？" class="headerlink" title="3. 为什么现在深度学习更火？"></a>3. 为什么现在深度学习更火？</h3><p>虽然深度学习的概念早在几十年前就有了，但直到近十年才爆发，主要得益于三个因素：</p><ol><li><strong>数据爆炸</strong>：互联网产生了足够训练深度模型的海量数据。</li><li><strong>算力突破</strong>：正如你之前提到的 <strong>Vera&#x2F;Rubin</strong> 架构（TPU&#x2F;GPU），这种强大的并行计算能力让训练深层网络成为可能。</li><li><strong>算法演进</strong>：例如 Transformer 架构的出现，直接促成了像 Gemini 和 ChatGPT 这样的生成式 AI。</li></ol><hr><h3 id="4-你的开发背景联系"><a href="#4-你的开发背景联系" class="headerlink" title="4. 你的开发背景联系"></a>4. 你的开发背景联系</h3><p>作为一名 <strong>CFD 工程师</strong>：</p><ul><li><strong>Machine Learning</strong>：可能用于实验数据的回归分析，或者根据几个关键参数预测阻力系数。</li><li><strong>Deep Learning</strong>：可以用于 <strong>Physics-Informed Neural Networks (PINNs)</strong>。这是一种前沿技术，将纳维-斯托克斯方程（N-S equations）作为损失函数约束，直接利用深度网络来求解流场，或者替代传统的 OpenFOAM 求解器进行极速推理。</li></ul><hr><p><strong>既然您对底层开发感兴趣，您是想了解如何将传统的 CFD 数值模拟（如 OpenFOAM）与深度学习模型结合起来，实现代理模型（Surrogate Model）加速吗？</strong></p>]]>
    </content>
    <id>https://hugh-tong.github.io/2026/09/15/ml-vs-dl/</id>
    <link href="https://hugh-tong.github.io/2026/09/15/ml-vs-dl/"/>
    <published>2026-09-15T08:00:00.000Z</published>
    <summary>ML 与 DL 的关键区别:特征提取视角。</summary>
    <title>机器学习 vs 深度学习</title>
    <updated>2026-09-15T08:00:00.000Z</updated>
  </entry>
  <entry>
    <author>
      <name>tttt</name>
    </author>
    <category term="CS" scheme="https://hugh-tong.github.io/categories/CS/"/>
    <category term="浸没边界法" scheme="https://hugh-tong.github.io/tags/%E6%B5%B8%E6%B2%A1%E8%BE%B9%E7%95%8C%E6%B3%95/"/>
    <category term="CS" scheme="https://hugh-tong.github.io/tags/CS/"/>
    <category term="PandocToExport" scheme="https://hugh-tong.github.io/tags/PandocToExport/"/>
    <content>
      <![CDATA[<h1 id="Pandoc-MdToDocx"><a href="#Pandoc-MdToDocx" class="headerlink" title="Pandoc_MdToDocx"></a>Pandoc_MdToDocx</h1><p>“工业级别的参数”指高级、专业级的参数选项，用于实现高质量、格式化的Word文档导出（适合学术论文、报告或企业文档等“工业级”场景）。Pandoc是一个强大的开源文档转换工具（官网：<a href="https://pandoc.org/%EF%BC%89%EF%BC%8C%E5%AE%83%E5%8F%AF%E4%BB%A5%E5%B0%86Markdown%EF%BC%88.md%EF%BC%89%E6%96%87%E4%BB%B6%E8%BD%AC%E6%8D%A2%E4%B8%BADOCX%EF%BC%88Microsoft">https://pandoc.org/），它可以将Markdown（.md）文件转换为DOCX（Microsoft</a> Word格式），并保留标题、列表、表格、图片、代码块、数学公式等格式。</p><p>在Windows下，Pandoc的使用与其他平台类似（命令行驱动）。我会先介绍安装和基本使用，然后列出关键参数（聚焦于提升导出质量到“工业级别”的选项），最后给出示例和提示。这些参数基于Pandoc的最新稳定版（截至2023年为v3.x），可以帮助您从Markdown快速生成专业化的Word文档。</p><h3 id="1-Windows下Pandoc的安装和准备"><a href="#1-Windows下Pandoc的安装和准备" class="headerlink" title="1. Windows下Pandoc的安装和准备"></a>1. Windows下Pandoc的安装和准备</h3><ul><li><strong>下载安装</strong>：从官网下载Windows安装包（.msi格式），安装后Pandoc会添加到系统PATH中。打开命令提示符（CMD）或PowerShell，运行<code>pandoc --version</code>验证安装。</li><li><strong>依赖</strong>：<ul><li>对于基本DOCX导出，无需额外依赖。</li><li>如果涉及引用&#x2F;参考文献，安装 CSL 文件（Citation Style Language）和bibliography文件。</li><li>推荐安装Microsoft Word查看导出结果。</li></ul></li><li><strong>基本命令格式</strong>：<figure class="highlight plaintext"><table><tr><td class="gutter"><pre><span class="line">1</span><br></pre></td><td class="code"><pre><span class="line">pandoc input.md -o output.docx [参数选项]</span><br></pre></td></tr></table></figure><ul><li><code>input.md</code>：您的Markdown输入文件。</li><li><code>-o output.docx</code>：输出为DOCX文件。</li><li>默认Pandoc会自动处理Markdown到DOCX的转换，保留基本格式（如H1-H6标题转换为Word样式、列表、粗体&#x2F;斜体、链接等）。</li></ul></li></ul><p>如果您有YAML元数据块在Markdown文件头部（e.g., <code>title: My Document</code>），Pandoc会自动应用到Word文档中。</p><h3 id="2-工业级别的导出参数"><a href="#2-工业级别的导出参数" class="headerlink" title="2. 工业级别的导出参数"></a>2. 工业级别的导出参数</h3><p>Pandoc有数百个参数，我聚焦于那些能让导出更专业、格式化更精细的选项（“工业级别”：如自定义样式、引用管理、元数据控制、兼容性优化）。这些参数可以组合使用。完整参数列表见<code>pandoc --help</code>或官网手册（<a href="https://pandoc.org/MANUAL.html%EF%BC%89%E3%80%82">https://pandoc.org/MANUAL.html）。</a></p><h4 id="核心参数（基本格式保留）"><a href="#核心参数（基本格式保留）" class="headerlink" title="核心参数（基本格式保留）"></a><strong>核心参数（基本格式保留）</strong></h4><ul><li><code>--from markdown</code> 或简写 <code>-f markdown</code>：指定输入格式（通常默认，但明确指定可避免问题）。</li><li><code>--to docx</code> 或简写 <code>-t docx</code>：指定输出为DOCX（Word格式）。</li><li><code>--standalone</code>：生成独立的文档（包括标题页等），适合完整报告。</li></ul><h4 id="高级样式和模板参数（提升专业性）"><a href="#高级样式和模板参数（提升专业性）" class="headerlink" title="高级样式和模板参数（提升专业性）"></a><strong>高级样式和模板参数（提升专业性）</strong></h4><p>这些是“工业级别”的关键，能让Word文档看起来像专业模板生成的（e.g., 自定义字体、页边距、页眉&#x2F;页脚）：</p><ul><li><strong><code>--reference-doc=template.docx</code></strong>：使用自定义Word模板文件作为参考。<strong>这是最强大的选项</strong>，允许您预设Word样式（e.g., 字体、颜色、段落间距）。<ul><li>如何使用：先用Word创建一个空模板（设置好Normal、Heading1等样式），保存为template.docx。然后在命令中指定它。Pandoc会继承这些样式。</li><li>为什么工业级：确保导出文档符合公司&#x2F;学术模板，避免手动调整。</li></ul></li><li><strong><code>--variable key=value</code></strong> 或 <code>-V key=value</code>：设置文档变量，控制Word特定属性。<ul><li>示例：<code>-V &#39;fontsize=12pt&#39; -V &#39;margin-left=1in&#39; -V &#39;margin-right=1in&#39;</code>（设置字体大小和页边距）。</li><li>其他常用：<code>-V &#39;lang=zh-CN&#39;</code>（设置语言为简体中文，避免乱码）；<code>-V &#39;version=1.0&#39;</code>（自定义元数据）。</li></ul></li><li><strong><code>--toc --toc-depth=3</code></strong>：自动生成目录（Table of Contents），深度到3级标题。工业级报告常用。</li><li><strong><code>--number-sections</code></strong>：为标题添加编号（e.g., 1.1 Section）。</li></ul><h4 id="引用和参考文献参数（学术-专业文档）"><a href="#引用和参考文献参数（学术-专业文档）" class="headerlink" title="引用和参考文献参数（学术&#x2F;专业文档）"></a><strong>引用和参考文献参数（学术&#x2F;专业文档）</strong></h4><ul><li><strong><code>--citeproc</code></strong>：启用内置引用处理器（基于citeproc），处理Markdown中的引用（如[@citation]）。<ul><li>需要在Markdown YAML头部添加<code>bibliography: refs.bib</code>和<code>csl: style.csl</code>（CSL文件从<a href="https://www.zotero.org/styles%E4%B8%8B%E8%BD%BD%EF%BC%89%E3%80%82">https://www.zotero.org/styles下载）。</a></li><li>为什么工业级：自动生成参考文献列表，支持APA、MLA、Chicago等样式。</li></ul></li><li><strong><code>--bibliography=refs.bib</code></strong>：指定BibTeX或类似格式的参考文献文件。</li><li><strong><code>--csl=chicago-author-date.csl</code></strong>：指定引用样式文件（下载后放置在路径中）。</li></ul><h4 id="格式优化和兼容性参数"><a href="#格式优化和兼容性参数" class="headerlink" title="格式优化和兼容性参数"></a><strong>格式优化和兼容性参数</strong></h4><ul><li><strong><code>--preserve-tabs</code></strong>：保留Markdown中的制表符（tabs），在Word中转换为实际制表。</li><li><strong><code>--track-changes=accept</code></strong>：如果源文件有变更跟踪，接受所有变更（或<code>reject</code>拒绝）。适合协作文档。</li><li><strong><code>--extract-media=images/</code></strong>：从Markdown中提取图片到指定文件夹，确保Word文档嵌入图片正确（避免路径问题）。</li><li><strong><code>--dpi=300</code></strong>：设置嵌入图片的分辨率（高DPI适合打印级文档）。</li><li><strong><code>--mathml</code> 或 <code>--mathjax</code></strong>：处理数学公式（e.g., LaTeX式）。导出到Word时转换为Office MathML，确保公式可编辑。</li><li><strong><code>--shift-heading-level-by=1</code></strong>：调整标题级别（e.g., Markdown的#变为Word的Heading 2），用于匹配模板。</li></ul><h4 id="性能和输出控制参数"><a href="#性能和输出控制参数" class="headerlink" title="性能和输出控制参数"></a><strong>性能和输出控制参数</strong></h4><ul><li><strong><code>--verbose</code></strong>：显示详细日志，帮助调试（工业级使用时便于追踪问题）。</li><li><strong><code>--quiet</code></strong>：抑制非错误输出，适合脚本自动化。</li><li><strong><code>--data-dir=dir</code></strong>：指定Pandoc数据目录（e.g., 存放模板&#x2F;CSL文件），便于组织文件。</li><li><strong><code>--resource-path=dir1;dir2</code></strong>：设置资源搜索路径（e.g., 图片&#x2F;模板），Windows下用分号分隔。</li></ul><h4 id="Windows特定注意"><a href="#Windows特定注意" class="headerlink" title="Windows特定注意"></a><strong>Windows特定注意</strong></h4><ul><li>Windows路径使用反斜杠（\）或双引号包围（e.g., <code>--reference-doc=&quot;C:\Templates\template.docx&quot;</code>）。</li><li>如果涉及中文字符，确保CMD&#x2F;PowerShell编码为UTF-8（运行<code>chcp 65001</code>）。</li><li>对于大文件，增加内存：Pandoc默认高效，但如果卡顿，用PowerShell运行以提升性能。</li></ul><h3 id="3-示例命令"><a href="#3-示例命令" class="headerlink" title="3. 示例命令"></a>3. 示例命令</h3><p>假设您的Markdown文件是<code>report.md</code>，包含标题、列表、图片和引用。</p><ul><li><p><strong>基本快速导出</strong>（保留格式）：</p><figure class="highlight plaintext"><table><tr><td class="gutter"><pre><span class="line">1</span><br></pre></td><td class="code"><pre><span class="line">pandoc report.md -o report.docx</span><br></pre></td></tr></table></figure></li><li><p><strong>工业级导出（带自定义模板、引用和目录）</strong>：</p><figure class="highlight plaintext"><table><tr><td class="gutter"><pre><span class="line">1</span><br></pre></td><td class="code"><pre><span class="line">pandoc report.md -o report.docx --reference-doc=template.docx --citeproc --bibliography=refs.bib --csl=apa.csl --toc --number-sections -V &#x27;fontsize=11pt&#x27; -V &#x27;lang=zh-CN&#x27; --extract-media=images/</span><br></pre></td></tr></table></figure><ul><li>这会生成一个带有自定义样式、自动目录、编号标题、参考文献的Word文档，图片提取到images文件夹。</li></ul></li><li><p><strong>自动化脚本</strong>（保存为.bat文件）：</p><figure class="highlight plaintext"><table><tr><td class="gutter"><pre><span class="line">1</span><br><span class="line">2</span><br></pre></td><td class="code"><pre><span class="line">@echo off</span><br><span class="line">pandoc %1 -o %1.docx --reference-doc=template.docx --citeproc</span><br></pre></td></tr></table></figure><p>使用：<code>script.bat report.md</code>。</p></li></ul><h3 id="4-提示和最佳实践"><a href="#4-提示和最佳实践" class="headerlink" title="4. 提示和最佳实践"></a>4. 提示和最佳实践</h3><ul><li><strong>创建自定义模板</strong>：<ol><li>用Word打开一个新文档，设置样式（修改Styles面板中的Normal、Heading 1等）。</li><li>添加页眉&#x2F;页脚、页码等。</li><li>保存为template.docx。</li><li>在Pandoc中使用<code>--reference-doc=template.docx</code>。</li></ol></li><li><strong>测试和迭代</strong>：先用小文件测试参数，避免大文件浪费时间。</li><li><strong>常见问题</strong>：<ul><li>字体缺失：模板中用系统字体（如Arial），确保Word有。</li><li>图片不显示：用绝对路径在Markdown中，或用<code>--extract-media</code>。</li><li>公式不支持：安装MathType或用<code>--mathml</code>。</li></ul></li><li><strong>高级扩展</strong>：结合Lua过滤器（<code>--lua-filter=script.lua</code>）自定义行为（e.g., 调整表格样式）。官网有示例。</li><li><strong>资源</strong>：<ul><li>官网手册：<a href="https://pandoc.org/MANUAL.html#options-for-wrapper-scripts">https://pandoc.org/MANUAL.html#options-for-wrapper-scripts</a></li><li>示例模板：搜索“Pandoc Word template GitHub”，有现成学术模板。</li><li>如果需要PDF导出，用<code>--pdf-engine=wkhtmltopdf</code>（但您问的是Word）。</li></ul></li></ul><p>这些参数能让您从Markdown快速生成高质量Word文档，适合专业场景。如果您有特定Markdown文件示例或遇到错误，分享更多细节，我可以给出针对性命令！</p>]]>
    </content>
    <id>https://hugh-tong.github.io/2026/09/15/pandoc-md-to-docx/</id>
    <link href="https://hugh-tong.github.io/2026/09/15/pandoc-md-to-docx/"/>
    <published>2026-09-15T08:00:00.000Z</published>
    <summary>用 Pandoc 把 Markdown 转 Word 的模板与命令配置。</summary>
    <title>Pandoc:Markdown 转 Docx 实用配置</title>
    <updated>2026-09-15T08:00:00.000Z</updated>
  </entry>
  <entry>
    <author>
      <name>tttt</name>
    </author>
    <category term="CS" scheme="https://hugh-tong.github.io/categories/CS/"/>
    <category term="Bash" scheme="https://hugh-tong.github.io/tags/Bash/"/>
    <category term="CS" scheme="https://hugh-tong.github.io/tags/CS/"/>
    <category term="GPU加速" scheme="https://hugh-tong.github.io/tags/GPU%E5%8A%A0%E9%80%9F/"/>
    <category term="Monitor" scheme="https://hugh-tong.github.io/tags/Monitor/"/>
    <content>
      <![CDATA[<h1 id="Ubuntu-下查看-CPU-温度、风扇转速等硬件传感信息的常用工具"><a href="#Ubuntu-下查看-CPU-温度、风扇转速等硬件传感信息的常用工具" class="headerlink" title="Ubuntu 下查看 CPU 温度、风扇转速等硬件传感信息的常用工具"></a>Ubuntu 下查看 CPU 温度、风扇转速等硬件传感信息的常用工具</h1><p>下面按用途分为命令行与图形界面两类，并给出快速上手命令与要点。多数工具依赖内核的 hwmon&#x2F;ACPI&#x2F;厂商驱动，若读不到数据，见文末“读不到传感器时的排查”。</p><hr><h2 id="一览表（按硬件-场景）"><a href="#一览表（按硬件-场景）" class="headerlink" title="一览表（按硬件&#x2F;场景）"></a>一览表（按硬件&#x2F;场景）</h2><table><thead><tr><th>硬件&#x2F;场景</th><th>推荐工具（CLI）</th><th>推荐工具（GUI&#x2F;桌面）</th></tr></thead><tbody><tr><td>CPU&#x2F;主板温度、风扇转速</td><td>lm-sensors（sensors）</td><td>Psensor、Vitals（GNOME 扩展）、KDE Plasma System Monitor、Indicator Sensors</td></tr><tr><td>NVIDIA 显卡温度&#x2F;风扇</td><td>nvidia-smi</td><td>GPU 图形软件（Psensor 也可显示）</td></tr><tr><td>AMD 显卡温度&#x2F;风扇</td><td>amdgpu_top、rocm-smi&#x2F;amd-smi</td><td>Psensor&#x2F;KDE（接入 lm-sensors）</td></tr><tr><td>NVMe SSD 温度</td><td>nvme-cli（nvme smart-log）</td><td>Psensor（经 lm-sensors&#x2F;hwmon）</td></tr><tr><td>SATA HDD&#x2F;SSD 温度</td><td>smartmontools（smartctl）</td><td>Psensor</td></tr><tr><td>终端面板式总览</td><td>glances、s-tui、bashtop&#x2F;btop、inxi</td><td>Psensor、KDE&#x2F;GNOME 系统监视器</td></tr><tr><td>服务器带 BMC&#x2F;IPMI</td><td>ipmitool sdr</td><td>Web BMC、第三方监控</td></tr></tbody></table><hr><h2 id="命令行工具"><a href="#命令行工具" class="headerlink" title="命令行工具"></a>命令行工具</h2><h3 id="1-lm-sensors（通用：CPU-主板温度与风扇）"><a href="#1-lm-sensors（通用：CPU-主板温度与风扇）" class="headerlink" title="1) lm-sensors（通用：CPU&#x2F;主板温度与风扇）"></a>1) lm-sensors（通用：CPU&#x2F;主板温度与风扇）</h3><ul><li>安装与检测：<figure class="highlight bash"><table><tr><td class="gutter"><pre><span class="line">1</span><br><span class="line">2</span><br><span class="line">3</span><br><span class="line">4</span><br><span class="line">5</span><br></pre></td><td class="code"><pre><span class="line">sudo apt update</span><br><span class="line">sudo apt install lm-sensors</span><br><span class="line">sudo sensors-detect     <span class="comment"># 按提示回车/Yes，加载建议的内核模块</span></span><br><span class="line">sensors                 <span class="comment"># 查看实时读数</span></span><br><span class="line">watch -n1 sensors       <span class="comment"># 每秒刷新一次</span></span><br></pre></td></tr></table></figure></li><li>提示<ul><li>能显示如 <code>temp1</code>, <code>fan1</code> 等；是否能读到风速取决于硬件与内核驱动。</li><li>读数来源路径可在 <code>/sys/class/hwmon/hwmon*/</code> 查看。</li></ul></li></ul><h3 id="2-存储设备温度"><a href="#2-存储设备温度" class="headerlink" title="2) 存储设备温度"></a>2) 存储设备温度</h3><ul><li>NVMe：<figure class="highlight bash"><table><tr><td class="gutter"><pre><span class="line">1</span><br><span class="line">2</span><br><span class="line">3</span><br></pre></td><td class="code"><pre><span class="line">sudo apt install nvme-cli</span><br><span class="line">sudo nvme list</span><br><span class="line">sudo nvme smart-log /dev/nvme0 | grep -i temperature</span><br></pre></td></tr></table></figure></li><li>SATA（HDD&#x2F;SSD）：<figure class="highlight bash"><table><tr><td class="gutter"><pre><span class="line">1</span><br><span class="line">2</span><br></pre></td><td class="code"><pre><span class="line">sudo apt install smartmontools</span><br><span class="line">sudo smartctl -A /dev/sda | grep -i temp</span><br></pre></td></tr></table></figure></li></ul><h3 id="3-显卡温度与风扇"><a href="#3-显卡温度与风扇" class="headerlink" title="3) 显卡温度与风扇"></a>3) 显卡温度与风扇</h3><ul><li>NVIDIA：<figure class="highlight bash"><table><tr><td class="gutter"><pre><span class="line">1</span><br><span class="line">2</span><br></pre></td><td class="code"><pre><span class="line">nvidia-smi             <span class="comment"># 需已安装 NVIDIA 驱动</span></span><br><span class="line">nvidia-settings        <span class="comment"># 可图形化查看/设置（可选）</span></span><br></pre></td></tr></table></figure></li><li>AMD：<figure class="highlight bash"><table><tr><td class="gutter"><pre><span class="line">1</span><br><span class="line">2</span><br><span class="line">3</span><br><span class="line">4</span><br><span class="line">5</span><br></pre></td><td class="code"><pre><span class="line">sudo apt install amdgpu-top        <span class="comment"># 部分版本包名为 amdgpu-tools 或在 PPA</span></span><br><span class="line">amdgpu_top                         <span class="comment"># 交互界面</span></span><br><span class="line"><span class="comment"># 或（若安装了 ROCm/AMD 工具）</span></span><br><span class="line">sudo apt install rocm-smi</span><br><span class="line">rocm-smi                           <span class="comment"># 新版也可用 amd-smi</span></span><br></pre></td></tr></table></figure></li></ul><h3 id="4-终端监控与压测联动"><a href="#4-终端监控与压测联动" class="headerlink" title="4) 终端监控与压测联动"></a>4) 终端监控与压测联动</h3><ul><li>Glances（系统全局 + 传感器）：<figure class="highlight bash"><table><tr><td class="gutter"><pre><span class="line">1</span><br><span class="line">2</span><br></pre></td><td class="code"><pre><span class="line">sudo apt install glances</span><br><span class="line">glances</span><br></pre></td></tr></table></figure></li><li>s-tui（温度&#x2F;频率&#x2F;功耗&#x2F;可选压力测试）：<figure class="highlight bash"><table><tr><td class="gutter"><pre><span class="line">1</span><br><span class="line">2</span><br></pre></td><td class="code"><pre><span class="line">sudo apt install s-tui stress</span><br><span class="line">s-tui</span><br></pre></td></tr></table></figure></li></ul><h3 id="5-服务器-工作站（有-BMC-IPMI）"><a href="#5-服务器-工作站（有-BMC-IPMI）" class="headerlink" title="5) 服务器&#x2F;工作站（有 BMC&#x2F;IPMI）"></a>5) 服务器&#x2F;工作站（有 BMC&#x2F;IPMI）</h3><figure class="highlight bash"><table><tr><td class="gutter"><pre><span class="line">1</span><br><span class="line">2</span><br></pre></td><td class="code"><pre><span class="line">sudo apt install ipmitool</span><br><span class="line">sudo ipmitool sdr          <span class="comment"># 传感器数据记录，含温度、风扇</span></span><br></pre></td></tr></table></figure><hr><h2 id="图形界面工具"><a href="#图形界面工具" class="headerlink" title="图形界面工具"></a>图形界面工具</h2><ul><li><p>Psensor（最常用）</p><figure class="highlight bash"><table><tr><td class="gutter"><pre><span class="line">1</span><br><span class="line">2</span><br></pre></td><td class="code"><pre><span class="line">sudo apt install psensor</span><br><span class="line">psensor</span><br></pre></td></tr></table></figure><ul><li>依赖 lm-sensors，可在托盘显示温度&#x2F;风速，支持日志&#x2F;告警。</li></ul></li><li><p>GNOME 桌面</p><ul><li>Vitals 扩展（显示 CPU&#x2F;GPU&#x2F;温度&#x2F;风扇）：安装“扩展”后在扩展网站或 <code>gnome-extensions-app</code> 中启用。</li><li>系统监视器 + 扩展&#x2F;插件也可显示部分信息。</li></ul></li><li><p>KDE Plasma</p><ul><li>Plasma System Monitor&#x2F;KSysGuard：添加“传感器”小组件即可显示温度&#x2F;风扇。</li></ul></li><li><p>Indicator Sensors（顶部面板指示器）</p><figure class="highlight bash"><table><tr><td class="gutter"><pre><span class="line">1</span><br></pre></td><td class="code"><pre><span class="line">sudo apt install indicator-sensors</span><br></pre></td></tr></table></figure></li><li><p>xsensors &#x2F; hardinfo</p><ul><li><code>xsensors</code> 是 lm-sensors 的极简 GUI；<code>hardinfo</code> 可在“传感器”页查看并做基本基准。</li></ul></li></ul><hr><h2 id="可选：风扇控制（了解即可）"><a href="#可选：风扇控制（了解即可）" class="headerlink" title="可选：风扇控制（了解即可）"></a>可选：风扇控制（了解即可）</h2><ul><li>若主板&#x2F;笔电支持，可用 <code>fancontrol</code> 配合 <code>pwmconfig</code> 调速（风险：不当设置会过热）。<figure class="highlight bash"><table><tr><td class="gutter"><pre><span class="line">1</span><br><span class="line">2</span><br><span class="line">3</span><br></pre></td><td class="code"><pre><span class="line">sudo apt install fancontrol</span><br><span class="line">sudo pwmconfig</span><br><span class="line">sudo systemctl <span class="built_in">enable</span> --now fancontrol</span><br></pre></td></tr></table></figure></li></ul><hr><h2 id="读不到温度-风扇时的排查"><a href="#读不到温度-风扇时的排查" class="headerlink" title="读不到温度&#x2F;风扇时的排查"></a>读不到温度&#x2F;风扇时的排查</h2><ul><li>先跑一次探测：<figure class="highlight bash"><table><tr><td class="gutter"><pre><span class="line">1</span><br><span class="line">2</span><br></pre></td><td class="code"><pre><span class="line">sudo sensors-detect</span><br><span class="line">sudo modprobe &lt;提示的内核模块名&gt;</span><br></pre></td></tr></table></figure></li><li>确认常见厂商 ACPI&#x2F;EC 模块已加载（笔记本常见）：<ul><li>ThinkPad：<code>thinkpad_acpi</code></li><li>Dell：<code>dell-smm-hwmon</code></li><li>ASUS：<code>asus_wmi</code></li></ul><figure class="highlight bash"><table><tr><td class="gutter"><pre><span class="line">1</span><br></pre></td><td class="code"><pre><span class="line">lsmod | egrep <span class="string">&#x27;thinkpad_acpi|dell|asus|hwmon&#x27;</span></span><br></pre></td></tr></table></figure></li><li>查看内核暴露的 hwmon：<figure class="highlight bash"><table><tr><td class="gutter"><pre><span class="line">1</span><br><span class="line">2</span><br></pre></td><td class="code"><pre><span class="line"><span class="built_in">ls</span> -l /sys/class/hwmon/</span><br><span class="line"><span class="built_in">cat</span> /sys/class/hwmon/hwmon*/name</span><br></pre></td></tr></table></figure></li><li>显卡需安装对应专有&#x2F;开源驱动后才有风扇转速读数（NVIDIA 多为专有驱动）。</li><li>虚拟机中通常读不到真实温度&#x2F;风扇。</li><li>某些笔记本不公开风扇转速传感器，这是硬件&#x2F;BIOS 限制。</li></ul><hr><h2 id="快速命令合集"><a href="#快速命令合集" class="headerlink" title="快速命令合集"></a>快速命令合集</h2><figure class="highlight bash"><table><tr><td class="gutter"><pre><span class="line">1</span><br><span class="line">2</span><br><span class="line">3</span><br><span class="line">4</span><br><span class="line">5</span><br><span class="line">6</span><br><span class="line">7</span><br><span class="line">8</span><br><span class="line">9</span><br><span class="line">10</span><br><span class="line">11</span><br><span class="line">12</span><br></pre></td><td class="code"><pre><span class="line"><span class="comment"># 通用</span></span><br><span class="line">sudo apt install lm-sensors psensor</span><br><span class="line">sudo sensors-detect</span><br><span class="line">watch -n1 sensors</span><br><span class="line"></span><br><span class="line"><span class="comment"># 显卡</span></span><br><span class="line">nvidia-smi</span><br><span class="line">amdgpu_top      <span class="comment"># 或 rocm-smi/amd-smi</span></span><br><span class="line"></span><br><span class="line"><span class="comment"># 磁盘</span></span><br><span class="line">sudo nvme smart-log /dev/nvme0 | grep -i temp</span><br><span class="line">sudo smartctl -A /dev/sda | grep -i temp</span><br></pre></td></tr></table></figure><p>如果你告诉我使用的硬件（CPU&#x2F;主板、显卡型号、笔记本品牌型号、Ubuntu 版本），我可以给出更精确的工具组合和操作步骤。</p>]]>
    </content>
    <id>https://hugh-tong.github.io/2026/09/15/pc-monitor-ubuntu/</id>
    <link href="https://hugh-tong.github.io/2026/09/15/pc-monitor-ubuntu/"/>
    <published>2026-09-15T08:00:00.000Z</published>
    <summary>Ubuntu 下查看 CPU 温度、风扇转速等传感信息的常用工具。</summary>
    <title>Ubuntu 硬件传感信息查看(CPU 温度/风扇转速)</title>
    <updated>2026-09-15T08:00:00.000Z</updated>
  </entry>
  <entry>
    <author>
      <name>tttt</name>
    </author>
    <category term="CS" scheme="https://hugh-tong.github.io/categories/CS/"/>
    <category term="编程" scheme="https://hugh-tong.github.io/categories/CS/%E7%BC%96%E7%A8%8B/"/>
    <category term="Python" scheme="https://hugh-tong.github.io/categories/CS/%E7%BC%96%E7%A8%8B/Python/"/>
    <category term="Bash" scheme="https://hugh-tong.github.io/tags/Bash/"/>
    <category term="浸没边界法" scheme="https://hugh-tong.github.io/tags/%E6%B5%B8%E6%B2%A1%E8%BE%B9%E7%95%8C%E6%B3%95/"/>
    <category term="CS/编程/Python" scheme="https://hugh-tong.github.io/tags/CS-%E7%BC%96%E7%A8%8B-Python/"/>
    <category term="Git" scheme="https://hugh-tong.github.io/tags/Git/"/>
    <category term="Python" scheme="https://hugh-tong.github.io/tags/Python/"/>
    <content>
      <![CDATA[<h1 id="工业级-Python-项目从零构建与规范清单"><a href="#工业级-Python-项目从零构建与规范清单" class="headerlink" title="工业级 Python 项目从零构建与规范清单"></a>工业级 Python 项目从零构建与规范清单</h1><p>下面给出一套在团队&#x2F;企业中可落地的“从零到上线”的项目骨架、工具链与最佳实践。适用于库、CLI 工具与服务端项目（Web&#x2F;微服务）。示例采用现代 <code>pyproject.toml</code> 工作流与 <code>src/</code> 布局，工具以稳定与团队协作友好为优先。</p><hr><h2 id="1-选型与总原则"><a href="#1-选型与总原则" class="headerlink" title="1. 选型与总原则"></a>1. 选型与总原则</h2><ul><li><strong>Python 版本策略</strong>：统一最低版本（如 3.10+），设定 EOL 升级节奏；CI 覆盖需要支持的多个版本。</li><li><strong>布局</strong>：推荐 <code>src/</code> 布局，避免测试时意外导入本地目录。</li><li><strong>依赖管理</strong>：使用基于 <code>pyproject.toml</code> 的单一真源。<ul><li>现代方案：uv（快、全能）、Poetry（成熟）、PDM（纯 PEP 实现）、pip-tools（简洁可控）。</li></ul></li><li><strong>代码质量四件套</strong>：格式化（black&#x2F;ruff format）、静态检查（ruff）、类型检查（mypy&#x2F;pyright）、测试（pytest）。</li><li><strong>自动化</strong>：pre-commit 钩子 + CI（GitHub Actions&#x2F;GitLab CI）。</li><li><strong>配置与秘密</strong>：12-Factor，环境变量优先；不要把密钥进仓库，集中用 Vault&#x2F;Secrets 管理。</li><li><strong>可观测性</strong>：结构化日志、指标、追踪；生产日志建议 JSON。</li><li><strong>安全与合规</strong>：SCA（pip-audit&#x2F;safety）、代码扫描（bandit）、许可证&#x2F;依赖白名单、SBOM。</li></ul><hr><h2 id="2-项目目录模板"><a href="#2-项目目录模板" class="headerlink" title="2. 项目目录模板"></a>2. 项目目录模板</h2><figure class="highlight text"><table><tr><td class="gutter"><pre><span class="line">1</span><br><span class="line">2</span><br><span class="line">3</span><br><span class="line">4</span><br><span class="line">5</span><br><span class="line">6</span><br><span class="line">7</span><br><span class="line">8</span><br><span class="line">9</span><br><span class="line">10</span><br><span class="line">11</span><br><span class="line">12</span><br><span class="line">13</span><br><span class="line">14</span><br><span class="line">15</span><br><span class="line">16</span><br><span class="line">17</span><br><span class="line">18</span><br><span class="line">19</span><br><span class="line">20</span><br><span class="line">21</span><br><span class="line">22</span><br><span class="line">23</span><br><span class="line">24</span><br></pre></td><td class="code"><pre><span class="line">your-project/</span><br><span class="line">├─ pyproject.toml</span><br><span class="line">├─ README.md</span><br><span class="line">├─ LICENSE</span><br><span class="line">├─ .gitignore</span><br><span class="line">├─ .editorconfig</span><br><span class="line">├─ .pre-commit-config.yaml</span><br><span class="line">├─ .ruff.toml</span><br><span class="line">├─ mypy.ini</span><br><span class="line">├─ pytest.ini</span><br><span class="line">├─ Makefile                # 或 noxfile.py / justfile</span><br><span class="line">├─ docs/                   # Sphinx/MkDocs</span><br><span class="line">├─ src/</span><br><span class="line">│  └─ your_pkg/</span><br><span class="line">│     ├─ __init__.py</span><br><span class="line">│     ├─ app.py</span><br><span class="line">│     └─ core/</span><br><span class="line">├─ tests/</span><br><span class="line">│  ├─ conftest.py</span><br><span class="line">│  └─ test_app.py</span><br><span class="line">├─ scripts/                # 仅开发脚本，不打包</span><br><span class="line">└─ docker/</span><br><span class="line">   ├─ Dockerfile</span><br><span class="line">   └─ gunicorn.conf.py</span><br></pre></td></tr></table></figure><hr><h2 id="3-pyproject-toml（示例：Poetry-uv-二选一）"><a href="#3-pyproject-toml（示例：Poetry-uv-二选一）" class="headerlink" title="3. pyproject.toml（示例：Poetry&#x2F;uv 二选一）"></a>3. pyproject.toml（示例：Poetry&#x2F;uv 二选一）</h2><h3 id="方案-A：Poetry（经典稳定）"><a href="#方案-A：Poetry（经典稳定）" class="headerlink" title="方案 A：Poetry（经典稳定）"></a>方案 A：Poetry（经典稳定）</h3><figure class="highlight toml"><table><tr><td class="gutter"><pre><span class="line">1</span><br><span class="line">2</span><br><span class="line">3</span><br><span class="line">4</span><br><span class="line">5</span><br><span class="line">6</span><br><span class="line">7</span><br><span class="line">8</span><br><span class="line">9</span><br><span class="line">10</span><br><span class="line">11</span><br><span class="line">12</span><br><span class="line">13</span><br><span class="line">14</span><br><span class="line">15</span><br><span class="line">16</span><br><span class="line">17</span><br><span class="line">18</span><br><span class="line">19</span><br><span class="line">20</span><br><span class="line">21</span><br><span class="line">22</span><br><span class="line">23</span><br><span class="line">24</span><br><span class="line">25</span><br><span class="line">26</span><br><span class="line">27</span><br><span class="line">28</span><br><span class="line">29</span><br></pre></td><td class="code"><pre><span class="line"><span class="section">[tool.poetry]</span></span><br><span class="line"><span class="attr">name</span> = <span class="string">&quot;your-project&quot;</span></span><br><span class="line"><span class="attr">version</span> = <span class="string">&quot;0.1.0&quot;</span></span><br><span class="line"><span class="attr">description</span> = <span class="string">&quot;Awesome service/library&quot;</span></span><br><span class="line"><span class="attr">authors</span> = [<span class="string">&quot;Team &lt;dev@example.com&gt;&quot;</span>]</span><br><span class="line"><span class="attr">readme</span> = <span class="string">&quot;README.md&quot;</span></span><br><span class="line"><span class="attr">license</span> = <span class="string">&quot;MIT&quot;</span></span><br><span class="line"><span class="attr">packages</span> = [&#123; include = <span class="string">&quot;your_pkg&quot;</span>, from = <span class="string">&quot;src&quot;</span> &#125;]</span><br><span class="line"></span><br><span class="line"><span class="section">[tool.poetry.dependencies]</span></span><br><span class="line"><span class="attr">python</span> = <span class="string">&quot;&gt;=3.10,&lt;3.13&quot;</span></span><br><span class="line"><span class="attr">pydantic</span> = <span class="string">&quot;^2.7&quot;</span></span><br><span class="line"></span><br><span class="line"><span class="section">[tool.poetry.group.dev.dependencies]</span></span><br><span class="line"><span class="attr">pytest</span> = <span class="string">&quot;^8.2&quot;</span></span><br><span class="line"><span class="attr">pytest-cov</span> = <span class="string">&quot;^5.0&quot;</span></span><br><span class="line"><span class="attr">ruff</span> = <span class="string">&quot;^0.5&quot;</span></span><br><span class="line"><span class="attr">mypy</span> = <span class="string">&quot;^1.10&quot;</span></span><br><span class="line"><span class="attr">black</span> = <span class="string">&quot;^24.8&quot;</span></span><br><span class="line"><span class="attr">pre-commit</span> = <span class="string">&quot;^3.8&quot;</span></span><br><span class="line"><span class="attr">pip-audit</span> = <span class="string">&quot;^2.7&quot;</span></span><br><span class="line"><span class="attr">bandit</span> = <span class="string">&quot;^1.7&quot;</span></span><br><span class="line"></span><br><span class="line"><span class="section">[tool.poetry.scripts]</span></span><br><span class="line"><span class="attr">your-cli</span> = <span class="string">&quot;your_pkg.app:main&quot;</span>  <span class="comment"># 生成可执行 CLI</span></span><br><span class="line"></span><br><span class="line"><span class="section">[build-system]</span></span><br><span class="line"><span class="attr">requires</span> = [<span class="string">&quot;poetry-core&gt;=1.9&quot;</span>]</span><br><span class="line"><span class="attr">build-backend</span> = <span class="string">&quot;poetry.core.masonry.api&quot;</span></span><br></pre></td></tr></table></figure><p>安装与锁定：</p><figure class="highlight bash"><table><tr><td class="gutter"><pre><span class="line">1</span><br><span class="line">2</span><br></pre></td><td class="code"><pre><span class="line">poetry install</span><br><span class="line">poetry run pre-commit install</span><br></pre></td></tr></table></figure><h3 id="方案-B：uv（超快、简洁）"><a href="#方案-B：uv（超快、简洁）" class="headerlink" title="方案 B：uv（超快、简洁）"></a>方案 B：uv（超快、简洁）</h3><figure class="highlight toml"><table><tr><td class="gutter"><pre><span class="line">1</span><br><span class="line">2</span><br><span class="line">3</span><br><span class="line">4</span><br><span class="line">5</span><br><span class="line">6</span><br><span class="line">7</span><br><span class="line">8</span><br><span class="line">9</span><br><span class="line">10</span><br><span class="line">11</span><br><span class="line">12</span><br><span class="line">13</span><br><span class="line">14</span><br><span class="line">15</span><br><span class="line">16</span><br><span class="line">17</span><br><span class="line">18</span><br><span class="line">19</span><br></pre></td><td class="code"><pre><span class="line"><span class="section">[project]</span></span><br><span class="line"><span class="attr">name</span> = <span class="string">&quot;your-project&quot;</span></span><br><span class="line"><span class="attr">version</span> = <span class="string">&quot;0.1.0&quot;</span></span><br><span class="line"><span class="attr">description</span> = <span class="string">&quot;Awesome service/library&quot;</span></span><br><span class="line"><span class="attr">readme</span> = <span class="string">&quot;README.md&quot;</span></span><br><span class="line"><span class="attr">requires-python</span> = <span class="string">&quot;&gt;=3.10&quot;</span></span><br><span class="line"><span class="attr">license</span> = &#123;text = <span class="string">&quot;MIT&quot;</span>&#125;</span><br><span class="line"><span class="attr">dependencies</span> = [<span class="string">&quot;pydantic&gt;=2.7&quot;</span>]</span><br><span class="line"><span class="attr">scripts</span> = &#123; your-cli = <span class="string">&quot;your_pkg.app:main&quot;</span> &#125;</span><br><span class="line"></span><br><span class="line"><span class="section">[project.optional-dependencies]</span></span><br><span class="line"><span class="attr">dev</span> = [<span class="string">&quot;pytest&gt;=8.2&quot;</span>, <span class="string">&quot;pytest-cov&gt;=5.0&quot;</span>, <span class="string">&quot;ruff&gt;=0.5&quot;</span>, <span class="string">&quot;mypy&gt;=1.10&quot;</span>, <span class="string">&quot;black&gt;=24.8&quot;</span>, <span class="string">&quot;pre-commit&gt;=3.8&quot;</span>, <span class="string">&quot;pip-audit&gt;=2.7&quot;</span>, <span class="string">&quot;bandit&gt;=1.7&quot;</span>]</span><br><span class="line"></span><br><span class="line"><span class="section">[tool.uv]</span></span><br><span class="line"><span class="attr">dev-dependencies</span> = [<span class="string">&quot;your-project[dev]&quot;</span>]</span><br><span class="line"></span><br><span class="line"><span class="section">[build-system]</span></span><br><span class="line"><span class="attr">requires</span> = [<span class="string">&quot;hatchling&gt;=1.25&quot;</span>]</span><br><span class="line"><span class="attr">build-backend</span> = <span class="string">&quot;hatchling.build&quot;</span></span><br></pre></td></tr></table></figure><p>安装与锁定：</p><figure class="highlight bash"><table><tr><td class="gutter"><pre><span class="line">1</span><br><span class="line">2</span><br><span class="line">3</span><br></pre></td><td class="code"><pre><span class="line">uv venv &amp;&amp; . .venv/bin/activate</span><br><span class="line">uv pip install -e <span class="string">&quot;.[dev]&quot;</span>  <span class="comment"># 可生成 uv.lock</span></span><br><span class="line">pre-commit install</span><br></pre></td></tr></table></figure><blockquote><p>若你偏好 requirements.txt 工作流，用 pip-tools：<code>pip-compile --generate-hashes</code> + <code>pip-sync</code>。</p></blockquote><hr><h2 id="4-代码风格与检查"><a href="#4-代码风格与检查" class="headerlink" title="4. 代码风格与检查"></a>4. 代码风格与检查</h2><ul><li><strong>格式化</strong>：统一用 <code>ruff format</code> 或 <code>black</code>，CI 强制。</li><li><strong>静态检查</strong>：<code>ruff</code>（替代 flake8+isort+pydocstyle 等）。</li><li><strong>类型</strong>：<code>mypy</code>（或 <code>pyright</code>），对公共 API 要求 100% 类型注解。</li><li><strong>Docstring</strong>：Google 或 NumPy 风格 + PEP 257。</li></ul><p>示例 <code>.ruff.toml</code>：</p><figure class="highlight toml"><table><tr><td class="gutter"><pre><span class="line">1</span><br><span class="line">2</span><br><span class="line">3</span><br><span class="line">4</span><br></pre></td><td class="code"><pre><span class="line"><span class="attr">line-length</span> = <span class="number">100</span></span><br><span class="line"><span class="attr">target-version</span> = <span class="string">&quot;py310&quot;</span></span><br><span class="line"><span class="attr">lint.select</span> = [<span class="string">&quot;E&quot;</span>,<span class="string">&quot;F&quot;</span>,<span class="string">&quot;W&quot;</span>,<span class="string">&quot;I&quot;</span>,<span class="string">&quot;N&quot;</span>,<span class="string">&quot;D&quot;</span>,<span class="string">&quot;UP&quot;</span>,<span class="string">&quot;B&quot;</span>,<span class="string">&quot;C4&quot;</span>,<span class="string">&quot;SIM&quot;</span>,<span class="string">&quot;PERF&quot;</span>,<span class="string">&quot;ARG&quot;</span>,<span class="string">&quot;RUF&quot;</span>]</span><br><span class="line"><span class="attr">lint.ignore</span> = [<span class="string">&quot;D203&quot;</span>,<span class="string">&quot;D212&quot;</span>]  <span class="comment"># 依据团队偏好</span></span><br></pre></td></tr></table></figure><p><code>mypy.ini</code>：</p><figure class="highlight ini"><table><tr><td class="gutter"><pre><span class="line">1</span><br><span class="line">2</span><br><span class="line">3</span><br><span class="line">4</span><br><span class="line">5</span><br><span class="line">6</span><br></pre></td><td class="code"><pre><span class="line"><span class="section">[mypy]</span></span><br><span class="line"><span class="attr">python_version</span> = <span class="number">3.10</span></span><br><span class="line"><span class="attr">strict</span> = <span class="literal">True</span></span><br><span class="line"><span class="attr">warn_unused_ignores</span> = <span class="literal">True</span></span><br><span class="line"><span class="attr">disallow_untyped_defs</span> = <span class="literal">True</span></span><br><span class="line"><span class="attr">plugins</span> = pydantic.mypy</span><br></pre></td></tr></table></figure><hr><h2 id="5-测试与覆盖率"><a href="#5-测试与覆盖率" class="headerlink" title="5. 测试与覆盖率"></a>5. 测试与覆盖率</h2><ul><li>框架：<code>pytest</code></li><li>目标：单元测试覆盖率 ≥ 80%（关键模块更高），集成测试分层。</li><li>工具：<code>pytest-cov</code>、<code>hypothesis</code>（性质测试）、<code>factory_boy</code>&#x2F;<code>faker</code>。</li></ul><p><code>pytest.ini</code>：</p><figure class="highlight ini"><table><tr><td class="gutter"><pre><span class="line">1</span><br><span class="line">2</span><br><span class="line">3</span><br></pre></td><td class="code"><pre><span class="line"><span class="section">[pytest]</span></span><br><span class="line"><span class="attr">addopts</span> = -q --strict-markers --maxfail=<span class="number">1</span> --cov=your_pkg --cov-report=term-missing</span><br><span class="line"><span class="attr">testpaths</span> = tests</span><br></pre></td></tr></table></figure><p>示例测试：</p><figure class="highlight python"><table><tr><td class="gutter"><pre><span class="line">1</span><br><span class="line">2</span><br><span class="line">3</span><br><span class="line">4</span><br><span class="line">5</span><br></pre></td><td class="code"><pre><span class="line"><span class="comment"># tests/test_app.py</span></span><br><span class="line"><span class="keyword">from</span> your_pkg.app <span class="keyword">import</span> add</span><br><span class="line"></span><br><span class="line"><span class="keyword">def</span> <span class="title function_">test_add</span>():</span><br><span class="line">    <span class="keyword">assert</span> add(<span class="number">1</span>, <span class="number">2</span>) == <span class="number">3</span></span><br></pre></td></tr></table></figure><hr><h2 id="6-预提交钩子与自动化"><a href="#6-预提交钩子与自动化" class="headerlink" title="6. 预提交钩子与自动化"></a>6. 预提交钩子与自动化</h2><p><code>.pre-commit-config.yaml</code>：</p><figure class="highlight yaml"><table><tr><td class="gutter"><pre><span class="line">1</span><br><span class="line">2</span><br><span class="line">3</span><br><span class="line">4</span><br><span class="line">5</span><br><span class="line">6</span><br><span class="line">7</span><br><span class="line">8</span><br><span class="line">9</span><br><span class="line">10</span><br><span class="line">11</span><br><span class="line">12</span><br><span class="line">13</span><br><span class="line">14</span><br><span class="line">15</span><br><span class="line">16</span><br><span class="line">17</span><br><span class="line">18</span><br><span class="line">19</span><br><span class="line">20</span><br><span class="line">21</span><br><span class="line">22</span><br><span class="line">23</span><br></pre></td><td class="code"><pre><span class="line"><span class="attr">repos:</span></span><br><span class="line">  <span class="bullet">-</span> <span class="attr">repo:</span> <span class="string">https://github.com/astral-sh/ruff-pre-commit</span></span><br><span class="line">    <span class="attr">rev:</span> <span class="string">v0.5.6</span></span><br><span class="line">    <span class="attr">hooks:</span></span><br><span class="line">      <span class="bullet">-</span> <span class="attr">id:</span> <span class="string">ruff</span></span><br><span class="line">        <span class="attr">args:</span> [<span class="string">--fix</span>]</span><br><span class="line">      <span class="bullet">-</span> <span class="attr">id:</span> <span class="string">ruff-format</span></span><br><span class="line">  <span class="bullet">-</span> <span class="attr">repo:</span> <span class="string">https://github.com/psf/black</span></span><br><span class="line">    <span class="attr">rev:</span> <span class="number">24.8</span><span class="number">.0</span></span><br><span class="line">    <span class="attr">hooks:</span> [&#123; <span class="attr">id:</span> <span class="string">black</span> &#125;]</span><br><span class="line">  <span class="bullet">-</span> <span class="attr">repo:</span> <span class="string">https://github.com/pre-commit/mirrors-mypy</span></span><br><span class="line">    <span class="attr">rev:</span> <span class="string">v1.10.1</span></span><br><span class="line">    <span class="attr">hooks:</span> [&#123; <span class="attr">id:</span> <span class="string">mypy</span>, <span class="attr">additional_dependencies:</span> [<span class="string">pydantic</span>] &#125;]</span><br><span class="line">  <span class="bullet">-</span> <span class="attr">repo:</span> <span class="string">https://github.com/pre-commit/pre-commit-hooks</span></span><br><span class="line">    <span class="attr">rev:</span> <span class="string">v4.6.0</span></span><br><span class="line">    <span class="attr">hooks:</span></span><br><span class="line">      <span class="bullet">-</span> <span class="attr">id:</span> <span class="string">check-merge-conflict</span></span><br><span class="line">      <span class="bullet">-</span> <span class="attr">id:</span> <span class="string">end-of-file-fixer</span></span><br><span class="line">      <span class="bullet">-</span> <span class="attr">id:</span> <span class="string">trailing-whitespace</span></span><br><span class="line">  <span class="bullet">-</span> <span class="attr">repo:</span> <span class="string">https://github.com/gitleaks/gitleaks</span></span><br><span class="line">    <span class="attr">rev:</span> <span class="string">v8.18.2</span></span><br><span class="line">    <span class="attr">hooks:</span> [&#123; <span class="attr">id:</span> <span class="string">gitleaks</span> &#125;]</span><br><span class="line"></span><br></pre></td></tr></table></figure><p><code>Makefile</code>（或 nox&#x2F;just）：</p><figure class="highlight makefile"><table><tr><td class="gutter"><pre><span class="line">1</span><br><span class="line">2</span><br><span class="line">3</span><br><span class="line">4</span><br><span class="line">5</span><br><span class="line">6</span><br><span class="line">7</span><br></pre></td><td class="code"><pre><span class="line"><span class="meta"><span class="keyword">.PHONY</span>: fmt lint test type audit</span></span><br><span class="line"><span class="section">fmt: ; ruff format &amp;&amp; black .</span></span><br><span class="line"><span class="section">lint: ; ruff .</span></span><br><span class="line"><span class="section">type: ; mypy .</span></span><br><span class="line"><span class="section">test: ; pytest</span></span><br><span class="line"><span class="section">audit: ; pip-audit || true</span></span><br><span class="line"><span class="section">all: fmt lint type test</span></span><br></pre></td></tr></table></figure><hr><h2 id="7-配置、日志与错误处理"><a href="#7-配置、日志与错误处理" class="headerlink" title="7. 配置、日志与错误处理"></a>7. 配置、日志与错误处理</h2><ul><li><strong>配置</strong>：使用环境变量，必要时 <code>.env</code> 文件；用 <code>pydantic-settings</code> 做强类型配置，多环境覆盖。</li><li><strong>日志</strong>：<code>logging</code>&#x2F;<code>structlog</code>，生产输出 JSON（便于 ELK&#x2F;云日志）。</li><li><strong>错误</strong>：定义领域异常层级；重试使用 <code>tenacity</code>；外部接口要超时与重试策略。</li></ul><p>示例：</p><figure class="highlight python"><table><tr><td class="gutter"><pre><span class="line">1</span><br><span class="line">2</span><br><span class="line">3</span><br><span class="line">4</span><br><span class="line">5</span><br><span class="line">6</span><br><span class="line">7</span><br><span class="line">8</span><br><span class="line">9</span><br><span class="line">10</span><br><span class="line">11</span><br></pre></td><td class="code"><pre><span class="line"><span class="keyword">import</span> logging, os</span><br><span class="line"><span class="keyword">from</span> pydantic_settings <span class="keyword">import</span> BaseSettings</span><br><span class="line"></span><br><span class="line"><span class="keyword">class</span> <span class="title class_">Settings</span>(<span class="title class_ inherited__">BaseSettings</span>):</span><br><span class="line">    env: <span class="built_in">str</span> = <span class="string">&quot;dev&quot;</span></span><br><span class="line">    db_url: <span class="built_in">str</span></span><br><span class="line">    <span class="keyword">class</span> <span class="title class_">Config</span>: env_file = <span class="string">&quot;.env&quot;</span></span><br><span class="line"></span><br><span class="line">settings = Settings()</span><br><span class="line">log = logging.getLogger(__name__)</span><br><span class="line">logging.basicConfig(level=os.getenv(<span class="string">&quot;LOG_LEVEL&quot;</span>,<span class="string">&quot;INFO&quot;</span>), <span class="built_in">format</span>=<span class="string">&quot;%(asctime)s %(levelname)s %(name)s %(message)s&quot;</span>)</span><br></pre></td></tr></table></figure><hr><h2 id="8-Web-服务特化（如-FastAPI）"><a href="#8-Web-服务特化（如-FastAPI）" class="headerlink" title="8. Web&#x2F;服务特化（如 FastAPI）"></a>8. Web&#x2F;服务特化（如 FastAPI）</h2><ul><li>服务器：<code>uvicorn</code>（ASGI），生产用 <code>gunicorn -k uvicorn.workers.UvicornWorker</code>。</li><li>健康检查、就绪探针、超时、限流、CORS。</li><li>数据层：SQLAlchemy + Alembic 迁移；或异步栈（async SQL drivers）。</li><li>可观测性：OpenTelemetry（traces, metrics），Prometheus 指标。</li><li>并发：I&#x2F;O 密集选 asyncio；CPU 密集用多进程或 C 扩展；避免阻塞事件循环。</li></ul><hr><h2 id="9-打包与发布"><a href="#9-打包与发布" class="headerlink" title="9. 打包与发布"></a>9. 打包与发布</h2><ul><li>库：发布 sdist + wheel 到私服（Artifactory&#x2F;DevPi）或 PyPI；版本用 <strong>SemVer</strong> 或 <strong>CalVer</strong>。</li><li>应用&#x2F;服务：容器化部署（K8s、Nomad）。</li></ul><p>Docker 多阶段示例（slim、非 root、可复现）：</p><figure class="highlight dockerfile"><table><tr><td class="gutter"><pre><span class="line">1</span><br><span class="line">2</span><br><span class="line">3</span><br><span class="line">4</span><br><span class="line">5</span><br><span class="line">6</span><br><span class="line">7</span><br><span class="line">8</span><br><span class="line">9</span><br><span class="line">10</span><br><span class="line">11</span><br><span class="line">12</span><br><span class="line">13</span><br><span class="line">14</span><br><span class="line">15</span><br><span class="line">16</span><br><span class="line">17</span><br></pre></td><td class="code"><pre><span class="line"><span class="keyword">FROM</span> python:<span class="number">3.11</span>-slim AS base</span><br><span class="line"><span class="keyword">ENV</span> PYTHONDONTWRITEBYTECODE=<span class="number">1</span> PYTHONUNBUFFERED=<span class="number">1</span></span><br><span class="line"><span class="keyword">RUN</span><span class="language-bash"> useradd -m app</span></span><br><span class="line"></span><br><span class="line"><span class="keyword">FROM</span> base AS builder</span><br><span class="line"><span class="keyword">WORKDIR</span><span class="language-bash"> /app</span></span><br><span class="line"><span class="keyword">COPY</span><span class="language-bash"> pyproject.toml ./</span></span><br><span class="line"><span class="keyword">RUN</span><span class="language-bash"> pip install --upgrade pip uv</span></span><br><span class="line"><span class="keyword">COPY</span><span class="language-bash"> . .</span></span><br><span class="line"><span class="keyword">RUN</span><span class="language-bash"> uv pip install --system -e <span class="string">&quot;.[dev]&quot;</span>  <span class="comment"># 或 poetry export + pip install</span></span></span><br><span class="line"></span><br><span class="line"><span class="keyword">FROM</span> base AS runtime</span><br><span class="line"><span class="keyword">WORKDIR</span><span class="language-bash"> /app</span></span><br><span class="line"><span class="keyword">COPY</span><span class="language-bash"> --from=builder /usr/local /usr/local</span></span><br><span class="line"><span class="keyword">COPY</span><span class="language-bash"> src/ src/</span></span><br><span class="line"><span class="keyword">USER</span> app</span><br><span class="line"><span class="keyword">CMD</span><span class="language-bash"> [<span class="string">&quot;your-cli&quot;</span>]  <span class="comment"># 或 gunicorn -c docker/gunicorn.conf.py your_pkg.web:app</span></span></span><br></pre></td></tr></table></figure><hr><h2 id="10-安全与供应链"><a href="#10-安全与供应链" class="headerlink" title="10. 安全与供应链"></a>10. 安全与供应链</h2><ul><li>依赖审计：<code>pip-audit</code>&#x2F;<code>safety</code>；CI 阶段强制。</li><li>代码安全：<code>bandit</code>；密钥扫描：<code>gitleaks</code>&#x2F;<code>trufflehog</code>。</li><li>可重现构建：锁定版本与哈希（pip-tools 生成 hashes，或用 lockfile）；记录 SBOM（CycloneDX）。</li><li>私有源与镜像：配置可信索引、凭证隔离；不在仓库存放 <code>.pypirc</code> 明文。</li></ul><hr><h2 id="11-文档与协作"><a href="#11-文档与协作" class="headerlink" title="11. 文档与协作"></a>11. 文档与协作</h2><ul><li>文档站：Sphinx 或 MkDocs（Material 主题）；README 面向上手，docs 面向用户。</li><li>变更日志：Keep a Changelog；自动生成（commitizen、towncrier）。</li><li>贡献指南与规范：<code>CONTRIBUTING.md</code>、<code>CODE_OF_CONDUCT.md</code>、<code>SECURITY.md</code>。</li><li>ADR（架构决策记录）：<code>docs/adr/</code> 保留关键决策的背景与取舍。</li></ul><hr><h2 id="12-常见陷阱与实践"><a href="#12-常见陷阱与实践" class="headerlink" title="12. 常见陷阱与实践"></a>12. 常见陷阱与实践</h2><ul><li>避免相对导入地狱，统一用绝对导入。</li><li>不要用可变对象作默认参数（用 <code>None</code> + 初始化）。</li><li>时区使用 UTC，持久化用 ISO-8601；金额用 <code>decimal.Decimal</code>。</li><li>文件路径用 <code>pathlib</code>; 文本编码显式 <code>utf-8</code>。</li><li>小心循环依赖；拆分模块或延迟导入。</li><li>长任务注意优雅退出与信号处理（SIGTERM）；使用上下文管理器确保资源释放。</li><li>性能诊断：<code>cProfile</code>, <code>py-spy</code>, <code>scalene</code>；热点再优化，不做过早优化。</li></ul><hr><h2 id="13-一键初始化脚本（可选）"><a href="#13-一键初始化脚本（可选）" class="headerlink" title="13. 一键初始化脚本（可选）"></a>13. 一键初始化脚本（可选）</h2><figure class="highlight bash"><table><tr><td class="gutter"><pre><span class="line">1</span><br><span class="line">2</span><br><span class="line">3</span><br><span class="line">4</span><br><span class="line">5</span><br></pre></td><td class="code"><pre><span class="line"><span class="comment"># 初始化项目骨架（Poetry 版简化示例）</span></span><br><span class="line">poetry new --src your-project &amp;&amp; <span class="built_in">cd</span> your-project</span><br><span class="line">poetry add pydantic</span><br><span class="line">poetry add -D pytest pytest-cov ruff black mypy pre-commit pip-audit bandit</span><br><span class="line">git init &amp;&amp; pre-commit install</span><br></pre></td></tr></table></figure><hr><p>如果你能提供项目类型（库&#x2F;CLI&#x2F;服务）、运行环境（容器&#x2F;K8s&#x2F;本地&#x2F;Serverless）、组织的合规要求（私有源、审计、SBOM），我可以给出更精确的模板文件与 CI 配置。</p>]]>
    </content>
    <id>https://hugh-tong.github.io/2026/09/15/python-project-from-scratch/</id>
    <link href="https://hugh-tong.github.io/2026/09/15/python-project-from-scratch/"/>
    <published>2026-09-15T08:00:00.000Z</published>
    <summary>从项目骨架到工具链配置的 Python 工业级项目规范清单。</summary>
    <title>工业级 Python 项目从零构建与规范清单</title>
    <updated>2026-09-15T08:00:00.000Z</updated>
  </entry>
  <entry>
    <author>
      <name>tttt</name>
    </author>
    <category term="阅读" scheme="https://hugh-tong.github.io/categories/%E9%98%85%E8%AF%BB/"/>
    <category term="论文笔记" scheme="https://hugh-tong.github.io/categories/%E9%98%85%E8%AF%BB/%E8%AE%BA%E6%96%87%E7%AC%94%E8%AE%B0/"/>
    <category term="浸没边界法" scheme="https://hugh-tong.github.io/tags/%E6%B5%B8%E6%B2%A1%E8%BE%B9%E7%95%8C%E6%B3%95/"/>
    <category term="RANS" scheme="https://hugh-tong.github.io/tags/RANS/"/>
    <category term="湍流" scheme="https://hugh-tong.github.io/tags/%E6%B9%8D%E6%B5%81/"/>
    <category term="阅读/论文" scheme="https://hugh-tong.github.io/tags/%E9%98%85%E8%AF%BB-%E8%AE%BA%E6%96%87/"/>
    <category term="论文笔记" scheme="https://hugh-tong.github.io/tags/%E8%AE%BA%E6%96%87%E7%AC%94%E8%AE%B0/"/>
    <content>
      <![CDATA[<h3 id="2017-Fu"><a href="#2017-Fu" class="headerlink" title="2017-Fu"></a>2017-Fu</h3><blockquote><p>[!PDF|yellow] 2017-Fu-boilInOpenFOAM, p.2</p><blockquote><p>Implementation and validation of two-phase boiling flow models in OpenFOAM</p></blockquote><p> 付博在2017年发的文章，涉及到OpenFOAM中开发两相流沸腾模型</p></blockquote><blockquote><p>[!PDF|note] 2017-Fu-boilInOpenFOAM, p.2</p><blockquote><p>The model consists of six conservation equations for the liquid and the vapor phase, allowing for the thermodynamic non-equilibrium and compressibility of both phases. In addition, the model includes two transport equations for the turbulence kinetic energy and energy dissipation and one transport equation for the interfacial area concentration. New models for wall heat partitioning as well as for the phase change terms in nucleate boiling have been implemented. Sensitivity studies as well as validation of the model against measured data available in the open literature have been performed and it has been shown that a reasonable agreement between predictions and experiments has been achieved.</p></blockquote><p>文章主要植入：<code>Wall heat partitioning</code>与<code>phase change terms in nucleate boiling</code></p></blockquote><blockquote><p>DNB：departure from nucleate boilng。是指加热表面上由汽泡产生的核态沸腾状态突然转变为膜态沸腾的现象。</p></blockquote><p><strong>[PDF 素材:2017-Fu-boilInOpenFOAM.pdf]</strong></p><p>$\Gamma_k$代表相$k$得到的质量，$k&#x3D;l,v$。</p><p>蒸汽得到的质量为正，就是evaporation蒸发。蒸汽的质量为负，就是condensation冷凝。<br><strong>[PDF 素材:2017-Fu-boilInOpenFOAM.pdf]</strong><br>Rusche 2002:<br><strong>[PDF 素材:2017-Fu-boilInOpenFOAM.pdf]</strong></p><p>能量方程采用焓方程：</p><p><strong>[PDF 素材:2017-Fu-boilInOpenFOAM.pdf]</strong></p><p>壁面处的热流，加到方程源项？壁面处的处理是？</p><p>从vapor到liquid的mass flux $\Gamma_l$，这里直接用前人的结果。主要是Kurul和Podowski，这两个人做的工作挺出名。后面看看。<br><strong>[PDF 素材:2017-Fu-boilInOpenFOAM.pdf]</strong></p><p><strong>[PDF 素材:2017-Fu-boilInOpenFOAM.pdf]</strong><br>首先，靠近壁面处的第一层网格就不能condensation，只能evaporation。这种操作是符合boiling flows的操作的。<br>壁面处存在：interaction among the liquid, vapor and walls.</p><p>忽略在气泡在壁面的直接加热，也即$a_w q^{‘’}_{vw}&#x3D;0$</p><p>Recall eqn 6。<br><strong>[PDF 素材:2017-Fu-boilInOpenFOAM.pdf]</strong></p><p>对液相，考虑傅里叶导热定律，molecular heat flux有：<br>$$<br>q_k^{‘’} &#x3D; - \frac{\lambda_l}{c_{pl}}\nabla h_l<br>$$<br>$\lambda$ 为导热系数，$c_p$为比热容。</p><h3 id="2022-Godino"><a href="#2022-Godino" class="headerlink" title="2022-Godino"></a>2022-Godino</h3><h4 id="Ranz-Marshall-model"><a href="#Ranz-Marshall-model" class="headerlink" title="Ranz-Marshall model:"></a>Ranz-Marshall model:</h4><p>$$<br>Nu &#x3D; 2 + 0.6 Re_d^{0.5}Pr_d^{1&#x2F;3}<br>$$</p><figure class="highlight c++"><table><tr><td class="gutter"><pre><span class="line">1</span><br><span class="line">2</span><br><span class="line">3</span><br><span class="line">4</span><br><span class="line">5</span><br><span class="line">6</span><br><span class="line">7</span><br><span class="line">8</span><br><span class="line">9</span><br><span class="line">10</span><br><span class="line">11</span><br><span class="line">12</span><br></pre></td><td class="code"><pre><span class="line">Foam::tmp&lt;Foam::volScalarField&gt;  </span><br><span class="line">Foam::heatTransferModels::RanzMarshall::<span class="built_in">K</span>(<span class="type">const</span> scalar residualAlpha) <span class="type">const</span>  </span><br><span class="line">&#123;  </span><br><span class="line">    <span class="function">volScalarField <span class="title">Nu</span><span class="params">(scalar(<span class="number">2</span>) + <span class="number">0.6</span>*sqrt(pair_.Re())*cbrt(pair_.Pr()))</span></span>;  </span><br><span class="line"></span><br><span class="line">    <span class="keyword">return</span>  </span><br><span class="line">        <span class="number">6.0</span>  </span><br><span class="line">       *<span class="built_in">max</span>(pair_.<span class="built_in">dispersed</span>(), residualAlpha)  </span><br><span class="line">       *pair_.<span class="built_in">continuous</span>().<span class="built_in">kappa</span>()  </span><br><span class="line">       *Nu  </span><br><span class="line">       /<span class="built_in">sqr</span>(pair_.<span class="built_in">dispersed</span>().<span class="built_in">d</span>());  </span><br><span class="line">&#125;</span><br></pre></td></tr></table></figure><p>return的是在算下面这个？<br><a name="formula1"></a><br>$$<br>A_f &#x3D; 6 \alpha_d&#x2F;d_d<br>$$</p><h4 id="算法流程"><a href="#算法流程" class="headerlink" title="算法流程"></a>算法流程</h4><p><strong>[PDF 素材:2022-Godino-chtBoilingTwoPhaseEulerFoam.pdf]</strong></p><h4 id="bubble-influence-factor"><a href="#bubble-influence-factor" class="headerlink" title="bubble influence factor"></a>bubble influence factor</h4><figure class="highlight c++"><table><tr><td class="gutter"><pre><span class="line">1</span><br><span class="line">2</span><br><span class="line">3</span><br><span class="line">4</span><br><span class="line">5</span><br></pre></td><td class="code"><pre><span class="line"><span class="function"><span class="type">const</span> scalarField <span class="title">Al</span></span></span><br><span class="line"><span class="function"><span class="params">(</span></span></span><br><span class="line"><span class="params"><span class="function">    fLiquid*<span class="number">4.8</span>*exp(min(-Ja/<span class="number">80</span>, log(vGreat)))</span></span></span><br><span class="line"><span class="params"><span class="function">)</span></span>;</span><br><span class="line"></span><br></pre></td></tr></table></figure><p>上述代码在求解$\xi$，bubble influence factor:</p><p>$$<br>\xi &#x3D; 4.8e^{Ja_{sub}&#x2F;80}<br>$$</p><h4 id="Wall-heat-transfer"><a href="#Wall-heat-transfer" class="headerlink" title="Wall heat transfer"></a>Wall heat transfer</h4><p>$$<br>q_w &#x3D; (q_c + q_q + q_e)f(\alpha_l)+q_{cv}(1-f(\alpha_l))<br>$$</p><p>function $f(\alpha_l)$ , expression by Lavieville</p><blockquote><p>Lavieville:<br><img src="/images/readlog-2017-fu-boiling/20250623_realcase_boilingLog.png"></p></blockquote><p><a href="#formula1">跳转到公式1</a></p><p>$$<br>f(\alpha_l) &#x3D;<br>\begin{cases}<br>1 - 0.5, e^{-20(\alpha_l - \alpha_{cr})}, &amp; \alpha_l - \alpha_{cr} &gt; 0 \<br>0.5 \left(\frac{\alpha_l}{\alpha_{cr}}\right)^{20 \alpha_{cr}}, &amp; \alpha_l - \alpha_{cr} \leq 0<br>\end{cases}<br>$$  </p><p>这里的$\alpha_{cr}&#x3D;0.2$。这个表达式的选择依赖于用户设置。</p><blockquote><p>文章中说到：“hence, the weakness of it is on the arbitrariness of the applied distribution function independent on the microscopic phenomena.”<br>因此，它的弱点在于所采用的分布函数具有任意性，而这种分布函数与微观现象无关。</p></blockquote><p>没有气泡的面积为$A_f$，所贡献的单相对流热量<br>$$<br>q_c &#x3D; A_f h_c(T_w-T_l)<br>$$<br>所谓<code>quenching area</code>计算公式为：<br>$$<br>A_f &#x3D; 1 - A_q<br>$$<br>上述公式的$h_c$，由Kader1981中得到的无量纲温度分布，和壁面处的对流换热连理得到。</p><p>$$<br>\begin{aligned}<br>T^+ &amp;&#x3D; Pr y^+ \<br>T+ &amp;&#x3D; \frac{T_w - T}{T_{\tau}}, \quad T_{\tau}&#x3D; \frac{q_w}{\rho c_p u_{\tau}} \<br>y^+ &amp;&#x3D; \frac{y u_{\tau}}{\nu} \<br>Pr &amp;&#x3D; \frac{\nu}{\alpha}<br>\end{aligned}<br>$$</p><p>由上：</p><p>$$<br>\begin{aligned}<br>T^+ &amp;&#x3D; Pr y^+\<br>&amp;&#x3D; \frac{\nu}{\alpha} \cdot \frac{y u_{\tau}}{\nu} \<br>&amp;&#x3D; \frac{y u_{\tau}}{\alpha} &#x3D; \frac{y u_{\tau} \rho c_p}{\lambda}<br>\end{aligned}<br>$$</p><p>对流换热：</p><p>$$<br>\begin{aligned}<br>Q_c &amp;&#x3D; h_cA(T_w - T) &#x3D; \lambda \frac{T_w - T}{y} \<br>h_c &amp;&#x3D; \frac{\lambda}{y}<br>\end{aligned}<br>$$</p><p>得到：</p><p>$$<br>\begin{aligned}<br>T^+ &#x3D; \frac{u_{\tau} \rho c_p}{h_c} \<br>h_c &#x3D; \frac{u_{\tau} \rho c_p}{T^+}<br>\end{aligned}<br>$$</p><h3 id="2023-王洪斌"><a href="#2023-王洪斌" class="headerlink" title="2023-王洪斌"></a>2023-王洪斌</h3><p>这里，文章给出了一组得到的最优模型配置<br><strong>[PDF 素材:2023-王洪彬-压水堆芯过冷沸腾.pdf]</strong></p><h4 id="其他"><a href="#其他" class="headerlink" title="其他"></a>其他</h4><p><a href="https://doc.openfoam.com/2306/tools/processing/boundary-conditions/rtm/derived/multiphase/alphatWallBoilingWallFunction/">OpenFOAM Documentation - alphatWallBoilingWallFunction</a></p>]]>
    </content>
    <id>https://hugh-tong.github.io/2026/09/15/readlog-2017-fu-boiling/</id>
    <link href="https://hugh-tong.github.io/2026/09/15/readlog-2017-fu-boiling/"/>
    <published>2026-09-15T08:00:00.000Z</published>
    <summary>2017 Fu 沸腾相变模型论文的阅读笔记(OpenFOAM 实现)。</summary>
    <title>论文阅读:Fu 2017 OpenFOAM 沸腾模拟</title>
    <updated>2026-09-15T08:00:00.000Z</updated>
  </entry>
  <entry>
    <author>
      <name>tttt</name>
    </author>
    <category term="阅读" scheme="https://hugh-tong.github.io/categories/%E9%98%85%E8%AF%BB/"/>
    <category term="论文笔记" scheme="https://hugh-tong.github.io/categories/%E9%98%85%E8%AF%BB/%E8%AE%BA%E6%96%87%E7%AC%94%E8%AE%B0/"/>
    <category term="OpenFOAM" scheme="https://hugh-tong.github.io/tags/OpenFOAM/"/>
    <category term="blockMesh" scheme="https://hugh-tong.github.io/tags/blockMesh/"/>
    <category term="浸没边界法" scheme="https://hugh-tong.github.io/tags/%E6%B5%B8%E6%B2%A1%E8%BE%B9%E7%95%8C%E6%B3%95/"/>
    <category term="阅读/论文" scheme="https://hugh-tong.github.io/tags/%E9%98%85%E8%AF%BB-%E8%AE%BA%E6%96%87/"/>
    <category term="论文笔记" scheme="https://hugh-tong.github.io/tags/%E8%AE%BA%E6%96%87%E7%AC%94%E8%AE%B0/"/>
    <content>
      <![CDATA[<h2 id="crash-course"><a href="#crash-course" class="headerlink" title="crash_course"></a>crash_course</h2><p>整个<code>chtMultiRegionFoam</code>的流程<br><strong>[PDF 素材:TUT_chtmultiregionfoam4regiontutorial.pdf]</strong></p><p>案例的几何结构，（采用<code>blockMesh</code>生成）<br><strong>[PDF 素材:TUT_chtmultiregionfoam4regiontutorial.pdf]</strong></p><blockquote><p>[!PDF|yellow] TUT_chtmultiregionfoam4regiontutorial, p.7</p><blockquote><p>To do so a subset of cells within the domain is selected to form a so-called cellSet.</p></blockquote><p>这里可以看到，<code>cellSet=Random selection of cells from domain</code>，<code>zone=coherent subset of cells which finally can be used to define a region</code></p></blockquote><p>图中的四个区域，用<code>topoSet</code>中的<code>setSet</code>来实现（具体名字可能有变，因为这个教程基于较老的OpenFOAM-2.0.0）</p><ul><li>这个<code>setSet</code>工具在<code>v2306</code>中的解释</li></ul><figure class="highlight shell"><table><tr><td class="gutter"><pre><span class="line">1</span><br><span class="line">2</span><br><span class="line">3</span><br><span class="line">4</span><br><span class="line">5</span><br><span class="line">6</span><br><span class="line">7</span><br><span class="line">8</span><br><span class="line">9</span><br><span class="line">10</span><br><span class="line">11</span><br><span class="line">12</span><br><span class="line">13</span><br><span class="line">14</span><br><span class="line">15</span><br><span class="line">16</span><br><span class="line">17</span><br><span class="line">18</span><br><span class="line">19</span><br><span class="line">20</span><br><span class="line">21</span><br><span class="line">22</span><br><span class="line">23</span><br><span class="line">24</span><br><span class="line">25</span><br><span class="line">26</span><br><span class="line">27</span><br><span class="line">28</span><br><span class="line">29</span><br><span class="line">30</span><br><span class="line">31</span><br><span class="line">32</span><br><span class="line">33</span><br><span class="line">34</span><br><span class="line">35</span><br><span class="line">36</span><br><span class="line">37</span><br><span class="line">38</span><br><span class="line">39</span><br><span class="line">40</span><br><span class="line">41</span><br><span class="line">42</span><br><span class="line">43</span><br><span class="line">44</span><br><span class="line">45</span><br><span class="line">46</span><br><span class="line">47</span><br><span class="line">48</span><br><span class="line">49</span><br><span class="line">50</span><br><span class="line">51</span><br><span class="line">52</span><br></pre></td><td class="code"><pre><span class="line"><span class="meta prompt_">$</span><span class="language-bash">FOAM_SOLVERS/heatTransfer/chtMultiRegionFoam &gt; setSet -help-full</span></span><br><span class="line"></span><br><span class="line">Usage: setSet [OPTIONS]</span><br><span class="line">Options:</span><br><span class="line">  -batch &lt;file&gt;     Process in batch mode, using input from specified file</span><br><span class="line">  -case &lt;dir&gt;       Case directory (instead of current directory)</span><br><span class="line">  -constant         Include the &#x27;constant/&#x27; dir in the times list</span><br><span class="line">  -debug-switch &lt;name=val&gt;</span><br><span class="line">                    Set named DebugSwitch (default value: 1).</span><br><span class="line">                    [Can be used multiple times]</span><br><span class="line">  -decomposeParDict &lt;file&gt;</span><br><span class="line">                    Alternative decomposePar dictionary file</span><br><span class="line">  -fileHandler &lt;handler&gt;</span><br><span class="line">                    Override the file handler type</span><br><span class="line">  -hostRoots &lt;((host1 dir1) .. (hostN dirN))&gt;</span><br><span class="line">                    Per-subprocess root directories for distributed running.</span><br><span class="line">                    The host specification can be a regex.</span><br><span class="line">  -info-switch &lt;name=val&gt;</span><br><span class="line">                    Set named InfoSwitch (default value: 1).</span><br><span class="line">                    [Can be used multiple times]</span><br><span class="line">  -latestTime       Select the latest time</span><br><span class="line">  -lib &lt;name&gt;       Additional library or library list to load.</span><br><span class="line">                    [Can be used multiple times]</span><br><span class="line">  -loop             Execute batch commands for all timesteps</span><br><span class="line">  -mpi-threads      Request use of MPI threads</span><br><span class="line">  -no-libs          Disable use of the controlDict &#x27;libs&#x27; entry</span><br><span class="line">  -noFunctionObjects</span><br><span class="line">                    Do not execute function objects</span><br><span class="line">  -noSync           Do not synchronise selection across coupled patches</span><br><span class="line">  -noVTK            Do not write VTK files</span><br><span class="line">  -noZero           Exclude the &#x27;0/&#x27; dir from the times list</span><br><span class="line">  -opt-switch &lt;name=val&gt;</span><br><span class="line">                    Set named OptimisationSwitch (default value: 1).</span><br><span class="line">                    [Can be used multiple times]</span><br><span class="line">  -parallel         Run in parallel</span><br><span class="line">  -region &lt;name&gt;    Specify alternative mesh region</span><br><span class="line">  -roots &lt;(dir1 .. dirN)&gt;</span><br><span class="line">                    Subprocess root directories for distributed running</span><br><span class="line">  -time &lt;ranges&gt;    List of ranges. Eg, &#x27;:10,20 40:70 1000:&#x27;, &#x27;none&#x27;, etc</span><br><span class="line">  -world &lt;name&gt;     Name of the local world for parallel communication</span><br><span class="line">  -doc              Display documentation in browser</span><br><span class="line">  -doc-source       Display source code in browser</span><br><span class="line">  -help             Display short help and exit</span><br><span class="line">  -help-man         Display full help (manpage format) and exit</span><br><span class="line">  -help-notes       Display help notes (description) and exit</span><br><span class="line">  -help-full        Display full help and exit</span><br><span class="line"></span><br><span class="line">Manipulate a cell/face/point Set or Zone interactively.</span><br><span class="line"></span><br><span class="line">Using: OpenFOAM-v2306 (2306) - visit www.openfoam.com</span><br><span class="line">Build: _fbf00d6bf2-20230626</span><br><span class="line">Arch:  LSB;label=32;scalar=64</span><br></pre></td></tr></table></figure><p>多区域求解器需要一些额外的工具，且<code>reconstructPar</code>这些工具也需要加入一些额外的参数来满足多区域的要求。</p><ol><li>区别于常规的求解器，物性需要在不同的文件夹中设置。</li><li>采用<code>changeDictionary</code>来设置不同区域的边界条件</li></ol><p>一些特有的字典文件：</p><figure class="highlight plaintext"><table><tr><td class="gutter"><pre><span class="line">1</span><br><span class="line">2</span><br><span class="line">3</span><br></pre></td><td class="code"><pre><span class="line">regionPropertie：Assign physical phase to each region, either fluid or solid</span><br><span class="line"></span><br><span class="line"></span><br></pre></td></tr></table></figure><p>creating files for paraview post-processing:</p><figure class="highlight shell"><table><tr><td class="gutter"><pre><span class="line">1</span><br></pre></td><td class="code"><pre><span class="line">paraFoam -touch -region $i</span><br></pre></td></tr></table></figure>]]>
    </content>
    <id>https://hugh-tong.github.io/2026/09/15/readlog-chtmultiregionfoam-tutorial/</id>
    <link href="https://hugh-tong.github.io/2026/09/15/readlog-chtmultiregionfoam-tutorial/"/>
    <published>2026-09-15T08:00:00.000Z</published>
    <summary>chtMultiRegionFoam 四区域教程的跟读笔记。</summary>
    <title>教程阅读:chtMultiRegionFoam 4 区域实战</title>
    <updated>2026-09-15T08:00:00.000Z</updated>
  </entry>
  <entry>
    <author>
      <name>tttt</name>
    </author>
    <category term="CS" scheme="https://hugh-tong.github.io/categories/CS/"/>
    <category term="浸没边界法" scheme="https://hugh-tong.github.io/tags/%E6%B5%B8%E6%B2%A1%E8%BE%B9%E7%95%8C%E6%B3%95/"/>
    <category term="CS" scheme="https://hugh-tong.github.io/tags/CS/"/>
    <category term="UsingUbuntu" scheme="https://hugh-tong.github.io/tags/UsingUbuntu/"/>
    <content>
      <![CDATA[<p><a href="https://cloud.tencent.com/developer/article/1657533">Ubuntu-20.04上安装KVM</a></p><p><a href="https://www.bilibili.com/opus/525500896624907829">Ubuntu-20.04采用GNOME美化桌面</a></p><h2 id="你的问题分成两部分：服务器启动时间常见范围，以及在启动时光标持续闪烁是否可以强制重启"><a href="#你的问题分成两部分：服务器启动时间常见范围，以及在启动时光标持续闪烁是否可以强制重启" class="headerlink" title="你的问题分成两部分：服务器启动时间常见范围，以及在启动时光标持续闪烁是否可以强制重启"></a>你的问题分成两部分：服务器启动时间常见范围，以及在启动时光标持续闪烁是否可以强制重启</h2><h3 id="1-服务器启动时间一般多久"><a href="#1-服务器启动时间一般多久" class="headerlink" title="1) 服务器启动时间一般多久"></a>1) 服务器启动时间一般多久</h3><ul><li><strong>新系统首次启动（整机上电后）</strong>：从引导加载到可用，通常在几十秒到几分钟之间，取决于硬件性能和启动服务的数量。SSD 快、干净的系统通常在 20–60 秒左右进入可用状态；较老的机械盘或有大量自启动服务的系统可能需要 1–2 分钟甚至更久。</li><li><strong>服务&#x2F;应用启动时间</strong>：某些服务（如数据库、容器编排、大型应用）在系统进入就绪后还需要额外的启动时间。完整的系统服务就绪到可用，可能再增加数十秒到几分钟。</li><li><strong>影响因素</strong>：<ul><li>启动项数量和服务依赖关系</li><li>磁盘性能（SSD vs 机械盘）、RAID 配置</li><li>文件系统检查（如有需要进行的 fsck、日志回放等）</li><li>硬件事件（内存、CPU、温度、电源问题）</li><li>启动脚本中的阻塞操作（等待网络、外部设备等）</li></ul></li></ul><blockquote><p>给出一个大致的判断：如果从开机到系统显示登陆界面已经超过 2–3 分钟，且没有明显错误信息，通常需要考虑进一步排错。</p></blockquote><h3 id="2-启动过程仅在左上角光标闪烁，是否可以强制重启"><a href="#2-启动过程仅在左上角光标闪烁，是否可以强制重启" class="headerlink" title="2) 启动过程仅在左上角光标闪烁，是否可以强制重启"></a>2) 启动过程仅在左上角光标闪烁，是否可以强制重启</h3><ul><li><p><strong>现象解释</strong>：屏幕只有一个光标在闪烁，通常意味着系统正在执行引导阶段的某些操作、或启动过程卡住、或进入了等待状态（如网络、磁盘等待、系统初始化服务阻塞）。也有可能是图形界面启动进程未能正确完成，回到文本模式的登陆仍在进行中。</p></li><li><p><strong>不建议盲目强制重启的情况</strong>：</p><ul><li>如果你怀疑系统仍在进行必要的自检或启动阶段，强制重启可能导致文件系统未正确同步、数据损坏，或引导问题更严重（需要维护模式&#x2F;修复引导）。</li><li>可以先尝试查看可访问的输出信息（如果有文本控制台输出、systemd 日志、Plymouth 日志等）。在不少系统上，按 Ctrl+Alt+F1–F6 可以切换到不同的控制台，查看启动日志。</li></ul></li><li><p><strong>推荐的排错步骤（先尝试，不立即重启）</strong>：</p><ol><li><p>尝试切换到另一控制台查看日志</p><ul><li><p><code>Ctrl + Alt + F2</code>（或 F3&#x2F;F4），登录后查看：</p>  <figure class="highlight plaintext"><table><tr><td class="gutter"><pre><span class="line">1</span><br></pre></td><td class="code"><pre><span class="line">journalctl -b -1 | tail -n 200</span><br></pre></td></tr></table></figure><p>  注：<code>-b -1</code> 查看上一次启动的日志，若当前启动仍在进行，可能需要查看当前启动日志：<code>journalctl -b | tail -n 200</code></p></li></ul></li><li><p>检查系统资源与进程阻塞情况</p><ul><li><p>查看 CPU、内存、磁盘 I&#x2F;O 使用情况：</p>  <figure class="highlight plaintext"><table><tr><td class="gutter"><pre><span class="line">1</span><br></pre></td><td class="code"><pre><span class="line">topiostat -xz 1</span><br></pre></td></tr></table></figure><p>  需要安装 <code>sysstat</code> 包：<code>sudo apt-get install sysstat</code></p></li></ul></li><li><p>查看磁盘&#x2F;文件系统状态</p> <figure class="highlight plaintext"><table><tr><td class="gutter"><pre><span class="line">1</span><br></pre></td><td class="code"><pre><span class="line">dmesg | tail -n 200lsblk -f</span><br></pre></td></tr></table></figure></li><li><p>检查网络与依赖服务</p> <figure class="highlight plaintext"><table><tr><td class="gutter"><pre><span class="line">1</span><br></pre></td><td class="code"><pre><span class="line">systemctl list-units --type=service --state=failedsystemctl status &lt;service-name&gt;</span><br></pre></td></tr></table></figure></li><li><p>如果你确认没有重要未完成的写操作，可以考虑安全重启，但优先选择正常关机路径</p><ul><li><p>通过远程或本机进入登录界面后执行：</p>  <figure class="highlight plaintext"><table><tr><td class="gutter"><pre><span class="line">1</span><br></pre></td><td class="code"><pre><span class="line">sudo shutdown -r now</span><br></pre></td></tr></table></figure></li><li><p>如果完全无法进入系统，才考虑强制硬重启（按下电源键长按 5–10 秒），但要明白这有丢失数据和文件系统损伤的风险。</p></li></ul></li></ol></li><li><p><strong>在极端情况（如无响应且无法通过控制台获取信息）</strong>：</p><ul><li>作为最后手段，可以短暂执行强制重启，但要准备可能的文件系统修复：<ul><li><p>重新启动后进入救援模式&#x2F;单用户模式，执行文件系统检查：</p>  <figure class="highlight plaintext"><table><tr><td class="gutter"><pre><span class="line">1</span><br></pre></td><td class="code"><pre><span class="line">sudo fsck -f /dev/sdX</span><br></pre></td></tr></table></figure></li><li><p>或使用系统提供的修复工具进行引导修复。</p></li></ul></li></ul></li></ul><h3 id="实用小结"><a href="#实用小结" class="headerlink" title="实用小结"></a>实用小结</h3><ul><li>首先尽量获取启动阶段的信息，而不是直接重启。</li><li>使用 Ctrl+Alt+F[1..6] 切换到不同控制台，查看启动日志和系统状态。</li><li>通过 <code>journalctl</code>, <code>dmesg</code>, <code>systemctl status</code> 等命令定位具体卡在哪个阶段。</li><li>若确认无害的等待时长，耐心等待；若系统确实卡死并且无信息输出，再考虑安全重启，并在重启后进行日志与文件系统的自检。</li></ul><p>如果你愿意，给我以下信息，我可以给出更有针对性的排错步骤：</p><ul><li>服务器的发行版和版本（如 Ubuntu 22.04、Debian 11 等）</li><li>你看到的屏幕输出（控制台的最近几行日志）</li><li>是否能访问远程控制台（SSH、IPMI&#x2F;ILO&#x2F;iDRAC 等）？</li><li>是否最近进行了系统更新、硬件改动或磁盘&#x2F;RAID 配置变化？</li></ul>]]>
    </content>
    <id>https://hugh-tong.github.io/2026/09/15/ubuntu-server-qa/</id>
    <link href="https://hugh-tong.github.io/2026/09/15/ubuntu-server-qa/"/>
    <published>2026-09-15T08:00:00.000Z</published>
    <summary>服务器启动时间常见范围与启动时光标持续闪烁能否强制的分析。</summary>
    <title>Ubuntu 服务器问答:启动时间与光标闪烁</title>
    <updated>2026-09-15T08:00:00.000Z</updated>
  </entry>
  <entry>
    <author>
      <name>tttt</name>
    </author>
    <category term="CS" scheme="https://hugh-tong.github.io/categories/CS/"/>
    <category term="CS" scheme="https://hugh-tong.github.io/tags/CS/"/>
    <category term="GPU加速" scheme="https://hugh-tong.github.io/tags/GPU%E5%8A%A0%E9%80%9F/"/>
    <category term="CUDA" scheme="https://hugh-tong.github.io/tags/CUDA/"/>
    <category term="UnifiedMemory" scheme="https://hugh-tong.github.io/tags/UnifiedMemory/"/>
    <content>
      <![CDATA[<p>这是 CUDA&#x2F;GPU 计算领域的一个<strong>高频易混概念</strong>问题。我们来详细区分：</p><hr><h1 id="1-Shared-memory（共享内存）"><a href="#1-Shared-memory（共享内存）" class="headerlink" title="1. Shared memory（共享内存）"></a>1. Shared memory（共享内存）</h1><ul><li><strong>定义</strong>：<br>在CUDA等GPU编程中，<strong>Shared memory</strong>专指<strong>每个线程块（Block）内部所有线程独享的高速片上内存</strong>。</li><li><strong>范围&#x2F;特性</strong>：<ul><li>作用范围（Scope）：<strong>仅同一个Block内</strong>的线程可见与读写，<strong>不同Block间不共享</strong>。</li><li>访问速度：<strong>极快，接近寄存器速度</strong>，远快于全局内存（global memory）。</li><li>容量有限：每个SM（流处理器组）通常只有48kB或更大一点（具体随硬件）。</li><li>典型用途：线程协作、数据缓存、矩阵块操作、并行归约等 Block 内部的高效并行数据交换。</li></ul></li><li><strong>声明</strong>：<figure class="highlight cpp"><table><tr><td class="gutter"><pre><span class="line">1</span><br></pre></td><td class="code"><pre><span class="line">__shared__ <span class="type">float</span> buf[<span class="number">256</span>];</span><br></pre></td></tr></table></figure></li><li><strong>同步</strong>：需手动使用<code>__syncthreads()</code>同步线程对shared memory的访问。</li></ul><hr><h1 id="2-Unified-memory（统一内存）"><a href="#2-Unified-memory（统一内存）" class="headerlink" title="2. Unified memory（统一内存）"></a>2. Unified memory（统一内存）</h1><ul><li><strong>定义</strong>：<br>Unified memory 是<strong>NVIDIA CUDA从Kepler架构开始引入的一种机制</strong>，它让CPU和GPU共享一块统一逻辑地址空间（Unified Virtual Address Space, UVA）。</li><li><strong>范围&#x2F;特性</strong>：<ul><li>作用范围：CPU 和 GPU 都能直接访问这块内存，<strong>开发者不需要手动区分主机内存和设备内存</strong>。</li><li>底层实现：物理上主机（CPU）和GPU的内存还是独立的，<strong>“统一”是编程角度</strong>，数据会根据需要在二者之间自动迁移。</li><li>用法简便：分配统一内存用<code>cudaMallocManaged</code>，不再需要单独的<code>cudaMemcpy</code>。</li><li>性能影响：自动迁移方便开发，但可能带来额外的访问延迟（比如数据在GPU需要时还在CPU，需迁移才可用）。</li></ul></li><li><strong>代码示例</strong>：<figure class="highlight cpp"><table><tr><td class="gutter"><pre><span class="line">1</span><br><span class="line">2</span><br></pre></td><td class="code"><pre><span class="line"><span class="type">float</span> *A;</span><br><span class="line"><span class="built_in">cudaMallocManaged</span>(&amp;A, N * <span class="built_in">sizeof</span>(<span class="type">float</span>));</span><br></pre></td></tr></table></figure></li><li><strong>优势</strong>：简化了多台CPU-GPU混合计算下的数据管理，可让数据“到处都能访问”，无需手动“拷来拷去”。</li></ul><hr><h2 id="总结对比"><a href="#总结对比" class="headerlink" title="总结对比"></a>总结对比</h2><table><thead><tr><th></th><th>Shared Memory</th><th>Unified Memory</th></tr></thead><tbody><tr><td>存在位置</td><td>GPU片上(每个Block独享)</td><td>由CUDA管理的CPU&#x2F;GPU统一虚拟空间</td></tr><tr><td>可访问范围</td><td>仅Block内部线程</td><td>所有CPU进程和所有GPU线程</td></tr><tr><td>用途&#x2F;意义</td><td>Block内部线程高速协同&#x2F;缓存</td><td>开发便捷，自动跨主机与设备迁移数据</td></tr><tr><td>分配与声明</td><td>内核内 <code>__shared__</code> 声明</td><td><code>cudaMallocManaged</code> 分配</td></tr><tr><td>速度</td><td>极快</td><td>与实际物理存储一致（访存+迁移延迟）</td></tr><tr><td>开发范式</td><td>需显式声明、手动同步</td><td>无需memcpy，后台隐式同步和迁移</td></tr><tr><td>典型适用</td><td>并行算法块内优化（如矩阵乘）</td><td>跨设备协同开发、方便调试和原型开发</td></tr></tbody></table><hr><h3 id="一句话区分"><a href="#一句话区分" class="headerlink" title="一句话区分"></a>一句话区分</h3><ul><li><strong>Shared memory</strong> 是<strong>线程块内部临时高速协作区</strong>；</li><li><strong>Unified memory</strong> 是<strong>CPU与GPU共享访问的自动同步全局内存区</strong>，开发角度“无缝”，但速度不如片上shared快。</li></ul><hr><p>如需更细节的原理说明、典型应用区别或代码示例，可以继续提问！</p>]]>
    </content>
    <id>https://hugh-tong.github.io/2026/09/15/unified-vs-shared-memory/</id>
    <link href="https://hugh-tong.github.io/2026/09/15/unified-vs-shared-memory/"/>
    <published>2026-09-15T08:00:00.000Z</published>
    <summary>GPU/DCU 编程中统一内存与共享内存的区别。</summary>
    <title>Unified Memory 与 Shared Memory</title>
    <updated>2026-09-15T08:00:00.000Z</updated>
  </entry>
  <entry>
    <author>
      <name>tttt</name>
    </author>
    <category term="CS" scheme="https://hugh-tong.github.io/categories/CS/"/>
    <category term="CS" scheme="https://hugh-tong.github.io/tags/CS/"/>
    <category term="LES" scheme="https://hugh-tong.github.io/tags/LES/"/>
    <category term="Git" scheme="https://hugh-tong.github.io/tags/Git/"/>
    <category term="WSL" scheme="https://hugh-tong.github.io/tags/WSL/"/>
    <content>
      <![CDATA[<h1 id="离线安装"><a href="#离线安装" class="headerlink" title="离线安装"></a>离线安装</h1><p><a href="https://www.cnblogs.com/zxyfrank/p/17134500.html">Win10 WSL2 手动安装在非C盘 的方法 - ZXYFrank - 博客园</a></p><ul><li>再把 <code>CanonicalGroupLimited.UbuntuonWindows_2004.2021.825.0\Ubuntu_2004.2021.825.0_x64.appx</code> 解压缩</li><li>双击 .exe安装 即可</li><li><strong>除了.exe 以及 ext4.vhdx，其他都可以删除</strong></li></ul><p><a href="https://zhuanlan.zhihu.com/p/640621418">离线安装WSL的安装包</a></p><p><a href="https://blog.csdn.net/dvd37784302/article/details/139106309">【调试笔记-20240522-Windows-WSL 修改已安装发行版名称】_wsl 改名-CSDN博客</a></p><p><a href="https://learn.microsoft.com/zh-cn/windows/wsl/install-manual">旧版 WSL 的手动安装步骤 | Microsoft Learn</a></p><h2 id="下载发行版"><a href="#下载发行版" class="headerlink" title="下载发行版"></a>下载发行版</h2><p>在某些情况下，你可能无法（或不想）使用 Microsoft 商店安装 WSL 的 Linux 发行版。 你可能正在运行不支持 Microsoft 应用商店的 Windows Server 或 Long-Term 服务 （LTSC） 桌面 OS SKU，或者公司网络策略和&#x2F;或管理员不允许在环境中使用 Microsoft 应用商店。 在这些情况下，虽然 WSL 本身可用，但可能需要直接下载 Linux 分发版。</p><p>如果 Microsoft 应用商店应用不可用，则可以使用以下链接下载并手动安装 Linux 分发版：</p><ul><li><a href="https://aka.ms/wslubuntu">Ubuntu</a></li><li><a href="https://wslstorestorage.blob.core.windows.net/wslblob/Ubuntu2404-240425.AppxBundle">Ubuntu 24.04 版本</a></li><li><a href="https://aka.ms/wslubuntu2204">Ubuntu 22.04 LTS</a></li><li><a href="https://aka.ms/wslubuntu2004">Ubuntu 20.04</a></li><li><a href="https://aka.ms/wslubuntu2004arm">Ubuntu 20.04 ARM</a></li><li><a href="https://aka.ms/wsl-ubuntu-1804">Ubuntu 18.04</a></li><li><a href="https://aka.ms/wsl-ubuntu-1804-arm">Ubuntu 18.04 ARM</a></li><li><a href="https://aka.ms/wsl-ubuntu-1604">Ubuntu 16.04 版本</a></li><li><a href="https://aka.ms/wsl-debian-gnulinux">Debian GNU&#x2F;Linux</a></li><li><a href="https://aka.ms/wsl-kali-linux-new">Kali Linux</a></li><li><a href="https://aka.ms/wsl-sles-12">SUSE Linux Enterprise Server 12</a></li><li><a href="https://aka.ms/wsl-SUSELinuxEnterpriseServer15SP2">SUSE Linux Enterprise Server 15 SP2</a></li><li><a href="https://aka.ms/wsl-SUSELinuxEnterpriseServer15SP3">SUSE Linux Enterprise Server 15 SP3</a></li><li><a href="https://aka.ms/wsl-opensuse-tumbleweed">openSUSE Tumbleweed</a></li><li><a href="https://aka.ms/wsl-opensuseleap15-3">openSUSE Leap 15.3</a></li><li><a href="https://aka.ms/wsl-opensuseleap15-2">openSUSE Leap 15.2</a></li><li><a href="https://aka.ms/wsl-oraclelinux-8-5">Oracle Linux 8.5</a></li><li><a href="https://aka.ms/wsl-oraclelinux-7-9">Oracle Linux 7.9</a></li><li><a href="https://github.com/WhitewaterFoundry/WSLFedoraRemix/releases/">用于 WSL 的 Fedora Remix</a></li></ul><p>这将导致 <code>&lt;distro&gt;.appx</code> 包下载到所选文件夹。</p><p>如果愿意，还可以通过命令行下载首选分发版，可以将 PowerShell 与 <a href="https://learn.microsoft.com/zh-cn/powershell/module/microsoft.powershell.utility/invoke-webrequest">Invoke-WebRequest</a> cmdlet 配合使用。 例如，若要下载 Ubuntu 20.04，</p><h1 id="WSL磁盘容量限制"><a href="#WSL磁盘容量限制" class="headerlink" title="WSL磁盘容量限制"></a>WSL磁盘容量限制</h1><h2 id="解决方法（20250825-已实践验证）"><a href="#解决方法（20250825-已实践验证）" class="headerlink" title="解决方法（20250825-已实践验证）"></a>解决方法（20250825-已实践验证）</h2><p><a href="https://learn.microsoft.com/zh-cn/windows/wsl/disk-space">如何管理 WSL 磁盘空间 | Microsoft Learn</a></p><p>Windows在操作了，别忘了在wsl中还需要mount！</p><h2 id="Why-has-容量限制？"><a href="#Why-has-容量限制？" class="headerlink" title="Why has 容量限制？"></a>Why has 容量限制？</h2><p>Q：为什么我的WSL虚拟磁盘ext4.vhdx有容量限制呢，他不应该和我的Windows的硬盘有关，只要我的Windows硬盘下有空间WSL也应该有的吗？</p><p>你的这个问题很好，很多 WSL 用户初期都会有类似疑惑。下面详细解释原因：</p><hr><h2 id="1-WSL2-的存储原理"><a href="#1-WSL2-的存储原理" class="headerlink" title="1. WSL2 的存储原理"></a>1. <strong>WSL2 的存储原理</strong></h2><ul><li><strong>WSL2</strong> 是通过一个<strong>虚拟硬盘</strong>（<code>ext4.vhdx</code> 文件）来模拟 Linux 的根文件系统。</li><li>这个文件存储在 Windows 的 <code>C:\Users\&lt;用户名&gt;\AppData\Local\Packages\&lt;发行版&gt;\LocalState\ext4.vhdx</code> 路径下。</li><li><strong>WSL2 的 Linux 子系统所有数据</strong>（除挂载的 <code>/mnt/c</code> 等 Windows 磁盘）都只存储在这个虚拟磁盘里。</li></ul><hr><h2 id="2-WSL2-虚拟磁盘和-Windows-硬盘的关系"><a href="#2-WSL2-虚拟磁盘和-Windows-硬盘的关系" class="headerlink" title="2. WSL2 虚拟磁盘和 Windows 硬盘的关系"></a>2. <strong>WSL2 虚拟磁盘和 Windows 硬盘的关系</strong></h2><ul><li>虚拟磁盘（<code>ext4.vhdx</code>）本质上就是一个很大的文件，存在 Windows 文件系统中。</li><li>虽然你 Windows 的硬盘有充足空间，但<strong>虚拟盘会有自己的容量限制</strong>，就像你插了一个大小定死的U盘&#x2F;移动硬盘。</li><li>WSL2 默认创建时，虚拟盘最大 256G，Ubuntu 22.04 新版上限是 1T（但初始只有你用多少就长多少，不会一下子吃满空间）。</li></ul><hr><h2 id="3-为什么有限制？"><a href="#3-为什么有限制？" class="headerlink" title="3. 为什么有限制？"></a>3. <strong>为什么有限制？</strong></h2><ul><li>WSL2 的 <code>ext4.vhdx</code> 虚拟磁盘格式是动态扩展的，但<strong>有最大容量上限</strong>，这个上限和发行版、创建参数相关。</li><li>一旦达到这个最大值（比如 250G），<strong>WSL2 里的 Linux 系统就像自己的磁盘满了一样，不能无限长大</strong>。  </li><li>你在 WSL 里看到的 <code>/</code>，就是这块虚像磁盘。和实际 Windows 剩余空间无直接绑定。</li></ul><hr><h2 id="4-和挂载盘的区别"><a href="#4-和挂载盘的区别" class="headerlink" title="4. 和挂载盘的区别"></a>4. <strong>和挂载盘的区别</strong></h2><ul><li><code>/mnt/c</code>、<code>/mnt/d</code> 等，是把 Windows 的实际磁盘直接挂到 WSL2 里用，如果你在这些路径下存文件，就不受 <code>ext4.vhdx</code> 限制，只要 Windows 有空间即可。</li><li>而 WSL2 默认的 <code>~</code> 或 <code>/home/xxx</code>、<code>/usr</code> 等等，全部在那块 ext4.vhdx 虚拟盘里，空间打满了只能清理&#x2F;扩容。</li></ul><hr><h2 id="5-如何解决磁盘打满"><a href="#5-如何解决磁盘打满" class="headerlink" title="5. 如何解决磁盘打满"></a>5. <strong>如何解决磁盘打满</strong></h2><ul><li>清理不必要文件。</li><li>或者像上面所说的——扩容现有 ext4.vhdx 文件。</li><li>或者将大数据放到 <code>/mnt/c</code> 这种目录下。</li></ul><p><a href="https://blog.csdn.net/saladpie/article/details/144007153">WSL安装、迁移及修改默认登录用户_wsl设置默认登录用户-CSDN博客</a></p><p>WSL查看磁盘可用空间：</p><figure class="highlight plaintext"><table><tr><td class="gutter"><pre><span class="line">1</span><br></pre></td><td class="code"><pre><span class="line">wsl.exe --system -d Ubuntu-20.04 df -h /mnt/wslg/distro</span><br></pre></td></tr></table></figure><hr><h2 id="6-简化理解"><a href="#6-简化理解" class="headerlink" title="6. 简化理解"></a>6. <strong>简化理解</strong></h2><ul><li>WSL2 虚拟磁盘 &#x3D; 一个本地 Linux 专用的“大文件”，和你 Windows 磁盘物理空间是<strong>间接相关</strong>（有空余才能增长），但逻辑上是个“独立开辟的区域”，空间大小你可以手动扩展，系统<strong>不会自动和 C 盘等实际剩余空间完全同步</strong>。</li></ul><hr><h3 id="总结"><a href="#总结" class="headerlink" title="总结"></a>总结</h3><ul><li><strong>WSL2 的 Linux 系统空间（比如<code>/home</code>）只受它当前的 ext4.vhdx 最大大小制约</strong>，和 Windows 剩余空间不是“同步增长”的关系。</li><li>只要你的 <code>ext4.vhdx</code> 没有扩容，哪怕 Windows 还剩几百G，你 WSL2 里也可能爆满。</li><li>如你空间打满，请扩容 vhdx，或者将数据迁移到 <code>/mnt/c</code> 下等挂载的 Windows 分区。</li></ul><p>如需扩容详细操作可继续问！</p><h1 id="Linux下怎么查看占用磁盘空间最大的十个文件夹？"><a href="#Linux下怎么查看占用磁盘空间最大的十个文件夹？" class="headerlink" title="Linux下怎么查看占用磁盘空间最大的十个文件夹？"></a>Linux下怎么查看占用磁盘空间最大的十个文件夹？</h1><p>以下是针对您的查询“Linux下怎么查看占用磁盘空间最大的十个文件夹？”的详细解答。Linux提供了多种命令行工具来实现这个功能，我会优先介绍最简单、标准的命令（无需额外安装），然后提及一些高级或交互式工具。操作需要在终端（Terminal）中执行。</p><h3 id="1-使用标准命令（du-sort-head）"><a href="#1-使用标准命令（du-sort-head）" class="headerlink" title="1. 使用标准命令（du + sort + head）"></a>1. <strong>使用标准命令（du + sort + head）</strong></h3><p>最常用的是<code>du</code>命令（disk usage），结合排序和截取前10个结果。这适用于大多数Linux发行版（如Ubuntu、CentOS、Fedora）。</p><h4 id="基本命令"><a href="#基本命令" class="headerlink" title="基本命令"></a>基本命令</h4><p>要查看指定目录（如根目录<code>/</code>）下占用空间最大的10个一级子文件夹：</p><figure class="highlight plaintext"><table><tr><td class="gutter"><pre><span class="line">1</span><br></pre></td><td class="code"><pre><span class="line">du -h --max-depth=1 / | sort -rh | head -n 11 | tail -n 10</span><br></pre></td></tr></table></figure><ul><li><p><strong>解释</strong>：</p><ul><li><code>du -h --max-depth=1 /</code>：计算指定路径（这里是根目录<code>/</code>）下所有一级子目录的磁盘占用大小。<code>-h</code> 表示人类可读格式（e.g., 1.2G 而非字节数）；<code>--max-depth=1</code> 限制只显示一级深度（避免递归太深）。</li><li><code>sort -rh</code>：对输出进行排序。<code>-r</code> 表示逆序（从大到小）；<code>-h</code> 支持人类可读数字排序。</li><li><code>head -n 11 | tail -n 10</code>：<code>du</code> 的输出第一行是当前目录的总大小，所以用 <code>head -n 11</code> 取前11行，然后 <code>tail -n 10</code> 排除第一行，只显示前10个子文件夹。</li></ul></li><li><p><strong>示例输出</strong>（假设在根目录运行）：</p><figure class="highlight plaintext"><table><tr><td class="gutter"><pre><span class="line">1</span><br><span class="line">2</span><br><span class="line">3</span><br><span class="line">4</span><br><span class="line">5</span><br><span class="line">6</span><br><span class="line">7</span><br><span class="line">8</span><br><span class="line">9</span><br><span class="line">10</span><br></pre></td><td class="code"><pre><span class="line">50G    /home</span><br><span class="line">20G    /var</span><br><span class="line">10G    /usr</span><br><span class="line">5G     /opt</span><br><span class="line">2G     /etc</span><br><span class="line">1G     /tmp</span><br><span class="line">500M   /boot</span><br><span class="line">100M   /root</span><br><span class="line">50M    /lib</span><br><span class="line">10M    /sbin</span><br></pre></td></tr></table></figure></li></ul><h4 id="自定义路径"><a href="#自定义路径" class="headerlink" title="自定义路径"></a>自定义路径</h4><ul><li>如果想查看当前目录下的前10个文件夹：替换 <code>/</code> 为 <code>.</code>（当前目录）。<figure class="highlight plaintext"><table><tr><td class="gutter"><pre><span class="line">1</span><br></pre></td><td class="code"><pre><span class="line">du -h --max-depth=1 . | sort -rh | head -n 11 | tail -n 10</span><br></pre></td></tr></table></figure></li><li>查看特定目录（如<code>/home</code>）：<figure class="highlight plaintext"><table><tr><td class="gutter"><pre><span class="line">1</span><br></pre></td><td class="code"><pre><span class="line">du -h --max-depth=1 /home | sort -rh | head -n 11 | tail -n 10</span><br></pre></td></tr></table></figure></li></ul><h4 id="注意事项"><a href="#注意事项" class="headerlink" title="注意事项"></a>注意事项</h4><ul><li><strong>权限问题</strong>：如果目录需要root权限（如根目录<code>/</code>），在命令前加<code>sudo</code>：<figure class="highlight plaintext"><table><tr><td class="gutter"><pre><span class="line">1</span><br></pre></td><td class="code"><pre><span class="line">sudo du -h --max-depth=1 / | sort -rh | head -n 11 | tail -n 10</span><br></pre></td></tr></table></figure></li><li><strong>深度调整</strong>：如果想查看更深层级的文件夹（e.g., 所有子目录），去掉<code>--max-depth=1</code>，但这可能会很慢（尤其在大分区上）。</li><li><strong>包括文件</strong>：默认<code>du</code> 只统计目录；如果想包括单个文件，用<code>du -ah</code>（<code>-a</code> 显示所有文件和目录）。</li><li><strong>性能</strong>：在大型文件系统上运行可能耗时，可以加<code>--exclude</code> 排除某些目录（e.g., <code>--exclude=/proc</code>）。</li></ul><h3 id="2-使用更高级的工具（推荐安装）"><a href="#2-使用更高级的工具（推荐安装）" class="headerlink" title="2. 使用更高级的工具（推荐安装）"></a>2. <strong>使用更高级的工具（推荐安装）</strong></h3><p>如果您经常需要这个功能，考虑安装交互式工具，更易用。</p><ul><li><p><strong>ncdu</strong>（NCurses Disk Usage，交互式工具）：</p><ul><li>安装：<code>sudo apt install ncdu</code>（Debian&#x2F;Ubuntu）或 <code>sudo yum install ncdu</code>（CentOS&#x2F;RHEL）或 <code>sudo dnf install ncdu</code>（Fedora）。</li><li>使用：<code>ncdu /</code>（或指定路径如<code>ncdu /home</code>）。</li><li>功能：进入交互界面，按大小排序文件夹，用箭头导航、删除文件等。退出按<code>q</code>。它会自动显示占用最大的文件夹。</li></ul></li><li><p><strong>duf</strong>（Disk Usage&#x2F;Free Utility，现代替代）：</p><ul><li>安装：从GitHub下载（<a href="https://github.com/muesli/duf%EF%BC%89%E6%88%96%E7%94%A8%E5%8C%85%E7%AE%A1%E7%90%86%E5%99%A8%EF%BC%88%E5%A6%82%60sudo">https://github.com/muesli/duf）或用包管理器（如`sudo</a> apt install duf&#96; 如果可用）。</li><li>使用：<code>duf /</code>。它以表格形式显示分区和文件夹大小，按大小排序。</li></ul></li><li><p><strong>tree</strong>（结合大小显示）：</p><ul><li>安装：<code>sudo apt install tree</code>。</li><li>使用：<code>tree -h --du /path | sort -rh | head -n 10</code>（但不如du直接）。</li></ul></li></ul><h3 id="3-其他提示"><a href="#3-其他提示" class="headerlink" title="3. 其他提示"></a>3. <strong>其他提示</strong></h3><ul><li><strong>图形化工具</strong>：如果不喜欢命令行，用<code>baobab</code>（GNOME Disk Usage Analyzer，安装<code>sudo apt install baobab</code>）或<code>kdirstat</code>&#x2F;<code>qdirstat</code>（KDE版本）。这些是GUI工具，能可视化显示文件夹大小。</li><li><strong>脚本化</strong>：如果需要自动化，可以写个Bash脚本保存命令，并定期运行。</li><li><strong>常见问题</strong>：<ul><li>如果命令报错“sort: invalid option – ‘h’”，可能是旧版sort不支持<code>-h</code>，升级系统或用<code>sort -rn</code>（数字排序，但需去掉<code>-h</code>）。</li><li>在WSL（Windows Subsystem for Linux）下运行类似，但注意Windows文件系统的挂载可能影响准确性。</li></ul></li></ul><p>这个方法应该能帮您快速找到占用空间大的文件夹。如果您有特定Linux发行版或其他要求（如递归显示所有层级），告诉我，我可以进一步调整！</p><p>以下是针对Linux系统（适用于大多数发行版，如Ubuntu、Debian、CentOS、Fedora等）配置GitHub SSH Key的全过程教程。SSH Key是一种安全的认证方式，能让你在不输入用户名&#x2F;密码的情况下与GitHub进行Git操作（如clone、push、pull），比HTTPS更安全和方便。</p><h1 id="生成ssh-key用于github"><a href="#生成ssh-key用于github" class="headerlink" title="生成ssh-key用于github"></a>生成ssh-key用于github</h1><h3 id="为什么使用SSH-Key？"><a href="#为什么使用SSH-Key？" class="headerlink" title="为什么使用SSH Key？"></a>为什么使用SSH Key？</h3><ul><li><strong>安全性</strong>：使用公钥&#x2F;私钥对加密，避免明文密码传输。</li><li><strong>便利性</strong>：无需每次操作输入凭证。</li><li><strong>前提条件</strong>：<ul><li>已安装Git（运行<code>git --version</code>检查；如果没有，安装：Ubuntu用<code>sudo apt install git</code>；CentOS&#x2F;Fedora用<code>sudo yum install git</code>或<code>sudo dnf install git</code>）。</li><li>已安装SSH客户端（通常默认有；检查<code>ssh -V</code>；如果没有，安装：Ubuntu用<code>sudo apt install openssh-client</code>）。</li><li>你有一个GitHub账号。</li></ul></li></ul><p>如果您是初次配置，跟着步骤走即可。整个过程在终端（Terminal）中完成，通常只需5-10分钟。</p><h3 id="步骤1-检查是否已有SSH-Key"><a href="#步骤1-检查是否已有SSH-Key" class="headerlink" title="步骤1: 检查是否已有SSH Key"></a>步骤1: 检查是否已有SSH Key</h3><p>在配置新Key前，先检查是否已有现有的SSH Key。</p><figure class="highlight plaintext"><table><tr><td class="gutter"><pre><span class="line">1</span><br></pre></td><td class="code"><pre><span class="line">ls -al ~/.ssh</span><br></pre></td></tr></table></figure><ul><li>如果看到<code>id_rsa</code>（私钥）和<code>id_rsa.pub</code>（公钥），说明已有Key，可以跳到步骤4复用它。</li><li>如果目录为空或不存在，继续生成新Key。</li></ul><h3 id="步骤2-生成新的SSH-Key"><a href="#步骤2-生成新的SSH-Key" class="headerlink" title="步骤2: 生成新的SSH Key"></a>步骤2: 生成新的SSH Key</h3><p>使用<code>ssh-keygen</code>命令生成RSA密钥对（推荐4096位强度）。</p><ol><li><p>运行命令：</p><figure class="highlight plaintext"><table><tr><td class="gutter"><pre><span class="line">1</span><br></pre></td><td class="code"><pre><span class="line">ssh-keygen -t rsa -b 4096 -C &quot;your_email@example.com&quot;</span><br></pre></td></tr></table></figure><ul><li><code>-t rsa</code>：指定RSA类型（GitHub支持）。</li><li><code>-b 4096</code>：密钥长度（更高安全性；默认是3072）。</li><li><code>-C &quot;your_email@example.com&quot;</code>：添加注释（用你的GitHub邮箱，便于识别）。</li></ul></li><li><p>系统会提示保存位置：按Enter接受默认（<code>~/.ssh/id_rsa</code>）。</p></li><li><p>系统会提示输入密码短语（passphrase）：推荐输入一个强密码（用于保护私钥），或按Enter跳过（不推荐，但更方便）。确认两次。</p></li></ol><ul><li>生成后，你会在<code>~/.ssh</code>目录看到：<ul><li><code>id_rsa</code>：私钥（绝不要分享！）。</li><li><code>id_rsa.pub</code>：公钥（稍后上传到GitHub）。</li></ul></li></ul><h3 id="步骤3-添加SSH-Key到SSH-Agent（可选，但推荐）"><a href="#步骤3-添加SSH-Key到SSH-Agent（可选，但推荐）" class="headerlink" title="步骤3: 添加SSH Key到SSH Agent（可选，但推荐）"></a>步骤3: 添加SSH Key到SSH Agent（可选，但推荐）</h3><p>SSH Agent管理你的Key，确保在会话中自动使用。</p><ol><li><p>启动SSH Agent（如果未运行）：</p><figure class="highlight plaintext"><table><tr><td class="gutter"><pre><span class="line">1</span><br></pre></td><td class="code"><pre><span class="line">eval &quot;$(ssh-agent -s)&quot;</span><br></pre></td></tr></table></figure><ul><li>输出类似<code>Agent pid 1234</code>表示成功。</li></ul></li><li><p>添加私钥到Agent：</p><figure class="highlight plaintext"><table><tr><td class="gutter"><pre><span class="line">1</span><br></pre></td><td class="code"><pre><span class="line">ssh-add ~/.ssh/id_rsa</span><br></pre></td></tr></table></figure><ul><li>如果设置了passphrase，会提示输入。</li></ul></li></ol><ul><li><strong>注意</strong>：这只在当前终端会话有效。如果想永久化，编辑<code>~/.bashrc</code>或<code>~/.zshrc</code>（取决于你的Shell），添加<code>eval &quot;$(ssh-agent -s)&quot;</code>和<code>ssh-add</code>命令，然后运行<code>source ~/.bashrc</code>。</li></ul><h3 id="步骤4-将公钥添加到GitHub账号"><a href="#步骤4-将公钥添加到GitHub账号" class="headerlink" title="步骤4: 将公钥添加到GitHub账号"></a>步骤4: 将公钥添加到GitHub账号</h3><ol><li><p>复制公钥内容到剪贴板：</p><figure class="highlight plaintext"><table><tr><td class="gutter"><pre><span class="line">1</span><br></pre></td><td class="code"><pre><span class="line">cat ~/.ssh/id_rsa.pub</span><br></pre></td></tr></table></figure><ul><li><p>输出类似<code>ssh-rsa AAAAB3NzaC1yc2E... your_email@example.com</code>。复制整个内容（包括<code>ssh-rsa</code>开头和邮箱结尾）。</p></li><li><p>或者用<code>xclip</code>工具（如果安装：<code>sudo apt install xclip</code>），运行<code>xclip -sel clip &lt; ~/.ssh/id_rsa.pub</code>自动复制。</p></li></ul></li><li><p>登录GitHub网站（<a href="https://github.com）：">https://github.com）：</a></p><ul><li>点击右上角头像 &gt; Settings（设置）。</li><li>左侧菜单：SSH and GPG keys。</li><li>点击”New SSH key”（新建SSH Key）。</li><li>Title：输入一个描述（如”My Linux Laptop”）。</li><li>Key：粘贴刚才复制的公钥内容。</li><li>点击”Add SSH key”。</li></ul></li><li><p>如果提示2FA（两因素认证），确认身份。</p></li></ol><h3 id="步骤5-测试SSH连接"><a href="#步骤5-测试SSH连接" class="headerlink" title="步骤5: 测试SSH连接"></a>步骤5: 测试SSH连接</h3><p>验证配置是否成功。</p><ol><li><p>运行：</p><figure class="highlight plaintext"><table><tr><td class="gutter"><pre><span class="line">1</span><br></pre></td><td class="code"><pre><span class="line">ssh -T git@github.com</span><br></pre></td></tr></table></figure><ul><li>如果首次连接，会提示<code>Are you sure you want to continue connecting (yes/no)?</code> 输入<code>yes</code>。</li><li>成功输出：<code>Hi username! You&#39;ve successfully authenticated, but GitHub does not provide shell access.</code>（username是你的GitHub用户名）。</li><li>如果失败，见下面的故障排除。</li></ul></li><li><p>测试Git操作：</p><ul><li>Clone一个仓库：<code>git clone git@github.com:username/repo.git</code>（替换为你的仓库）。</li><li>如果无需密码即成功，配置OK。</li></ul></li></ol><h3 id="步骤6-配置Git使用SSH（如果需要）"><a href="#步骤6-配置Git使用SSH（如果需要）" class="headerlink" title="步骤6: 配置Git使用SSH（如果需要）"></a>步骤6: 配置Git使用SSH（如果需要）</h3><p>如果你的仓库URL是HTTPS，切换到SSH：</p><ol><li>检查当前远程URL：<code>git remote -v</code>。</li><li>更改为SSH：<code>git remote set-url origin git@github.com:username/repo.git</code>。</li></ol><p>此外，在<code>~/.gitconfig</code>中设置全局用户名&#x2F;邮箱（可选，但推荐）：</p><figure class="highlight plaintext"><table><tr><td class="gutter"><pre><span class="line">1</span><br><span class="line">2</span><br></pre></td><td class="code"><pre><span class="line">git config --global user.name &quot;Your Name&quot;</span><br><span class="line">git config --global user.email &quot;your_email@example.com&quot;</span><br></pre></td></tr></table></figure><h3 id="常见问题和故障排除"><a href="#常见问题和故障排除" class="headerlink" title="常见问题和故障排除"></a>常见问题和故障排除</h3><ul><li><strong>命令不存在</strong>：确保安装了git和openssh-client。</li><li><strong>Permission denied (publickey)</strong>：公钥未正确添加，或私钥权限不对。运行<code>chmod 600 ~/.ssh/id_rsa</code>修复权限。</li><li><strong>ssh-add失败</strong>：如果Agent未运行，先运行<code>eval &quot;$(ssh-agent -s)&quot;</code>。</li><li><strong>连接超时</strong>：检查网络&#x2F;防火墙；或用<code>ssh -v git@github.com</code>查看详细日志。</li><li><strong>多个Key管理</strong>：如果有多个Key，编辑<code>~/.ssh/config</code>添加：<figure class="highlight plaintext"><table><tr><td class="gutter"><pre><span class="line">1</span><br><span class="line">2</span><br></pre></td><td class="code"><pre><span class="line">Host github.com</span><br><span class="line">    IdentityFile ~/.ssh/id_rsa</span><br></pre></td></tr></table></figure></li><li><strong>WSL（Windows Subsystem for Linux）特殊</strong>：WSL下配置类似，但确保Windows的SSH Agent未冲突；有时需重启WSL。</li><li><strong>旧Key冲突</strong>：如果有多个Key，用<code>ssh-keygen -t rsa -b 4096 -f ~/.ssh/github_rsa</code>生成特定文件名的Key，然后在GitHub添加对应公钥。</li></ul><h3 id="额外提示"><a href="#额外提示" class="headerlink" title="额外提示"></a>额外提示</h3><ul><li><strong>安全性</strong>：私钥绝不分享；定期备份<code>~/.ssh</code>目录；启用GitHub的2FA。</li><li><strong>更新Key</strong>：如果邮箱变了，生成新Key并更新GitHub。</li><li><strong>参考资源</strong>：GitHub官方文档（<a href="https://docs.github.com/en/authentication/connecting-to-github-with-ssh%EF%BC%89%EF%BC%9B%E8%BF%90%E8%A1%8C%60man">https://docs.github.com/en/authentication/connecting-to-github-with-ssh）；运行`man</a> ssh-keygen&#96;查看命令帮助。</li><li><strong>如果用ED25519</strong>（更现代算法）：替换步骤2为<code>ssh-keygen -t ed25519 -C &quot;your_email@example.com&quot;</code>（GitHub支持）。</li></ul><p>如果在任何步骤遇到错误，复制错误消息告诉我，我可以帮你调试！这个配置完成后，你就可以无缝使用GitHub了。</p><h1 id="TMUX常用指令"><a href="#TMUX常用指令" class="headerlink" title="TMUX常用指令"></a>TMUX常用指令</h1><p>以下是tmux（Terminal Multiplexer，一个强大的终端多路复用工具，常用于Linux&#x2F;Unix系统）的常用命令指南。tmux允许你在单个终端窗口中管理多个会话、窗口和窗格，支持会话持久化、窗口分割等功能，非常适合服务器远程工作或多任务处理。</p><h3 id="重要提示"><a href="#重要提示" class="headerlink" title="重要提示"></a>重要提示</h3><ul><li><strong>默认前缀键</strong>：tmux的快捷键通常以<code>Ctrl-b</code>（简称<code>&lt;prefix&gt;</code>）开头，按下<code>Ctrl-b</code>后释放，然后按后续键（e.g., <code>Ctrl-b c</code> 创建新窗口）。</li><li><strong>命令模式</strong>：按<code>&lt;prefix&gt; :</code> 进入命令行模式，然后输入命令（e.g., <code>new-session</code>）。</li><li><strong>安装</strong>：如果未安装，Ubuntu用<code>sudo apt install tmux</code>；CentOS用<code>sudo yum install tmux</code>。</li><li><strong>配置文件</strong>：自定义配置在<code>~/.tmux.conf</code>（e.g., 改前缀为<code>Ctrl-a</code>：<code>set -g prefix C-a</code>）。</li><li><strong>帮助</strong>：在tmux中按<code>&lt;prefix&gt; ?</code> 查看所有绑定键；或运行<code>man tmux</code>。</li></ul><p>我将命令按类别分组，列出快捷键和等效命令行形式。假设您已在终端运行<code>tmux</code>启动会话。</p><h3 id="1-启动和会话管理"><a href="#1-启动和会话管理" class="headerlink" title="1. 启动和会话管理"></a>1. 启动和会话管理</h3><ul><li>启动tmux：<code>tmux</code> 或 <code>tmux new -s session_name</code>（创建名为session_name的会话）。</li><li>附加到现有会话：<code>tmux attach -t session_name</code>（或<code>tmux a</code> 附加最后一个）。</li><li>列出会话：<code>tmux ls</code>（命令行）或<code>&lt;prefix&gt; s</code>（在tmux内）。</li><li>重命名当前会话：<code>&lt;prefix&gt; $</code> 或 <code>:rename-session new_name</code>。</li><li>分离当前会话：<code>&lt;prefix&gt; d</code>（detach，回到普通终端；会话在后台运行）。</li><li>杀死会话：<code>tmux kill-session -t session_name</code> 或在会话内<code>&lt;prefix&gt; &amp;</code> 杀死当前窗口的所有会话。</li><li>新建会话：<code>&lt;prefix&gt; :new</code>（在当前tmux内创建新会话）。</li></ul><h3 id="2-窗口管理（类似标签页）"><a href="#2-窗口管理（类似标签页）" class="headerlink" title="2. 窗口管理（类似标签页）"></a>2. 窗口管理（类似标签页）</h3><ul><li>创建新窗口：<code>&lt;prefix&gt; c</code>。</li><li>切换到下一个窗口：<code>&lt;prefix&gt; n</code> 或 <code>&lt;prefix&gt; l</code>（最后一个活动窗口）。</li><li>切换到上一个窗口：<code>&lt;prefix&gt; p</code>。</li><li>选择窗口（列表）：<code>&lt;prefix&gt; w</code>。</li><li>重命名当前窗口：<code>&lt;prefix&gt; ,</code>。</li><li>关闭当前窗口：<code>&lt;prefix&gt; &amp;</code>（确认后关闭）。</li><li>查找窗口：<code>&lt;prefix&gt; f</code>（输入关键词搜索）。</li><li>切换到指定窗口：<code>&lt;prefix&gt; 0-9</code>（数字键，切换到第N个窗口）。</li></ul><h3 id="3-窗格管理（窗口分割）"><a href="#3-窗格管理（窗口分割）" class="headerlink" title="3. 窗格管理（窗口分割）"></a>3. 窗格管理（窗口分割）</h3><ul><li>水平分割窗格：<code>&lt;prefix&gt; &quot;</code>（将当前窗格分成上下两部分）。</li><li>垂直分割窗格：<code>&lt;prefix&gt; %</code>（分成左右两部分）。</li><li>切换窗格：<code>&lt;prefix&gt; 箭头键</code>（上&#x2F;下&#x2F;左&#x2F;右）或<code>&lt;prefix&gt; o</code>（循环切换）。</li><li>关闭当前窗格：<code>&lt;prefix&gt; x</code>（确认后关闭）。</li><li>调整窗格大小：<code>&lt;prefix&gt; Ctrl-箭头键</code>（按住Ctrl调整边界）。</li><li>全屏当前窗格（切换）：<code>&lt;prefix&gt; z</code>（zoom&#x2F;unzoom）。</li><li>重新排列窗格：<code>&lt;prefix&gt; Space</code>（循环布局，如主-从、平铺）。</li><li>交换窗格位置：<code>&lt;prefix&gt; {</code>（与上一个交换）或<code>&lt;prefix&gt; }</code>（与下一个）。</li></ul><h3 id="4-复制和粘贴模式（Vi模式推荐）"><a href="#4-复制和粘贴模式（Vi模式推荐）" class="headerlink" title="4. 复制和粘贴模式（Vi模式推荐）"></a>4. 复制和粘贴模式（Vi模式推荐）</h3><ul><li>进入复制模式：<code>&lt;prefix&gt; [</code>（然后用箭头键导航）。</li><li>开始选择文本（Vi模式）：在复制模式下，按<code>v</code>（visual mode），用箭头移动选择。</li><li>复制选中文本：按<code>y</code>（yank）或Enter。</li><li>粘贴：<code>&lt;prefix&gt; ]</code>。</li><li>滚动历史：复制模式下，用PageUp&#x2F;PageDown或鼠标滚轮（如果启用）。</li><li><strong>提示</strong>：在<code>~/.tmux.conf</code>添加<code>set -g mode-keys vi</code> 以启用Vi风格键绑定（更高效）。</li></ul><h3 id="5-其他常用命令"><a href="#5-其他常用命令" class="headerlink" title="5. 其他常用命令"></a>5. 其他常用命令</h3><ul><li>重新加载配置：<code>&lt;prefix&gt; r</code>（需在配置中添加<code>bind r source-file ~/.tmux.conf</code>）。</li><li>分割窗口成网格布局：<code>&lt;prefix&gt; Alt-1</code> 到 <code>Alt-5</code>（不同布局）。</li><li>同步窗格输入：<code>&lt;prefix&gt; :setw synchronize-panes</code>（在所有窗格同时输入）。</li><li>捕获窗格输出到文件：<code>&lt;prefix&gt; :capture-pane -S - -E -</code>（捕获所有历史）。</li><li>鼠标支持：<code>&lt;prefix&gt; :set -g mouse on</code>（启用鼠标点击&#x2F;拖拽窗格&#x2F;滚动）。</li><li>杀死服务器（关闭所有会话）：<code>tmux kill-server</code>。</li><li>显示时钟：<code>&lt;prefix&gt; t</code>（临时显示大时钟）。</li><li>自定义键绑定：在配置中添加如<code>bind-key C-j resize-pane -D 10</code>（自定义调整大小）。</li></ul><h3 id="示例工作流"><a href="#示例工作流" class="headerlink" title="示例工作流"></a>示例工作流</h3><ol><li>启动：<code>tmux new -s mysession</code>。</li><li>创建窗口：<code>&lt;prefix&gt; c</code>。</li><li>分割窗格：<code>&lt;prefix&gt; %</code>（垂直）。</li><li>运行命令：在窗格中运行如<code>top</code>或<code>vim</code>。</li><li>分离：<code>&lt;prefix&gt; d</code>。</li><li>重新附加：<code>tmux a -t mysession</code>。</li></ol><h3 id="高级提示"><a href="#高级提示" class="headerlink" title="高级提示"></a>高级提示</h3><ul><li><strong>自定义配置</strong>：编辑<code>~/.tmux.conf</code>，例如：<figure class="highlight plaintext"><table><tr><td class="gutter"><pre><span class="line">1</span><br><span class="line">2</span><br><span class="line">3</span><br><span class="line">4</span><br></pre></td><td class="code"><pre><span class="line">set -g prefix C-a  # 改前缀为Ctrl-a</span><br><span class="line">unbind C-b</span><br><span class="line">set -g mouse on    # 启用鼠标</span><br><span class="line">set -g history-limit 50000  # 增加历史行数</span><br></pre></td></tr></table></figure>保存后，运行<code>tmux source ~/.tmux.conf</code> 或重启tmux。</li><li><strong>插件</strong>：用tmux插件管理器（如tpm：<a href="https://github.com/tmux-plugins/tpm%EF%BC%89%E6%B7%BB%E5%8A%A0%E6%89%A9%E5%B1%95%EF%BC%8C%E5%A6%82tmux-resurrect%EF%BC%88%E4%BF%9D%E5%AD%98/%E6%81%A2%E5%A4%8D%E4%BC%9A%E8%AF%9D%EF%BC%89%E3%80%82">https://github.com/tmux-plugins/tpm）添加扩展，如tmux-resurrect（保存/恢复会话）。</a></li><li><strong>常见问题</strong>：如果快捷键无效，检查是否在嵌套tmux中（用<code>&lt;prefix&gt;&lt;prefix&gt;</code>发送前缀）；或用<code>tmux -v</code>调试。</li></ul><p>这些是tmux的最常用命令，覆盖80%的日常使用。如果您需要特定场景的命令（如服务器部署）或配置示例，告诉我，我可以扩展！更多细节见<code>man tmux</code>或官网（<a href="https://github.com/tmux/tmux/wiki%EF%BC%89%E3%80%82">https://github.com/tmux/tmux/wiki）。</a></p><h1 id="多个WSL只关闭一个"><a href="#多个WSL只关闭一个" class="headerlink" title="多个WSL只关闭一个"></a>多个WSL只关闭一个</h1><p><code>wsl --shutdown</code> 这个命令在 Windows 的 WSL（Windows Subsystem for Linux）环境下的实际作用是：</p><h3 id="作用"><a href="#作用" class="headerlink" title="作用"></a>作用</h3><ul><li><strong><code>wsl --shutdown</code> 会关闭所有正在运行的 WSL 实例</strong>，而不是只关闭单独的某一个。</li><li>包括所有分发版（比如 Ubuntu、Debian、Kali 等），所有正在运行的 WSL 2 虚拟机和 WSL 1 实例，都会被一起终止。</li><li>这也会释放掉被相关 WSL 虚拟机占用的内存资源。</li><li>执行后，再进入 <code>wsl</code> 或启动具体发行版，会重新启动新的 WSL 实例。</li></ul><hr><h3 id="如果你只想关闭-终止某一个WSL发行版"><a href="#如果你只想关闭-终止某一个WSL发行版" class="headerlink" title="如果你只想关闭&#x2F;终止某一个WSL发行版"></a>如果你只想关闭&#x2F;终止<strong>某一个</strong>WSL发行版</h3><p>可以使用以下命令：</p><figure class="highlight bash"><table><tr><td class="gutter"><pre><span class="line">1</span><br></pre></td><td class="code"><pre><span class="line">wsl --terminate &lt;发行版名称&gt;</span><br></pre></td></tr></table></figure><p>比如：</p><figure class="highlight bash"><table><tr><td class="gutter"><pre><span class="line">1</span><br></pre></td><td class="code"><pre><span class="line">wsl --terminate Ubuntu-20.04</span><br></pre></td></tr></table></figure><p>这样只会关闭名为“Ubuntu-20.04”的那个 WSL 分发版，其他的不受影响。</p><hr><p><strong>总结：</strong></p><ul><li><code>wsl --shutdown</code> 关闭所有WSL实例。</li><li><code>wsl --terminate &lt;Name&gt;</code> 只关闭指定的某一个实例。</li></ul><p>如果有更多关于 WSL 的问题，欢迎继续提问！</p><h1 id="Windows上删除某个WSL版本"><a href="#Windows上删除某个WSL版本" class="headerlink" title="Windows上删除某个WSL版本"></a>Windows上删除某个WSL版本</h1><figure class="highlight plaintext"><table><tr><td class="gutter"><pre><span class="line">1</span><br></pre></td><td class="code"><pre><span class="line">wsl --unregister Ubuntu-22.04</span><br></pre></td></tr></table></figure><blockquote><p>wsl在Windows中unregister后，硬盘空间立马就腾出来了，其背后的原理是什么？</p></blockquote><p>非常棒的问题 👍，这个现象确实容易让人好奇。<br>当你在 Windows 上执行：</p><figure class="highlight bash"><table><tr><td class="gutter"><pre><span class="line">1</span><br></pre></td><td class="code"><pre><span class="line">wsl --unregister &lt;发行版名称&gt;</span><br></pre></td></tr></table></figure><p>后，<strong>磁盘空间几乎“立刻”就释放</strong>出来，这其实是因为 ——</p><blockquote><p>WSL 的每个发行版（Linux 实例）在 Windows 上只是一个文件（虚拟磁盘映像），<br><code>--unregister</code> 命令删除的就是这个大文件。</p></blockquote><hr><h2 id="🔬-一、核心原理：WSL-的文件系统是一个-VHDX-虚拟磁盘文件"><a href="#🔬-一、核心原理：WSL-的文件系统是一个-VHDX-虚拟磁盘文件" class="headerlink" title="🔬 一、核心原理：WSL 的文件系统是一个 VHDX 虚拟磁盘文件"></a>🔬 一、核心原理：WSL 的文件系统是一个 VHDX 虚拟磁盘文件</h2><p>当你安装一个 WSL 发行版（例如 Ubuntu-22.04），实际上 Windows 会在你的用户目录下创建一个虚拟磁盘文件：</p><figure class="highlight plaintext"><table><tr><td class="gutter"><pre><span class="line">1</span><br></pre></td><td class="code"><pre><span class="line">%LOCALAPPDATA%\Packages\&lt;发行版包名&gt;\LocalState\ext4.vhdx</span><br></pre></td></tr></table></figure><p>比如：</p><figure class="highlight plaintext"><table><tr><td class="gutter"><pre><span class="line">1</span><br></pre></td><td class="code"><pre><span class="line">C:\Users\&lt;用户&gt;\AppData\Local\Packages\CanonicalGroupLimited.Ubuntu22.04onWindows_79rhkp1fndgsc\LocalState\ext4.vhdx</span><br></pre></td></tr></table></figure><p>这个文件就是 WSL 的 <strong>完整 Linux 文件系统镜像</strong>（ext4 文件系统容器）。</p><p>所有你在 WSL 里创建的文件、安装的软件、apt 下载的包，都存储在这个 VHDX 里。</p><ul><li>它通常采用 <strong>稀疏文件(sparse file)</strong> 格式；</li><li>Windows NTFS 会“按需分配”磁盘空间。</li></ul><p>👉 因此 “你的整个 WSL 系统” 本质上就是一个单独的文件！</p><hr><h2 id="💥-二、unregister-做了什么？"><a href="#💥-二、unregister-做了什么？" class="headerlink" title="💥 二、unregister 做了什么？"></a>💥 二、unregister 做了什么？</h2><p>执行：</p><figure class="highlight bash"><table><tr><td class="gutter"><pre><span class="line">1</span><br></pre></td><td class="code"><pre><span class="line">wsl --unregister Ubuntu-22.04</span><br></pre></td></tr></table></figure><p>这条命令会：</p><ol><li><p>停止该发行版的所有正在运行的进程；</p></li><li><p>从注册表中删除该发行版的映射信息；</p></li><li><p>删除对应的文件夹路径：</p> <figure class="highlight plaintext"><table><tr><td class="gutter"><pre><span class="line">1</span><br></pre></td><td class="code"><pre><span class="line">%LOCALAPPDATA%\Packages\CanonicalGroupLimited.Ubuntu22.04onWindows_79rhkp1fndgsc\</span><br></pre></td></tr></table></figure></li><li><p>也就同时删除了里面的 <code>ext4.vhdx</code> 文件。</p></li></ol><hr><h2 id="⚙️-三、那么为什么“空间立马释放”？"><a href="#⚙️-三、那么为什么“空间立马释放”？" class="headerlink" title="⚙️ 三、那么为什么“空间立马释放”？"></a>⚙️ 三、那么为什么“空间立马释放”？</h2><p>因为这个 <code>.vhdx</code> 文件可能占几十 GB，是在 <strong>NTFS 文件系统上作为一个单一文件</strong> 持有的。<br>当 <code>wsl --unregister</code> 删除它时：</p><ul><li>Windows 直接删除该 VHDX 文件；</li><li>操作系统立即回收它所占用的空间；</li><li>不需要像 ext4 删除文件那样清理块结构；</li><li>所以看起来“瞬间腾出几十 GB”。</li></ul><p>👉 这跟你在 Windows 上删除一个 30 GB 的电影文件类似，删除操作只是移除了文件表项，系统立即统计为“腾出空间”。</p><hr><h2 id="🧩-四、可视化："><a href="#🧩-四、可视化：" class="headerlink" title="🧩 四、可视化："></a>🧩 四、可视化：</h2><table><thead><tr><th>操作</th><th>文件系统变化</th><th>空间变化</th></tr></thead><tbody><tr><td>安装 WSL 发行版</td><td>创建 <code>ext4.vhdx</code> 文件</td><td>占用磁盘空间</td></tr><tr><td>使用 Linux、安装软件</td><td>向该虚拟磁盘写入数据</td><td>VHDX 文件变大</td></tr><tr><td><code>wsl --unregister</code></td><td>删除整个 <code>ext4.vhdx</code> 文件</td><td>空间立即释放</td></tr><tr><td></td><td></td><td></td></tr></tbody></table><hr><h2 id="🧱-五、补充知识：导出-备份机制"><a href="#🧱-五、补充知识：导出-备份机制" class="headerlink" title="🧱 五、补充知识：导出 &#x2F; 备份机制"></a>🧱 五、补充知识：导出 &#x2F; 备份机制</h2><p>在删除前，你可以先导出备份整个 VHDX 文件内容：</p><figure class="highlight bash"><table><tr><td class="gutter"><pre><span class="line">1</span><br></pre></td><td class="code"><pre><span class="line">wsl --<span class="built_in">export</span> Ubuntu-22.04 D:\backup\ubuntu22.tar</span><br></pre></td></tr></table></figure><p>然后删除：</p><figure class="highlight bash"><table><tr><td class="gutter"><pre><span class="line">1</span><br></pre></td><td class="code"><pre><span class="line">wsl --unregister Ubuntu-22.04</span><br></pre></td></tr></table></figure><p>若以后想恢复：</p><figure class="highlight bash"><table><tr><td class="gutter"><pre><span class="line">1</span><br></pre></td><td class="code"><pre><span class="line">wsl --import Ubuntu-22.04 D:\WSL\Ubuntu22 D:\backup\ubuntu22.tar</span><br></pre></td></tr></table></figure><p>这一来一回的过程，其实就是压缩 &#x2F; 解压 <code>.vhdx</code> 文件。</p><hr><h2 id="💡-六、总结一句话："><a href="#💡-六、总结一句话：" class="headerlink" title="💡 六、总结一句话："></a>💡 六、总结一句话：</h2><blockquote><p><code>wsl --unregister</code> 删除的不是一堆小文件，而是一个巨大的虚拟磁盘文件（ext4.vhdx），<br>所以 <strong>Windows 文件系统能瞬间回收整个空间</strong>，看上去就像“硬盘空间立刻腾出来了”。</p></blockquote><hr><h1 id="WSL导出"><a href="#WSL导出" class="headerlink" title="WSL导出"></a>WSL导出</h1><p>你可以利用 <code>wsl --export</code> 和 <code>wsl --import</code> 命令，将 WSL 发行版从一台电脑迁移到另一台，方法如下：</p><hr><h2 id="一、导出（Export）"><a href="#一、导出（Export）" class="headerlink" title="一、导出（Export）"></a>一、导出（Export）</h2><p>在源（导出）电脑的 PowerShell、CMD 或 Windows Terminal 里：</p><ol><li><p><strong>查找现有的发行版名称：</strong></p><figure class="highlight bash"><table><tr><td class="gutter"><pre><span class="line">1</span><br></pre></td><td class="code"><pre><span class="line">wsl --list --verbose</span><br></pre></td></tr></table></figure><p>比如，你要迁出的发行版是 <code>Ubuntu-20.04</code>。</p></li><li><p><strong>导出发行版为 .tar 文件：</strong></p><figure class="highlight bash"><table><tr><td class="gutter"><pre><span class="line">1</span><br></pre></td><td class="code"><pre><span class="line">wsl --<span class="built_in">export</span> Ubuntu-20.04 D:\backup\ubuntu20.tar</span><br></pre></td></tr></table></figure><blockquote><p>上述命令会把整个 Ubuntu-20.04 环境打包到 <code>D:\backup\ubuntu20.tar</code>，包括所有已安装的软件、文件、配置等。</p></blockquote></li></ol><hr><h2 id="二、迁移-导入（Import）"><a href="#二、迁移-导入（Import）" class="headerlink" title="二、迁移&#x2F;导入（Import）"></a>二、迁移&#x2F;导入（Import）</h2><p>在目标（导入）电脑上：</p><ol><li><strong>把 <code>ubuntu20.tar</code> 拷贝到本地，比如 <code>D:\backup\ubuntu20.tar</code>。</strong></li><li><strong>选择一个安装目录（空目录），比如 <code>D:\WSL\Ubuntu20</code>。</strong></li><li><strong>导入发行版：</strong><figure class="highlight bash"><table><tr><td class="gutter"><pre><span class="line">1</span><br></pre></td><td class="code"><pre><span class="line">wsl --import Ubuntu-20.04 D:\WSL\Ubuntu20 D:\backup\ubuntu20.tar</span><br></pre></td></tr></table></figure><blockquote><p>这样会以新的分发名“Ubuntu-20.04”在指定文件夹创建 WSL 环境。</p></blockquote></li></ol><hr><h2 id="三、使用"><a href="#三、使用" class="headerlink" title="三、使用"></a>三、使用</h2><p>导入成功后，可以用以下命令进入新环境：</p><figure class="highlight bash"><table><tr><td class="gutter"><pre><span class="line">1</span><br></pre></td><td class="code"><pre><span class="line">wsl -d Ubuntu-20.04</span><br></pre></td></tr></table></figure><p>或在 Windows Terminal 新建标签选择相应发行版。</p><hr><h2 id="注意事项与限制"><a href="#注意事项与限制" class="headerlink" title="注意事项与限制"></a>注意事项与限制</h2><ol><li><p><strong>操作系统一致性</strong><br>迁移包中内容与内核紧密相关，通常建议目标电脑上的 WSL 版本（WSL 2&#x2F;WSL 1）保持一致；但一般情况下互相兼容问题不大。</p></li><li><p><strong>WSL 配置独立</strong><br><code>.wslconfig</code>、网络配置、挂载设置等是每台 Windows 独立的，不会跟着导出&#x2F;导入，要重新设置。</p></li><li><p><strong>路径变化</strong><br>导入时可以选新的存放路径；导出的 <code>.tar</code> 文件只是文件系统打包，由你指定安装地点。</p></li><li><p><strong>Windows 与 Linux 的映射路径</strong><br>用户的个人文件和配置、软件都会迁入新电脑，但 Windows 原有的磁盘（如 <code>/mnt/c/</code> 下修改的文件）并不会一起导出来，只导 Linux 子系统自身内容。</p></li><li><p><strong>网络与权限</strong><br>某些涉及主机网络、端口转发、外部程序调用等由 Windows 管理部分，需要在新机单独配置。</p></li><li><p><strong>用户名与用户ID</strong><br>旧发行版默认用户、UID 会一同迁移，如果导入电脑已有同名发行版&#x2F;同名用户，需注意重名冲突或清理。</p></li></ol><hr><h2 id="总结-1"><a href="#总结-1" class="headerlink" title="总结"></a>总结</h2><ul><li>利用 <code>wsl --export</code>（导出）和 <code>wsl --import</code>（导入）即可在不同电脑间迁移 WSL 环境。</li><li>除了 WSL 本身的高级配置不迁移外，大部分发行版内的内容都能完整打包和恢复。</li><li>通常不存在特别的限制，流程相对简单。</li></ul><p>如需详细操作或有特殊需求（比如定制迁移方案、多分发版本处理等），欢迎补充追问！</p>]]>
    </content>
    <id>https://hugh-tong.github.io/2026/09/15/wsl-experience/</id>
    <link href="https://hugh-tong.github.io/2026/09/15/wsl-experience/"/>
    <published>2026-09-15T08:00:00.000Z</published>
    <summary>WSL 离线安装与日常使用经验,与站内 zsh 篇互补。</summary>
    <title>WSL 使用经验(含离线安装)</title>
    <updated>2026-09-15T08:00:00.000Z</updated>
  </entry>
  <entry>
    <author>
      <name>tttt</name>
    </author>
    <category term="阅读" scheme="https://hugh-tong.github.io/categories/%E9%98%85%E8%AF%BB/"/>
    <category term="论文笔记" scheme="https://hugh-tong.github.io/categories/%E9%98%85%E8%AF%BB/%E8%AE%BA%E6%96%87%E7%AC%94%E8%AE%B0/"/>
    <category term="阅读/论文" scheme="https://hugh-tong.github.io/tags/%E9%98%85%E8%AF%BB-%E8%AE%BA%E6%96%87/"/>
    <category term="论文笔记" scheme="https://hugh-tong.github.io/tags/%E8%AE%BA%E6%96%87%E7%AC%94%E8%AE%B0/"/>
    <category term="Zotero" scheme="https://hugh-tong.github.io/tags/Zotero/"/>
    <content>
      <![CDATA[<p><a href="https://zotero-chinese.com/user-guide/add-attachments">添加附件 | Zotero 中文社区</a></p><h2 id="存储的附件和链接的附件"><a href="#存储的附件和链接的附件" class="headerlink" title="存储的附件和链接的附件"></a>存储的附件和链接的附件</h2><h3 id="存储的附件"><a href="#存储的附件" class="headerlink" title="存储的附件"></a>存储的附件</h3><p><img src="data:image/svg+xml,%3csvg%20width='28'%20height='28'%20viewBox='0%200%2028%2028'%20fill='none'%20xmlns='http://www.w3.org/2000/svg'%3e%3cg%20clip-path='url(%23clip0_144_2136)'%3e%3cpath%20opacity='0.5'%20d='M20.717%200H5V28H28V7.283L20.717%200Z'%20fill='white'/%3e%3cpath%20d='M6%201V27H27V7.698L20.302%201H6Z'%20fill='white'/%3e%3cpath%20opacity='0.08'%20d='M21%201.698V7H26.302L21%201.698Z'%20fill='black'/%3e%3cpath%20opacity='0.2'%20d='M20.717%200H5V28H28V7.283L20.717%200ZM21%201.7L26.3%207H21V1.7ZM27%2027H6V1H20V8H27V27Z'%20fill='black'/%3e%3cpath%20d='M15%206H1V11H15V6Z'%20fill='%23F1ABB0'/%3e%3cpath%20d='M15%206V11H1V6H15ZM16%205H0V12H16V5Z'%20fill='%23DB2C3A'/%3e%3c/g%3e%3cdefs%3e%3cclipPath%20id='clip0_144_2136'%3e%3crect%20width='28'%20height='28'%20fill='white'/%3e%3c/clipPath%3e%3c/defs%3e%3c/svg%3e" alt="icon-pdf"> <img src="data:image/svg+xml,%3csvg%20width='28'%20height='28'%20viewBox='0%200%2028%2028'%20fill='none'%20xmlns='http://www.w3.org/2000/svg'%3e%3cg%20clip-path='url(%23clip0_216_4489)'%3e%3cpath%20opacity='0.5'%20d='M26.25%203C26.0513%203.002%2025.8544%203.03819%2025.668%203.107L25%202.43915V1.75C24.9997%201.28595%2024.8153%200.840987%2024.4871%200.512856C24.159%200.184725%2023.7141%200.000264943%2023.25%200H5.75C5.28596%200.000264943%204.84099%200.184725%204.51286%200.512856C4.18473%200.840987%204.00027%201.28595%204%201.75V23.25C3.99968%2023.4798%204.04484%2023.7075%204.13289%2023.9198C4.22093%2024.1321%204.35012%2024.3248%204.513%2024.487L7.513%2027.487C7.67512%2027.6499%207.8679%2027.7791%208.08021%2027.8672C8.29252%2027.9552%208.52016%2028.0004%208.75%2028H26.25C26.7141%2027.9997%2027.159%2027.8153%2027.4871%2027.4871C27.8153%2027.159%2027.9997%2026.714%2028%2026.25V4.75C27.9997%204.28595%2027.8153%203.84099%2027.4871%203.51286C27.159%203.18472%2026.7141%203.00026%2026.25%203Z'%20fill='white'/%3e%3cpath%20d='M24%201H8V24H24V1Z'%20fill='white'/%3e%3cpath%20d='M7%201H5V24H7V1Z'%20fill='white'/%3e%3cpath%20d='M16%2026H11V27H16V26Z'%20fill='%2339BF68'/%3e%3cpath%20opacity='0.2'%20d='M26.25%203C26.0513%203.002%2025.8544%203.03819%2025.668%203.107L26.78%204.22C26.8499%204.28941%2026.9053%204.37199%2026.9431%204.46297C26.9808%204.55394%2027.0002%204.6515%2027%204.75V26.25C27%2026.4489%2026.921%2026.6397%2026.7803%2026.7803C26.6397%2026.921%2026.4489%2027%2026.25%2027H8.439L6.439%2025H23.25C23.7141%2024.9997%2024.159%2024.8153%2024.4871%2024.4871C24.8153%2024.159%2024.9997%2023.714%2025%2023.25V1.75C24.9997%201.28595%2024.8153%200.840987%2024.4871%200.512856C24.159%200.184725%2023.7141%200.000264943%2023.25%200L5.75%200C5.28595%200.000264943%204.84099%200.184725%204.51286%200.512856C4.18473%200.840987%204.00027%201.28595%204%201.75V23.25C3.99968%2023.4798%204.04484%2023.7075%204.13289%2023.9198C4.22093%2024.1321%204.35012%2024.3248%204.513%2024.487L7.513%2027.487C7.67512%2027.6499%207.86789%2027.7791%208.0802%2027.8672C8.29252%2027.9552%208.52016%2028.0004%208.75%2028H26.25C26.7141%2027.9997%2027.159%2027.8153%2027.4871%2027.4871C27.8153%2027.159%2027.9997%2026.714%2028%2026.25V4.75C27.9997%204.28595%2027.8153%203.84099%2027.4871%203.51286C27.159%203.18472%2026.7141%203.00026%2026.25%203ZM8%201H23.25C23.4489%201%2023.6397%201.07902%2023.7803%201.21967C23.921%201.36032%2024%201.55109%2024%201.75V23.25C24%2023.4489%2023.921%2023.6397%2023.7803%2023.7803C23.6397%2023.921%2023.4489%2024%2023.25%2024H8V1ZM5%2023.25V1.75C5%201.55109%205.07902%201.36032%205.21967%201.21967C5.36032%201.07902%205.55109%201%205.75%201H7V24H5.75C5.55109%2024%205.36032%2023.921%205.21967%2023.7803C5.07902%2023.6397%205%2023.4489%205%2023.25Z'%20fill='black'/%3e%3cpath%20d='M23.2499%2025C23.714%2024.9998%2024.159%2024.8153%2024.4871%2024.4872C24.8152%2024.159%2024.9997%2023.7141%2024.9999%2023.25V2.43909L26.7799%204.22002C26.8498%204.28944%2026.9053%204.37202%2026.943%204.46299C26.9796%204.55117%2026.9989%204.64553%2026.9999%204.74094V26.2576C26.9979%2026.4538%2026.9191%2026.6415%2026.7803%2026.7804C26.6396%2026.921%2026.4489%2027%2026.2499%2027H8.43894L6.43896%2025L23.2499%2025Z'%20fill='%23EBEBEB'/%3e%3cpath%20d='M15%206H1V11H15V6Z'%20fill='%23B0E5C3'/%3e%3cpath%20d='M15%206V11H1V6H15ZM16%205H0V12H16V5Z'%20fill='%2339BF68'/%3e%3c/g%3e%3cdefs%3e%3cclipPath%20id='clip0_216_4489'%3e%3crect%20width='28'%20height='28'%20fill='white'/%3e%3c/clipPath%3e%3c/defs%3e%3c/svg%3e" alt="icon-epub"></p><p>默认情况下，存储文件存储在 <a href="https://zotero-chinese.com/user-guide/backup#%E6%95%B0%E6%8D%AE%E6%96%87%E4%BB%B6">Zotero 数据目录</a> 中，Zotero 会自动管理它们，包括在 Zotero 中删除附件项时删除它们。如果使用 <a href="https://zotero-chinese.com/user-guide/sync">文件同步</a> 功能，Zotero 会自动在设备之间同步存储的附件，并将它们储存在官方网盘（或 WebDAV 网盘）中。</p><p>将一个文件添加为存储的附件，该文件将被复制到 Zotero 数据目录，因此建议你删除原始文件以避免混淆。</p><h3 id="链接的附件"><a href="#链接的附件" class="headerlink" title="链接的附件"></a>链接的附件</h3><p><img src="data:image/svg+xml,%3csvg%20width='28'%20height='28'%20viewBox='0%200%2028%2028'%20fill='none'%20xmlns='http://www.w3.org/2000/svg'%3e%3cg%20clip-path='url(%23clip0_144_2127)'%3e%3cpath%20opacity='0.5'%20d='M18.717%200H4V26H12V25H14.551C14.5198%2024.8351%2014.5027%2024.6678%2014.5%2024.5C14.4984%2023.7426%2014.7841%2023.0127%2015.2994%2022.4577C15.8148%2021.9027%2016.5215%2021.5638%2017.277%2021.5093C18.0324%2021.4549%2018.7804%2021.689%2019.37%2022.1644C19.9597%2022.6398%2020.347%2023.3212%2020.454%2024.071L20.516%2024.5H21.484L21.546%2024.071C21.6497%2023.3601%2022.0048%2022.7099%2022.5467%2022.2382C23.0886%2021.7666%2023.7816%2021.5047%2024.5%2021.5C24.6678%2021.5027%2024.8351%2021.5198%2025%2021.551V19H26V7.283L18.717%200Z'%20fill='white'/%3e%3cpath%20d='M18.3%201H5V25H14.551C14.5198%2024.8351%2014.5027%2024.6678%2014.5%2024.5C14.4984%2023.7426%2014.7841%2023.0127%2015.2994%2022.4577C15.8148%2021.9027%2016.5215%2021.5638%2017.277%2021.5093C18.0324%2021.4549%2018.7804%2021.689%2019.37%2022.1644C19.9597%2022.6398%2020.347%2023.3212%2020.454%2024.071L20.516%2024.5H21.484L21.546%2024.071C21.6497%2023.3601%2022.0048%2022.7099%2022.5467%2022.2382C23.0886%2021.7666%2023.7816%2021.5047%2024.5%2021.5C24.6678%2021.5027%2024.8351%2021.5198%2025%2021.551V7.7L18.3%201Z'%20fill='white'/%3e%3cpath%20opacity='0.08'%20d='M19%201.698V7H24.302L19%201.698Z'%20fill='black'/%3e%3cpath%20opacity='0.2'%20d='M12%2025H5V1H18V8H25V19H26V7.283L18.717%200H4V26H12V25ZM19%201.7L24.3%207H19V1.7Z'%20fill='black'/%3e%3cpath%20d='M24.4999%2021C23.6602%2021.0015%2022.8492%2021.3057%2022.2155%2021.8567C21.5819%2022.4077%2021.168%2023.1686%2021.0499%2024H20.9499C20.8235%2023.1242%2020.3701%2022.3288%2019.6809%2021.7739C18.9916%2021.2189%2018.1178%2020.9456%2017.2352%2021.009C16.3526%2021.0724%2015.5268%2021.4677%2014.9239%2022.1154C14.321%2022.7631%2013.9858%2023.6151%2013.9858%2024.5C13.9858%2025.3849%2014.321%2026.2369%2014.9239%2026.8846C15.5268%2027.5323%2016.3526%2027.9277%2017.2352%2027.991C18.1178%2028.0544%2018.9916%2027.7811%2019.6809%2027.2262C20.3701%2026.6712%2020.8235%2025.8758%2020.9499%2025H21.0499C21.1471%2025.6624%2021.4326%2026.2829%2021.8723%2026.7876C22.3121%2027.2923%2022.8877%2027.6601%2023.5305%2027.847C24.1733%2028.034%2024.8563%2028.0323%2025.4982%2027.8421C26.1401%2027.6519%2026.7138%2027.2813%2027.151%2026.7744C27.5883%2026.2674%2027.8706%2025.6455%2027.9645%2024.9827C28.0583%2024.3198%2027.9597%2023.644%2027.6804%2023.0356C27.4011%2022.4272%2026.9528%2021.9119%2026.3889%2021.551C25.8251%2021.1901%2025.1694%2020.9989%2024.4999%2021ZM17.4999%2027C17.0269%2027.0001%2016.5635%2026.866%2016.1636%2026.6132C15.7638%2026.3604%2015.4438%2025.9994%2015.241%2025.5721C15.0381%2025.1447%2014.9607%2024.6686%2015.0176%2024.1989C15.0746%2023.7293%2015.2637%2023.2855%2015.5628%2022.9191C15.862%2022.5526%2016.2589%2022.2785%2016.7076%2022.1287C17.1564%2021.9789%2017.6384%2021.9594%2018.0977%2022.0726C18.557%2022.1858%2018.9748%2022.427%2019.3025%2022.7682C19.6302%2023.1094%2019.8543%2023.5365%2019.9489%2024H17.4999C17.3673%2024%2017.2402%2024.0527%2017.1464%2024.1465C17.0526%2024.2402%2016.9999%2024.3674%2016.9999%2024.5C16.9999%2024.6326%2017.0526%2024.7598%2017.1464%2024.8536C17.2402%2024.9473%2017.3673%2025%2017.4999%2025H19.9489C19.8337%2025.5645%2019.527%2026.0719%2019.0808%2026.4363C18.6345%2026.8008%2018.0761%2026.9999%2017.4999%2027ZM24.4999%2027C23.9238%2026.9999%2023.3654%2026.8008%2022.9191%2026.4363C22.4729%2026.0719%2022.1662%2025.5645%2022.0509%2025H24.4999C24.6326%2025%2024.7597%2024.9473%2024.8535%2024.8536C24.9473%2024.7598%2024.9999%2024.6326%2024.9999%2024.5C24.9999%2024.3674%2024.9473%2024.2402%2024.8535%2024.1465C24.7597%2024.0527%2024.6326%2024%2024.4999%2024H22.0509C22.1456%2023.5365%2022.3697%2023.1094%2022.6974%2022.7682C23.0251%2022.427%2023.4429%2022.1858%2023.9022%2022.0726C24.3615%2021.9594%2024.8435%2021.9789%2025.2922%2022.1287C25.7409%2022.2785%2026.1379%2022.5526%2026.4371%2022.9191C26.7362%2023.2855%2026.9253%2023.7293%2026.9822%2024.1989C27.0392%2024.6686%2026.9618%2025.1447%2026.7589%2025.5721C26.5561%2025.9994%2026.2361%2026.3604%2025.8362%2026.6132C25.4364%2026.866%2024.973%2027.0001%2024.4999%2027Z'%20fill='%23888888'/%3e%3cpath%20d='M13%206H1V11H13V6Z'%20fill='%23F1ABB0'/%3e%3cpath%20d='M13%206V11H1V6H13ZM14%205H0V12H14V5Z'%20fill='%23DB2C3A'/%3e%3c/g%3e%3cdefs%3e%3cclipPath%20id='clip0_144_2127'%3e%3crect%20width='28'%20height='28'%20fill='white'/%3e%3c/clipPath%3e%3c/defs%3e%3c/svg%3e" alt="icon-pdf-link"> <img src="data:image/svg+xml,%3csvg%20width='28'%20height='28'%20viewBox='0%200%2028%2028'%20fill='none'%20xmlns='http://www.w3.org/2000/svg'%3e%3cg%20clip-path='url(%23clip0_1960_191)'%3e%3cpath%20opacity='0.5'%20fill-rule='evenodd'%20clip-rule='evenodd'%20d='M23.668%203.107C23.8544%203.03819%2024.0513%203.002%2024.25%203C24.7141%203.00026%2025.159%203.18472%2025.4872%203.51286C25.8153%203.84099%2025.9997%204.28595%2026%204.75V19.207C25.5232%2019.0722%2025.02%2019%2024.5%2019C23.1704%2019%2021.9509%2019.4718%2021%2020.2572C20.0491%2019.4718%2018.8296%2019%2017.5%2019C14.4624%2019%2012%2021.4624%2012%2024.5C12%2025.02%2012.0722%2025.5232%2012.207%2026H8.75001C8.52016%2026.0004%208.29252%2025.9552%208.08021%2025.8672C7.8679%2025.7791%207.67512%2025.6499%207.513%2025.487L4.513%2022.487C4.35012%2022.3248%204.22093%2022.1321%204.13289%2021.9198C4.04484%2021.7075%203.99968%2021.4798%204%2021.25V1.75C4.00027%201.28595%204.18473%200.840987%204.51286%200.512856C4.84099%200.184725%205.28596%200.000264943%205.75%200H21.25C21.7141%200.000264943%2022.159%200.184725%2022.4872%200.512856C22.8153%200.840987%2022.9997%201.28595%2023%201.75V2.43915L23.668%203.107Z'%20fill='white'/%3e%3cpath%20d='M22%201H8V22H22V1Z'%20fill='white'/%3e%3cpath%20d='M7%201H5V22H7V1Z'%20fill='white'/%3e%3cpath%20opacity='0.2'%20fill-rule='evenodd'%20clip-rule='evenodd'%20d='M23.668%203.107C23.8544%203.03819%2024.0513%203.002%2024.25%203C24.714%203.00026%2025.159%203.18472%2025.4871%203.51286C25.8153%203.84099%2025.9997%204.28595%2026%204.75V19.207C25.6777%2019.1159%2025.3434%2019.0534%2025%2019.0224V4.75C25.0002%204.6515%2024.9808%204.55394%2024.9431%204.46297C24.9053%204.37199%2024.8499%204.28941%2024.78%204.22L23.668%203.107ZM12.207%2023H6.439L8.439%2025H12.0224C12.0534%2025.3434%2012.1159%2025.6777%2012.207%2026H8.75C8.52016%2026.0004%208.29252%2025.9552%208.0802%2025.8672C7.86789%2025.7791%207.67512%2025.6499%207.513%2025.487L4.513%2022.487C4.35012%2022.3248%204.22093%2022.1321%204.13289%2021.9198C4.04484%2021.7075%203.99968%2021.4798%204%2021.25V1.75C4.00027%201.28595%204.18473%200.840987%204.51286%200.512856C4.84099%200.184725%205.28595%200.000264943%205.75%200H21.25C21.714%200.000264943%2022.159%200.184725%2022.4871%200.512856C22.8153%200.840987%2022.9997%201.28595%2023%201.75V19.207C22.6514%2019.3056%2022.3168%2019.4378%2022%2019.5997V1.75C22%201.55109%2021.921%201.36032%2021.7803%201.21967C21.6397%201.07902%2021.4489%201%2021.25%201H8V22H12.5997C12.4378%2022.3168%2012.3056%2022.6514%2012.207%2023ZM5%201.75V21.25C5%2021.4489%205.07902%2021.6397%205.21967%2021.7803C5.36032%2021.921%205.55109%2022%205.75%2022H7V1H5.75C5.55109%201%205.36032%201.07902%205.21967%201.21967C5.07902%201.36032%205%201.55109%205%201.75Z'%20fill='black'/%3e%3cpath%20fill-rule='evenodd'%20clip-rule='evenodd'%20d='M22.9999%2019.2071C23.4768%2019.0722%2023.98%2019%2024.5%2019C24.6685%2019%2024.8353%2019.0076%2024.9999%2019.0224V4.74094C24.9989%204.64553%2024.9796%204.55117%2024.943%204.46299C24.9053%204.37202%2024.8498%204.28944%2024.7799%204.22002L22.9999%202.43909V19.2071ZM12.0224%2025C12.0076%2024.8353%2012%2024.6686%2012%2024.5C12%2023.98%2012.0722%2023.4769%2012.207%2023L6.43896%2023L8.43894%2025H12.0224Z'%20fill='%23EBEBEB'/%3e%3cpath%20d='M14%206H1V11H14V6Z'%20fill='%23B0E5C3'/%3e%3cpath%20d='M14%206V11H1V6H14ZM15%205H0V12H15V5Z'%20fill='%2339BF68'/%3e%3cpath%20fill-rule='evenodd'%20clip-rule='evenodd'%20d='M20.9646%2024C20.722%2022.3037%2019.2632%2021%2017.5%2021C15.567%2021%2014%2022.5669%2014%2024.5C14%2026.4331%2015.567%2028%2017.5%2028C19.2632%2028%2020.722%2026.6963%2020.9646%2025H21.0354C21.278%2026.6963%2022.7368%2028%2024.5%2028C26.433%2028%2028%2026.4331%2028%2024.5C28%2022.5669%2026.433%2021%2024.5%2021C22.7368%2021%2021.278%2022.3037%2021.0354%2024H20.9646ZM19.95%2024H17.5C17.2238%2024%2017%2024.2239%2017%2024.5C17%2024.7761%2017.2238%2025%2017.5%2025H19.95C19.7183%2026.1411%2018.7095%2027%2017.5%2027C16.1193%2027%2015%2025.8806%2015%2024.5C15%2023.1194%2016.1193%2022%2017.5%2022C18.7095%2022%2019.7183%2022.8589%2019.95%2024ZM22.05%2025H24.5C24.7762%2025%2025%2024.7761%2025%2024.5C25%2024.2239%2024.7762%2024%2024.5%2024H22.05C22.2817%2022.8589%2023.2905%2022%2024.5%2022C25.8807%2022%2027%2023.1194%2027%2024.5C27%2025.8806%2025.8807%2027%2024.5%2027C23.2905%2027%2022.2817%2026.1411%2022.05%2025Z'%20fill='%23888888'/%3e%3c/g%3e%3cdefs%3e%3cclipPath%20id='clip0_1960_191'%3e%3crect%20width='28'%20height='28'%20fill='white'/%3e%3c/clipPath%3e%3c/defs%3e%3c/svg%3e" alt="icon-epub"></p><p>对于链接文件，Zotero 只存储指向计算机上原始文件位置的链接。链接文件不会同步，如果附件项在 Zotero 中被删除，链接文件也不会被删除，Zotero 程序也不支持链接文件的同步。（可以简单理解为链接的文件在 Zotero 中作用类似于 Windows 的快捷方式）</p><p>如果您使用外部工具（Dropbox 等）同步链接文件以在多台计算机上使用，最好设置链接附件根目录，以便 Zotero 在每台计算机上都可以找到这些文件，即使包含文件夹位于文件系统中的不同位置。</p><h3 id="链接的附件-→-存储的附件"><a href="#链接的附件-→-存储的附件" class="headerlink" title="链接的附件 → 存储的附件"></a>链接的附件 → 存储的附件</h3><p>如果希望将「链接的附件」转换为「存储的附件」以便 Zotero 管理它们，您可以从「工具」→「管理附件」→「转换已链接的附件为已存储的附件」菜单执行此操作。</p><p> [@shamsQuasidirectNumericalSimulation2013a]</p>]]>
    </content>
    <id>https://hugh-tong.github.io/2026/09/15/zotero-attachments/</id>
    <link href="https://hugh-tong.github.io/2026/09/15/zotero-attachments/"/>
    <published>2026-09-15T08:00:00.000Z</published>
    <summary>Zotero 存储附件与链接附件两种方式的管理策略。</summary>
    <title>Zotero 附件管理:存储 vs 链接</title>
    <updated>2026-09-15T08:00:00.000Z</updated>
  </entry>
  <entry>
    <author>
      <name>tttt</name>
    </author>
    <category term="CFD" scheme="https://hugh-tong.github.io/categories/CFD/"/>
    <category term="数值方法" scheme="https://hugh-tong.github.io/categories/CFD/%E6%95%B0%E5%80%BC%E6%96%B9%E6%B3%95/"/>
    <category term="OpenFOAM" scheme="https://hugh-tong.github.io/tags/OpenFOAM/"/>
    <category term="CFD/数值方法" scheme="https://hugh-tong.github.io/tags/CFD-%E6%95%B0%E5%80%BC%E6%96%B9%E6%B3%95/"/>
    <category term="数值稳定性" scheme="https://hugh-tong.github.io/tags/%E6%95%B0%E5%80%BC%E7%A8%B3%E5%AE%9A%E6%80%A7/"/>
    <content>
      <![CDATA[<blockquote><p>适用范围：OpenFOAM Foundation 13。其他发行线可能有同名实现，但应按对应版本源码核对。<br>最后核对：2026-09-16。</p></blockquote><p><code>bound</code> 是一个面向 <code>volScalarField</code> 的下界修正函数，常用于避免湍动能 $k$、耗散率 $\epsilon$ 等本应非负的量进入无效区间。它不是简单地把所有负值替换为同一个常数：Foundation 13 的实现会先尝试利用邻域信息修正负值，最后再保证结果不低于指定下界。</p><h2 id="调用接口与返回值"><a href="#调用接口与返回值" class="headerlink" title="调用接口与返回值"></a>调用接口与返回值</h2><p>接口只有两个参数：待修改的标量场和带量纲的最小值。</p><figure class="highlight cpp"><table><tr><td class="gutter"><pre><span class="line">1</span><br><span class="line">2</span><br><span class="line">3</span><br><span class="line">4</span><br><span class="line">5</span><br></pre></td><td class="code"><pre><span class="line"><span class="function"><span class="type">bool</span> <span class="title">Foam::bound</span></span></span><br><span class="line"><span class="function"><span class="params">(</span></span></span><br><span class="line"><span class="params"><span class="function">    volScalarField&amp; field,</span></span></span><br><span class="line"><span class="params"><span class="function">    <span class="type">const</span> dimensionedScalar&amp; minimum</span></span></span><br><span class="line"><span class="params"><span class="function">)</span></span>;</span><br></pre></td></tr></table></figure><p>函数会原地修改 <code>field</code>。若调用前全场最小值已经不低于 <code>minimum</code>，它返回 <code>false</code> 且不修改场；一旦执行修正则返回 <code>true</code>，并向日志输出修正前的最小值、最大值和平均值。</p><h2 id="内部场如何修正"><a href="#内部场如何修正" class="headerlink" title="内部场如何修正"></a>内部场如何修正</h2><p>源码中的核心表达式可按下面三步理解：</p><ol><li>对参与邻域平均的场先执行 <code>max(field, minimum)</code>，避免负邻居继续污染平均值。</li><li>只在当前单元值为负时，用相邻面值的面积加权平均作为候选值；非负单元保持原值。</li><li>最外层再与 <code>minimum</code> 取最大值，确保最终结果不低于指定下界。</li></ol><p>因此，若一个单元值为负且周围单元仍有合理的正值，修正结果可能高于硬下界；若邻域平均仍不足，才会落到 <code>minimum</code>。边界场采用类似思路：负的 patch 值会参考 <code>patchInternalField()</code>，最后同样执行下界截断。</p><p>这里有一个容易忽略的细节：邻域替换由 <code>pos0(-field)</code> 触发，即主要针对负值；而位于 $[0, minimum)$ 的值最终由外层 <code>max(..., minimum)</code> 直接提升到下界。</p><h2 id="它解决什么，不解决什么"><a href="#它解决什么，不解决什么" class="headerlink" title="它解决什么，不解决什么"></a>它解决什么，不解决什么</h2><p><code>bound</code> 适合充当求解过程中的保护措施：防止本应为正的模型变量导致除零、开方无效或模型系数失真。但它不能证明离散格式稳定，也不能修复错误的边界条件、过大的时间步、质量很差的网格或不合理的松弛设置。</p><p>频繁出现 <code>bounding k</code>、<code>bounding epsilon</code> 一类日志时，应把它当成诊断信号：记录发生位置和幅度，再检查初始场、边界条件、网格质量、离散格式与时间步。仅提高下界可能让计算继续运行，却也可能掩盖原始问题并改变局部解。</p><h2 id="与-MULES-的区别"><a href="#与-MULES-的区别" class="headerlink" title="与 MULES 的区别"></a>与 MULES 的区别</h2><p>两者都涉及“限幅”，但层级不同：</p><ul><li><code>bound</code> 是求解后对一个体标量场执行下界修正。</li><li>MULES 是有限体积输运方程中的有界性算法，围绕通量与显式修正项控制相分数等变量。</li></ul><p>所以不能把 <code>bound(k, kMin)</code> 描述成 MULES 的简化版本，也不能由 <code>bound</code> 已执行就推断输运过程守恒。若修正量对结果重要，应额外检查守恒误差和网格收敛性。</p><h2 id="参考资料"><a href="#参考资料" class="headerlink" title="参考资料"></a>参考资料</h2><ul><li><a href="https://cpp.openfoam.org/v13/bound_8H_source.html">OpenFOAM Foundation 13：<code>bound.H</code></a></li><li><a href="https://cpp.openfoam.org/v13/bound_8C_source.html">OpenFOAM Foundation 13：<code>bound.C</code></a></li><li><a href="https://www.cfd-china.com/topic/6766/">bound 函数的实现方法 - CFD-China</a> —— 社区讨论保留作延伸阅读</li></ul>]]>
    </content>
    <id>https://hugh-tong.github.io/2026/09/15/bound-function/</id>
    <link href="https://hugh-tong.github.io/2026/09/15/bound-function/"/>
    <published>2026-09-15T07:10:00.000Z</published>
    <summary>基于 OpenFOAM Foundation 13 源码说明 bound 如何修正低于物理下界的标量场，并区分数值保护、守恒限幅和根因排查。</summary>
    <title>OpenFOAM bound 函数：下界修正的源码逻辑与使用边界</title>
    <updated>2026-09-16T07:30:00.000Z</updated>
  </entry>
  <entry>
    <author>
      <name>tttt</name>
    </author>
    <category term="CFD" scheme="https://hugh-tong.github.io/categories/CFD/"/>
    <category term="OpenFOAM" scheme="https://hugh-tong.github.io/categories/CFD/OpenFOAM/"/>
    <category term="工具链" scheme="https://hugh-tong.github.io/categories/CFD/OpenFOAM/%E5%B7%A5%E5%85%B7%E9%93%BE/"/>
    <category term="CFD/OpenFOAM/工具链" scheme="https://hugh-tong.github.io/tags/CFD-OpenFOAM-%E5%B7%A5%E5%85%B7%E9%93%BE/"/>
    <content>
      <![CDATA[<p>redistributePar 用于并行网格&#x2F;解的重分布与重构。</p><blockquote><p>本站已有专题对比文:<a href="/2026/09/15/redistributePar_VS_reconstructPar/">redistributePar vs reconstructPar</a></p></blockquote><h2 id="官方资料"><a href="#官方资料" class="headerlink" title="官方资料"></a>官方资料</h2><ul><li><a href="https://doc.openfoam.com/2606/tools/parallel/redistributePar/">OpenFOAM redistributePar 文档</a></li><li><a href="https://cpp.openfoam.org/v13/redistributePar_8C_source.html">OpenFOAM Foundation v13 源码</a></li></ul>]]>
    </content>
    <id>https://hugh-tong.github.io/2026/09/15/redistributepar-tool/</id>
    <link href="https://hugh-tong.github.io/2026/09/15/redistributepar-tool/"/>
    <published>2026-09-15T07:10:00.000Z</published>
    <summary>指向本站 redistributePar 与 reconstructPar 对比专题的导航页；命令细节以对应发行版官方文档为准。</summary>
    <title>redistributePar 工具导航</title>
    <updated>2026-09-15T07:10:00.000Z</updated>
  </entry>
  <entry>
    <author>
      <name>tttt</name>
    </author>
    <category term="CFD" scheme="https://hugh-tong.github.io/categories/CFD/"/>
    <category term="OpenFOAM" scheme="https://hugh-tong.github.io/categories/CFD/OpenFOAM/"/>
    <category term="工具链" scheme="https://hugh-tong.github.io/categories/CFD/OpenFOAM/%E5%B7%A5%E5%85%B7%E9%93%BE/"/>
    <category term="CFD/OpenFOAM/工具链" scheme="https://hugh-tong.github.io/tags/CFD-OpenFOAM-%E5%B7%A5%E5%85%B7%E9%93%BE/"/>
    <content>
      <![CDATA[<p>cfd.direct 的 OpenFOAM 实用工具总览页。</p><h2 id="资料索引"><a href="#资料索引" class="headerlink" title="资料索引"></a>资料索引</h2><ul><li><a href="https://cfd.direct/openfoam/useful-tools/">Useful tools - cfd.direct</a></li></ul><p>该页面只作为外部资料导航，不对工具参数和版本行为做二次承诺；使用前请查看对应发行版手册。</p>]]>
    </content>
    <id>https://hugh-tong.github.io/2026/09/15/useful-tools-cfddirect/</id>
    <link href="https://hugh-tong.github.io/2026/09/15/useful-tools-cfddirect/"/>
    <published>2026-09-15T07:10:00.000Z</published>
    <summary>cfd.direct OpenFOAM 工具总览与本站相关专题的导航页。</summary>
    <title>cfd.direct 实用工具导航</title>
    <updated>2026-09-15T07:10:00.000Z</updated>
  </entry>
  <entry>
    <author>
      <name>tttt</name>
    </author>
    <category term="CFD" scheme="https://hugh-tong.github.io/categories/CFD/"/>
    <category term="OpenFOAM" scheme="https://hugh-tong.github.io/categories/CFD/OpenFOAM/"/>
    <category term="工具" scheme="https://hugh-tong.github.io/categories/CFD/OpenFOAM/%E5%B7%A5%E5%85%B7/"/>
    <category term="Cpp" scheme="https://hugh-tong.github.io/tags/Cpp/"/>
    <category term="OpenFOAM" scheme="https://hugh-tong.github.io/tags/OpenFOAM/"/>
    <category term="RANS" scheme="https://hugh-tong.github.io/tags/RANS/"/>
    <category term="CFD/OpenFOAM/工具" scheme="https://hugh-tong.github.io/tags/CFD-OpenFOAM-%E5%B7%A5%E5%85%B7/"/>
    <category term="工具" scheme="https://hugh-tong.github.io/tags/%E5%B7%A5%E5%85%B7/"/>
    <content>
      <![CDATA[<p><code>createPatch</code> 是 OpenFOAM 中的一个实用工具，用于<strong>将某些 patch（边界面）合并、细分或修改</strong>，常见于切割网格、把周期性边界&#x2F;内部面分开形成新边界等场景。常配合 <code>createPatchDict</code> 配置文件使用。</p><hr><h2 id="使用流程"><a href="#使用流程" class="headerlink" title="使用流程"></a>使用流程</h2><h3 id="1-制作或编辑系统字典文件"><a href="#1-制作或编辑系统字典文件" class="headerlink" title="1. 制作或编辑系统字典文件"></a>1. 制作或编辑系统字典文件</h3><p>在你的算例目录下（如 <code>case/system</code>）创建或编辑 <code>createPatchDict</code>：</p><p>路径：  </p><figure class="highlight plaintext"><table><tr><td class="gutter"><pre><span class="line">1</span><br></pre></td><td class="code"><pre><span class="line">system/createPatchDict</span><br></pre></td></tr></table></figure><p><strong>常见结构和参数说明</strong>：</p><figure class="highlight plaintext"><table><tr><td class="gutter"><pre><span class="line">1</span><br><span class="line">2</span><br><span class="line">3</span><br><span class="line">4</span><br><span class="line">5</span><br><span class="line">6</span><br><span class="line">7</span><br><span class="line">8</span><br><span class="line">9</span><br><span class="line">10</span><br><span class="line">11</span><br><span class="line">12</span><br><span class="line">13</span><br><span class="line">14</span><br><span class="line">15</span><br><span class="line">16</span><br><span class="line">17</span><br><span class="line">18</span><br><span class="line">19</span><br><span class="line">20</span><br></pre></td><td class="code"><pre><span class="line">patches</span><br><span class="line">(</span><br><span class="line">    &#123;</span><br><span class="line">        name newPatchName;     // 要生成的新 patch 名</span><br><span class="line">        patchInfo</span><br><span class="line">        &#123;</span><br><span class="line">            type patch;        // 新 patch 类型（如 patch，wall，cyclic，symmetryPlane 等）</span><br><span class="line">        &#125;yon</span><br><span class="line">        constructFrom patches; // 来源，可以是patches或set</span><br><span class="line">        patches (origPatch1 origPatch2); // 被合并/拆分的原始 patch 列表</span><br><span class="line">    &#125;</span><br><span class="line">);</span><br><span class="line"></span><br><span class="line">set</span><br><span class="line">(</span><br><span class="line">    // 如果 constructFrom 设为 set，要写这里的 set 名</span><br><span class="line">);</span><br><span class="line"></span><br><span class="line">// 其它全局控制选项:</span><br><span class="line">pointSync false; // 是否需要点同步（通常默认 false 即可）</span><br></pre></td></tr></table></figure><p>20250707，一个真实的例子：</p><figure class="highlight plaintext"><table><tr><td class="gutter"><pre><span class="line">1</span><br><span class="line">2</span><br><span class="line">3</span><br><span class="line">4</span><br><span class="line">5</span><br><span class="line">6</span><br><span class="line">7</span><br><span class="line">8</span><br><span class="line">9</span><br><span class="line">10</span><br><span class="line">11</span><br><span class="line">12</span><br><span class="line">13</span><br><span class="line">14</span><br><span class="line">15</span><br><span class="line">16</span><br><span class="line">17</span><br><span class="line">18</span><br><span class="line">19</span><br><span class="line">20</span><br><span class="line">21</span><br><span class="line">22</span><br><span class="line">23</span><br><span class="line">24</span><br><span class="line">25</span><br><span class="line">26</span><br><span class="line">27</span><br><span class="line">28</span><br><span class="line">29</span><br><span class="line">30</span><br><span class="line">31</span><br><span class="line">32</span><br><span class="line">33</span><br><span class="line">34</span><br><span class="line">35</span><br><span class="line">36</span><br><span class="line">37</span><br><span class="line">38</span><br><span class="line">39</span><br><span class="line">40</span><br><span class="line">41</span><br><span class="line">42</span><br><span class="line">43</span><br><span class="line">44</span><br><span class="line">45</span><br><span class="line">46</span><br></pre></td><td class="code"><pre><span class="line">/*--------------------------------*- C++ -*----------------------------------*\</span><br><span class="line">| =========                 |                                                 |</span><br><span class="line">| \\      /  F ield         | OpenFOAM: The Open Source CFD Toolbox           |</span><br><span class="line">|  \\    /   O peration     | Version:  v2406                                 |</span><br><span class="line">|   \\  /    A nd           | Website:  www.openfoam.com                      |</span><br><span class="line">|    \\/     M anipulation  |                                                 |</span><br><span class="line">\*---------------------------------------------------------------------------*/</span><br><span class="line">FoamFile</span><br><span class="line">&#123;</span><br><span class="line">    version     2.0;</span><br><span class="line">    format      ascii;</span><br><span class="line">    class       dictionary;</span><br><span class="line">    object      createPatchDict;</span><br><span class="line">&#125;</span><br><span class="line">// * * * * * * * * * * * * * * * * * * * * * * * * * * * * * * * * * * * * * //</span><br><span class="line"></span><br><span class="line">// Do a synchronisation of coupled points after creation of any patches.</span><br><span class="line">// Note: this does not work with points that are on multiple coupled patches</span><br><span class="line">//       with transformations (i.e. cyclics).</span><br><span class="line">pointSync false;</span><br><span class="line"></span><br><span class="line">__settings</span><br><span class="line">&#123;</span><br><span class="line">    patchInfo &#123; type patch; &#125;</span><br><span class="line">    constructFrom set;</span><br><span class="line">&#125;</span><br><span class="line"></span><br><span class="line">// Patches to create.</span><br><span class="line">patches</span><br><span class="line">(</span><br><span class="line">    &#123;</span><br><span class="line">        name            vaporInlet;</span><br><span class="line">        $&#123;__settings&#125;;</span><br><span class="line">        set  inletFaceSet;</span><br><span class="line">    &#125;</span><br><span class="line"></span><br><span class="line">    &#123;</span><br><span class="line">        name            outlet;</span><br><span class="line">        $&#123;__settings&#125;;</span><br><span class="line">        set  outletFaceSet;</span><br><span class="line">    &#125;</span><br><span class="line"></span><br><span class="line">);</span><br><span class="line"></span><br><span class="line"></span><br><span class="line">// ************************************************************************* //</span><br></pre></td></tr></table></figure><p><strong>简单示例：合并两个 patch 为一个新 patch</strong></p><figure class="highlight plaintext"><table><tr><td class="gutter"><pre><span class="line">1</span><br><span class="line">2</span><br><span class="line">3</span><br><span class="line">4</span><br><span class="line">5</span><br><span class="line">6</span><br><span class="line">7</span><br><span class="line">8</span><br><span class="line">9</span><br><span class="line">10</span><br><span class="line">11</span><br><span class="line">12</span><br></pre></td><td class="code"><pre><span class="line">patches</span><br><span class="line">(</span><br><span class="line">    &#123;</span><br><span class="line">        name    combinedWall;</span><br><span class="line">        patchInfo</span><br><span class="line">        &#123;</span><br><span class="line">            type wall;</span><br><span class="line">        &#125;</span><br><span class="line">        constructFrom patches;</span><br><span class="line">        patches (wall1 wall2);</span><br><span class="line">    &#125;</span><br><span class="line">);</span><br></pre></td></tr></table></figure><p><strong>示例2：将内部面（如用于周期性或 AMI）抽成 patch</strong></p><figure class="highlight plaintext"><table><tr><td class="gutter"><pre><span class="line">1</span><br><span class="line">2</span><br><span class="line">3</span><br><span class="line">4</span><br><span class="line">5</span><br><span class="line">6</span><br><span class="line">7</span><br><span class="line">8</span><br><span class="line">9</span><br><span class="line">10</span><br><span class="line">11</span><br><span class="line">12</span><br></pre></td><td class="code"><pre><span class="line">patches</span><br><span class="line">(</span><br><span class="line">    &#123;</span><br><span class="line">        name    periodicPatch;</span><br><span class="line">        patchInfo</span><br><span class="line">        &#123;</span><br><span class="line">            type patch;</span><br><span class="line">        &#125;</span><br><span class="line">        constructFrom patches;</span><br><span class="line">        patches (defaultFaces);</span><br><span class="line">    &#125;</span><br><span class="line">);</span><br></pre></td></tr></table></figure><hr><h3 id="2-执行-createPatch-工具"><a href="#2-执行-createPatch-工具" class="headerlink" title="2. 执行 createPatch 工具"></a>2. 执行 createPatch 工具</h3><p>在 case 根目录下运行：</p><figure class="highlight bash"><table><tr><td class="gutter"><pre><span class="line">1</span><br></pre></td><td class="code"><pre><span class="line">createPatch -overwrite</span><br></pre></td></tr></table></figure><ul><li><code>-overwrite</code>：直接覆盖旧的 polyMesh&#x2F;boundary 文件</li><li>不加参数会生成 <code>polyMesh/boundary.new</code>，需要手动替换</li></ul><hr><h3 id="3-检查效果"><a href="#3-检查效果" class="headerlink" title="3. 检查效果"></a>3. 检查效果</h3><p>运行后，网格的 <code>constant/polyMesh/boundary</code> 文件中的 Patch section 会更新。<br>可用 <code>checkMesh</code> 检查网格，或用 paraFoam&#x2F;其它查看边界。</p><hr><h2 id="应用场景"><a href="#应用场景" class="headerlink" title="应用场景"></a>应用场景</h2><ul><li>合并若干 patch 成一个新 patch</li><li>拆分 patch、给定 patch 赋予新类型</li><li>将内部面（cutFace、defaultFaces等）变成外部 patch 作周期性或 AMI 边界</li><li>删改分区网格的冗余 patch</li></ul><hr><h2 id="常见问题和技巧"><a href="#常见问题和技巧" class="headerlink" title="常见问题和技巧"></a>常见问题和技巧</h2><ul><li>patch 类型要和后续物理边界条件对应（如 <code>wall</code>、<code>patch</code>、<code>inlet</code>、<code>cyclic</code> 等）。</li><li>如果只需要重命名 patch，可以直接在 boundary 文件和 0 文件的 U、p等里同步修改名即可，createPatch 用于更复杂场景。</li><li><code>constructFrom</code> 也可以用 set，通过 <code>faceSet</code>等提前选择。</li></ul><hr><h2 id="更多官方参考"><a href="#更多官方参考" class="headerlink" title="更多官方参考"></a>更多官方参考</h2><ul><li><a href="https://www.openfoam.com/documentation/guides/latest/doc/command-createpatch.html">OpenFOAM 官方说明（英文）</a></li><li><a href="https://openfoamwiki.net/index.php/CreatePatch">其他案例参考</a></li></ul>]]>
    </content>
    <id>https://hugh-tong.github.io/2026/09/15/createpatch/</id>
    <link href="https://hugh-tong.github.io/2026/09/15/createpatch/"/>
    <published>2026-09-15T07:00:00.000Z</published>
    <summary>createPatch 从 faceSet/createPatchDict 生成新 patch 的用法与注意事项。</summary>
    <title>createPatch 用法详解</title>
    <updated>2026-09-15T07:00:00.000Z</updated>
  </entry>
  <entry>
    <author>
      <name>tttt</name>
    </author>
    <category term="CFD" scheme="https://hugh-tong.github.io/categories/CFD/"/>
    <category term="数值方法" scheme="https://hugh-tong.github.io/categories/CFD/%E6%95%B0%E5%80%BC%E6%96%B9%E6%B3%95/"/>
    <category term="CFD/数值方法" scheme="https://hugh-tong.github.io/tags/CFD-%E6%95%B0%E5%80%BC%E6%96%B9%E6%B3%95/"/>
    <category term="simpleFoam" scheme="https://hugh-tong.github.io/tags/simpleFoam/"/>
    <category term="持续增大" scheme="https://hugh-tong.github.io/tags/%E6%8C%81%E7%BB%AD%E5%A2%9E%E5%A4%A7/"/>
    <category term="数值方法" scheme="https://hugh-tong.github.io/tags/%E6%95%B0%E5%80%BC%E6%96%B9%E6%B3%95/"/>
    <content>
      <![CDATA[<h1 id="simpleFoam-中连续性误差（cumulative）持续增大、最终发散的常见原因与对策"><a href="#simpleFoam-中连续性误差（cumulative）持续增大、最终发散的常见原因与对策" class="headerlink" title="simpleFoam 中连续性误差（cumulative）持续增大、最终发散的常见原因与对策"></a>simpleFoam 中连续性误差（cumulative）持续增大、最终发散的常见原因与对策</h1><p>在 <code>simpleFoam</code> 的迭代日志里，像下面这行来自压力校正（<code>p</code>-equation）与通量校正（<code>phi</code>）的连续性检查：</p><figure class="highlight plaintext"><table><tr><td class="gutter"><pre><span class="line">1</span><br></pre></td><td class="code"><pre><span class="line">time step continuity errors : sum local = 2.44316043779e-09, global = -4.34080109975e-12, cumulative = -4.34080109975e-12</span><br></pre></td></tr></table></figure><ul><li><code>sum local</code>：各个控制体的局部质量不平衡的绝对值总和（只反映量级）。</li><li><code>global</code>：整个域的净质量不平衡（有符号），理想应接近 0。</li><li><code>cumulative</code>：全局误差的累积和（随迭代更新），如果持续偏离 0 并增大，通常预示压力-速度耦合或边界流量不匹配的问题，可能走向发散。</li></ul><p>下面按“成因分类 → 现象 → 快速检查 → 解决策略”的方式总结。</p><hr><h2 id="1-边界条件不一致或不物理"><a href="#1-边界条件不一致或不物理" class="headerlink" title="1) 边界条件不一致或不物理"></a>1) 边界条件不一致或不物理</h2><ul><li><p><strong>典型症状</strong></p><ul><li><code>global</code> 带固定符号并逐步累积（<code>cumulative</code> 单调漂移）。</li><li>入口&#x2F;出口设置导致总质量通量不平衡（如多个入口 <code>fixedValue U</code>，出口也用 <code>fixedValue U</code>）。</li></ul></li><li><p><strong>快速检查</strong></p><ul><li>用 <code>checkMesh -constant</code> 看是否有网格面法向&#x2F;体积问题（虽不直接对应，但先排除）。</li><li>检查 0 文件夹中的 <code>U</code>、<code>p</code>、<code>nut</code>、<code>k/epsilon/omega</code> 边界条件：<ul><li>入口常用：<code>U: fixedValue</code>、<code>p: zeroGradient</code></li><li>出口常用：<code>U: zeroGradient</code>、<code>p: fixedValue</code>（或 <code>totalPressure</code>）</li><li>固壁：<code>U: noSlip/slip</code>、<code>p: zeroGradient</code></li></ul></li><li>多个出口时尽量选用压力型出口（<code>fixedValue p</code> 或 <code>outletInlet</code> 等）。</li></ul></li><li><p><strong>解决策略</strong></p><ul><li>确保流量唯一由入口速度或出口压力来“决定”，避免同一方向上过度“刚性”的双定常量（入口速度 + 出口速度）。</li><li>对非定常方向&#x2F;多出口，采用压力出口（<code>fixedValue p</code>、<code>inletOutlet</code>、<code>pressureInletOutletVelocity</code>）。</li></ul></li></ul><hr><h2 id="2-压力方程奇异-近奇异（参考压力设置不当）"><a href="#2-压力方程奇异-近奇异（参考压力设置不当）" class="headerlink" title="2) 压力方程奇异&#x2F;近奇异（参考压力设置不当）"></a>2) 压力方程奇异&#x2F;近奇异（参考压力设置不当）</h2><ul><li><p><strong>症状</strong></p><ul><li><code>p</code> 的线性系统难以收敛，<code>global</code>&#x2F;<code>cumulative</code> 漂移大。</li><li>封闭域或近封闭域未设定参考压力，或参考面设置不合理。</li></ul></li><li><p><strong>快速检查</strong></p><ul><li><code>fvSolution</code> 中 <code>SIMPLE</code>&#x2F;<code>PISO</code> 的 <code>nNonOrthogonalCorrectors</code>、<code>pRefCell/pRefValue</code> 是否设置。</li><li>闭合域（无明确出口）场景是否设置了 <code>pRefCell/pRefValue</code>。</li></ul></li><li><p><strong>解决策略</strong></p><ul><li><p>在 <code>system/fvSolution</code> 的 <code>SIMPLE</code> 块设置参考压力，例如：</p>  <figure class="highlight text"><table><tr><td class="gutter"><pre><span class="line">1</span><br></pre></td><td class="code"><pre><span class="line">SIMPLE&#123;    nNonOrthogonalCorrectors 2;    pRefCell 0;    pRefValue 0;&#125;</span><br></pre></td></tr></table></figure></li><li><p>或在某一合适位置（接近出口）设置一个小面或小区域的 <code>fixedValue p</code>。</p></li></ul></li></ul><hr><h2 id="3-离散化与数值设置过于激进（导致非物理振荡）"><a href="#3-离散化与数值设置过于激进（导致非物理振荡）" class="headerlink" title="3) 离散化与数值设置过于激进（导致非物理振荡）"></a>3) 离散化与数值设置过于激进（导致非物理振荡）</h2><ul><li><p><strong>症状</strong></p><ul><li>迭代初期还稳定，随迭代出现振荡，<code>cumulative</code> 加速漂移。</li><li>残差难以下降或出现锯齿型变化。</li></ul></li><li><p><strong>快速检查</strong></p><ul><li><code>system/fvSchemes</code> 中的对流项是否使用高阶且无界限格式（如 <code>linearUpwind</code>、<code>QUICK</code>）但未配合限幅。</li><li><code>fvSolution</code> 的 <code>relaxationFactors</code> 是否过大（尤其是 <code>p</code>）。</li></ul></li><li><p><strong>解决策略</strong></p><ul><li><p>对流项改为更稳健的有界格式：</p><ul><li>标量（k&#x2F;epsilon&#x2F;omega&#x2F;nut）：<code>bounded Gauss upwind</code> 或 <code>linearUpwindV limited 0.5</code></li><li>速度：<code>bounded Gauss upwind</code> 或 <code>linearUpwindV limited 0.5</code></li></ul></li><li><p>增大压力校正次数、非正交修正：</p>  <figure class="highlight text"><table><tr><td class="gutter"><pre><span class="line">1</span><br><span class="line">2</span><br><span class="line">3</span><br><span class="line">4</span><br></pre></td><td class="code"><pre><span class="line">SIMPLE&#123;  </span><br><span class="line">nNonOrthogonalCorrectors 2;   // 甚至 3–5（高非正交网格）  </span><br><span class="line">pRefCell 0; </span><br><span class="line">pRefValue 0;&#125;</span><br></pre></td></tr></table></figure></li><li><p>放松因子更保守：</p>  <figure class="highlight text"><table><tr><td class="gutter"><pre><span class="line">1</span><br><span class="line">2</span><br><span class="line">3</span><br><span class="line">4</span><br><span class="line">5</span><br><span class="line">6</span><br><span class="line">7</span><br></pre></td><td class="code"><pre><span class="line">relaxationFactors&#123; </span><br><span class="line"> fields  &#123;  </span><br><span class="line">   p 0.3;         // 0.2–0.4 </span><br><span class="line">    &#125;  equations  &#123; </span><br><span class="line">       U 0.7;        // 0.3–0.7   </span><br><span class="line">       k 0.7;    </span><br><span class="line">       epsilon 0.7;   // 或 omega 0.5–0.7    nut 0.7;  &#125;&#125;</span><br></pre></td></tr></table></figure></li></ul></li></ul><hr><h2 id="4-网格质量问题（非正交-歪斜-小面-负体积）"><a href="#4-网格质量问题（非正交-歪斜-小面-负体积）" class="headerlink" title="4) 网格质量问题（非正交&#x2F;歪斜&#x2F;小面&#x2F;负体积）"></a>4) 网格质量问题（非正交&#x2F;歪斜&#x2F;小面&#x2F;负体积）</h2><ul><li><p><strong>症状</strong></p><ul><li><code>checkMesh</code> 报告高非正交（&gt; 70–80°）、高 skewness 或极小&#x2F;退化单元。</li><li>即使保守数值设置仍难以稳定。</li></ul></li><li><p><strong>快速检查</strong></p><ul><li><code>checkMesh</code> 重点看：<ul><li><code>Max skewness</code>, <code>Max non-orthogonality</code>, <code>Face pyramids</code>, <code>Cell determinant</code></li></ul></li><li><code>snappyHexMesh</code> 后是否做了合理的 <code>snap/layer</code> 参数调优。</li></ul></li><li><p><strong>解决策略</strong></p><ul><li>改善网格：<ul><li>降低最大非正交，控制最小面角，提高近壁质量。</li><li>在 <code>snappyHexMeshDict</code> 中放宽层铺展、降低过强的细化跳跃；或对几何做 <code>surfaceCheck/surfaceClean</code>。</li></ul></li><li>数值上增加 <code>nNonOrthogonalCorrectors</code>，对高非正交网格很重要。</li></ul></li></ul><hr><h2 id="5-初始场或入口剖面与壁面粗糙-湍流模型不一致"><a href="#5-初始场或入口剖面与壁面粗糙-湍流模型不一致" class="headerlink" title="5) 初始场或入口剖面与壁面粗糙&#x2F;湍流模型不一致"></a>5) 初始场或入口剖面与壁面粗糙&#x2F;湍流模型不一致</h2><ul><li><p><strong>症状</strong></p><ul><li>刚开始迭代 <code>U/p/k/epsilon(omega)</code> 残差跳变，连续性误差陡增。</li><li>入口剖面与墙函数粗糙参数（<code>z0</code>、<code>nutURoughWallFunction</code> 等）不匹配，产生强发展段。</li></ul></li><li><p><strong>快速检查</strong></p><ul><li>入口 <code>U</code> 剖面、湍流量 <code>k/epsilon/omega</code> 是否与预期边界层一致。</li><li>壁面粗糙参数是否与入口剖面的粗糙度一致；y+ 是否落在墙函数适用范围。</li></ul></li><li><p><strong>解决策略</strong></p><ul><li>用对数律&#x2F;幂律一致的 ABL 入口；匹配 <code>k-ε</code> 或 <code>k-ω</code> 初值。</li><li>在复杂地形&#x2F;城市算例中，尽量采用足够高的顶边界和发展段长度。</li></ul></li></ul><hr><h2 id="6-物性或源项设置问题"><a href="#6-物性或源项设置问题" class="headerlink" title="6) 物性或源项设置问题"></a>6) 物性或源项设置问题</h2><ul><li><p><strong>症状</strong></p><ul><li>非常小的黏度（高雷诺）+ 粗网格 + 激进格式 → 不稳定。</li><li>体力&#x2F;源项（如 <code>fvOptions</code>）设置不当，质量源或动量源不守恒。</li></ul></li><li><p><strong>快速检查</strong></p><ul><li><code>constant/transportProperties</code> 物性是否合理。</li><li><code>system/fvOptions</code> 是否添加了体积流量源（<code>massFlowRate</code>、<code>pressureGradientExplicitSource</code>）而未闭合。</li></ul></li><li><p><strong>解决策略</strong></p><ul><li>在高 Re 粗网格场景，先用更保守格式与更强放松，逐步放开。</li><li>审核源项的守恒性与方向符号。</li></ul></li></ul><hr><h2 id="7-线性求解器-预条件器设置不合适"><a href="#7-线性求解器-预条件器设置不合适" class="headerlink" title="7) 线性求解器&#x2F;预条件器设置不合适"></a>7) 线性求解器&#x2F;预条件器设置不合适</h2><ul><li><strong>症状</strong><ul><li><code>p</code> 方程迭代次数很高、残差不下去，连续性误差跟着漂移。</li></ul></li><li><strong>快速检查</strong><ul><li><code>fvSolution</code> 中 <code>solvers</code> 设置是否与网格性质匹配（对称&#x2F;非对称、稀疏性）。</li></ul></li><li><strong>解决策略</strong><ul><li><p>压力使用 GAMG 并合理配置：</p>  <figure class="highlight text"><table><tr><td class="gutter"><pre><span class="line">1</span><br><span class="line">2</span><br><span class="line">3</span><br><span class="line">4</span><br><span class="line">5</span><br><span class="line">6</span><br><span class="line">7</span><br><span class="line">8</span><br><span class="line">9</span><br><span class="line">10</span><br><span class="line">11</span><br><span class="line">12</span><br><span class="line">13</span><br><span class="line">14</span><br><span class="line">15</span><br><span class="line">16</span><br><span class="line">17</span><br></pre></td><td class="code"><pre><span class="line">solvers&#123;  </span><br><span class="line">       p  &#123;   </span><br><span class="line">           solver          GAMG;    </span><br><span class="line">           tolerance       1e-7;   </span><br><span class="line">           relTolerance    0.1;   </span><br><span class="line">           smoother        DICGaussSeidel;  </span><br><span class="line">           nCellsInCoarsestLevel 200;  </span><br><span class="line">           agglomerator    faceAreaPair;    </span><br><span class="line">           mergeLevels     1;  </span><br><span class="line">          &#125; </span><br><span class="line">       U  &#123;    </span><br><span class="line">             solver          smoothSolver;   </span><br><span class="line">             smoother        symGaussSeidel;   // 或 DILU   </span><br><span class="line">             tolerance       1e-8;    </span><br><span class="line">             relTolerance    0.1;  </span><br><span class="line">           &#125;</span><br><span class="line">        &#125;</span><br></pre></td></tr></table></figure></li><li><p>对高度非正交网格，可尝试 <code>DIC</code>&#x2F;<code>DILU</code> 平滑器。</p></li></ul></li></ul><hr><h2 id="建议的诊断步骤（按优先级）"><a href="#建议的诊断步骤（按优先级）" class="headerlink" title="建议的诊断步骤（按优先级）"></a>建议的诊断步骤（按优先级）</h2><ol><li>运行 <code>checkMesh</code>，确认网格质量门槛（非正交、skewness）。</li><li>核对 0 文件夹边界条件组合是否物理、是否存在“速度+压力同时刚性定值”的出口&#x2F;入口。</li><li>在 <code>fvSolution</code> 中添加&#x2F;确认 <code>pRefCell/pRefValue</code>（封闭域）与合理的 <code>nNonOrthogonalCorrectors</code>。</li><li>采用更稳健的对流格式（bounded upwind&#x2F;limited linearUpwind）和保守放松因子。</li><li>检查&#x2F;匹配入口边界层剖面与墙函数粗糙参数；确保 y+ 合理。</li><li>审核 <code>fvOptions</code> 源项与物性；必要时先去掉源项测试。</li><li>查看 <code>log.simpleFoam</code> 中 <code>p</code> 求解器的迭代与残差变化，调整 <code>GAMG</code> 参数。</li></ol><hr><h2 id="小结"><a href="#小结" class="headerlink" title="小结"></a>小结</h2><ul><li><code>cumulative</code> 连续性误差持续增大，通常由边界条件不匹配、压力参考&#x2F;非正交修正不足、离散化过激进或网格质量问题引起。</li><li>优先保证：物理一致的边界条件 + 合理网格 + 稳健数值设置（对流格式、放松、非正交修正），再逐步“解锁”精度和速度。</li></ul><p>如果你愿意贴出你的 <code>fvSchemes</code>、<code>fvSolution</code>、关键边界条件（0&#x2F;U, 0&#x2F;p）以及 <code>checkMesh</code> 摘要，我可以针对你的案例给出更具体的修改建议。</p>]]>
    </content>
    <id>https://hugh-tong.github.io/2026/09/15/cumulative-error-growth/</id>
    <link href="https://hugh-tong.github.io/2026/09/15/cumulative-error-growth/"/>
    <published>2026-09-15T07:00:00.000Z</published>
    <summary>OpenFOAM 时间累计误差持续增大的原因分析与排查路线。</summary>
    <title>cumulative error 持续增大的排查</title>
    <updated>2026-09-15T07:00:00.000Z</updated>
  </entry>
</feed>